Feeds:
Posts
Comments

Posts Tagged ‘violin maintenance’

Occasionally, I have a job come in that seems to make an extreme sport out of basic violin maintenance. This is the kind of job that I prefer to turn over quickly, since my clients are serious musicians, and most find it difficult to be parted with their instruments for any length of time. Usually, it doesn’t even occur to me to take out my camera, because, let’s face it, fingerboard planing is so “ho humm” for us fiddle fixers. Which is NOT to say that it doesn’t require absolute skill and precision to execute properly! In that it is a basic procedure, it is a little like buying new tires for your car, although having your fingerboard planed will probably cost less and yield results that you will actually notice. I hate buying tires for my car.

I’m making a serious comparison here!  The fact is that driving your car and playing your instrument both impact the surface in play. In the former case, we replace the tires when excessive wear is evident, or else we call the DPW:

images-2

In the latter case, we develop superior finger callouses, and then resurface the fingerboard as needed.

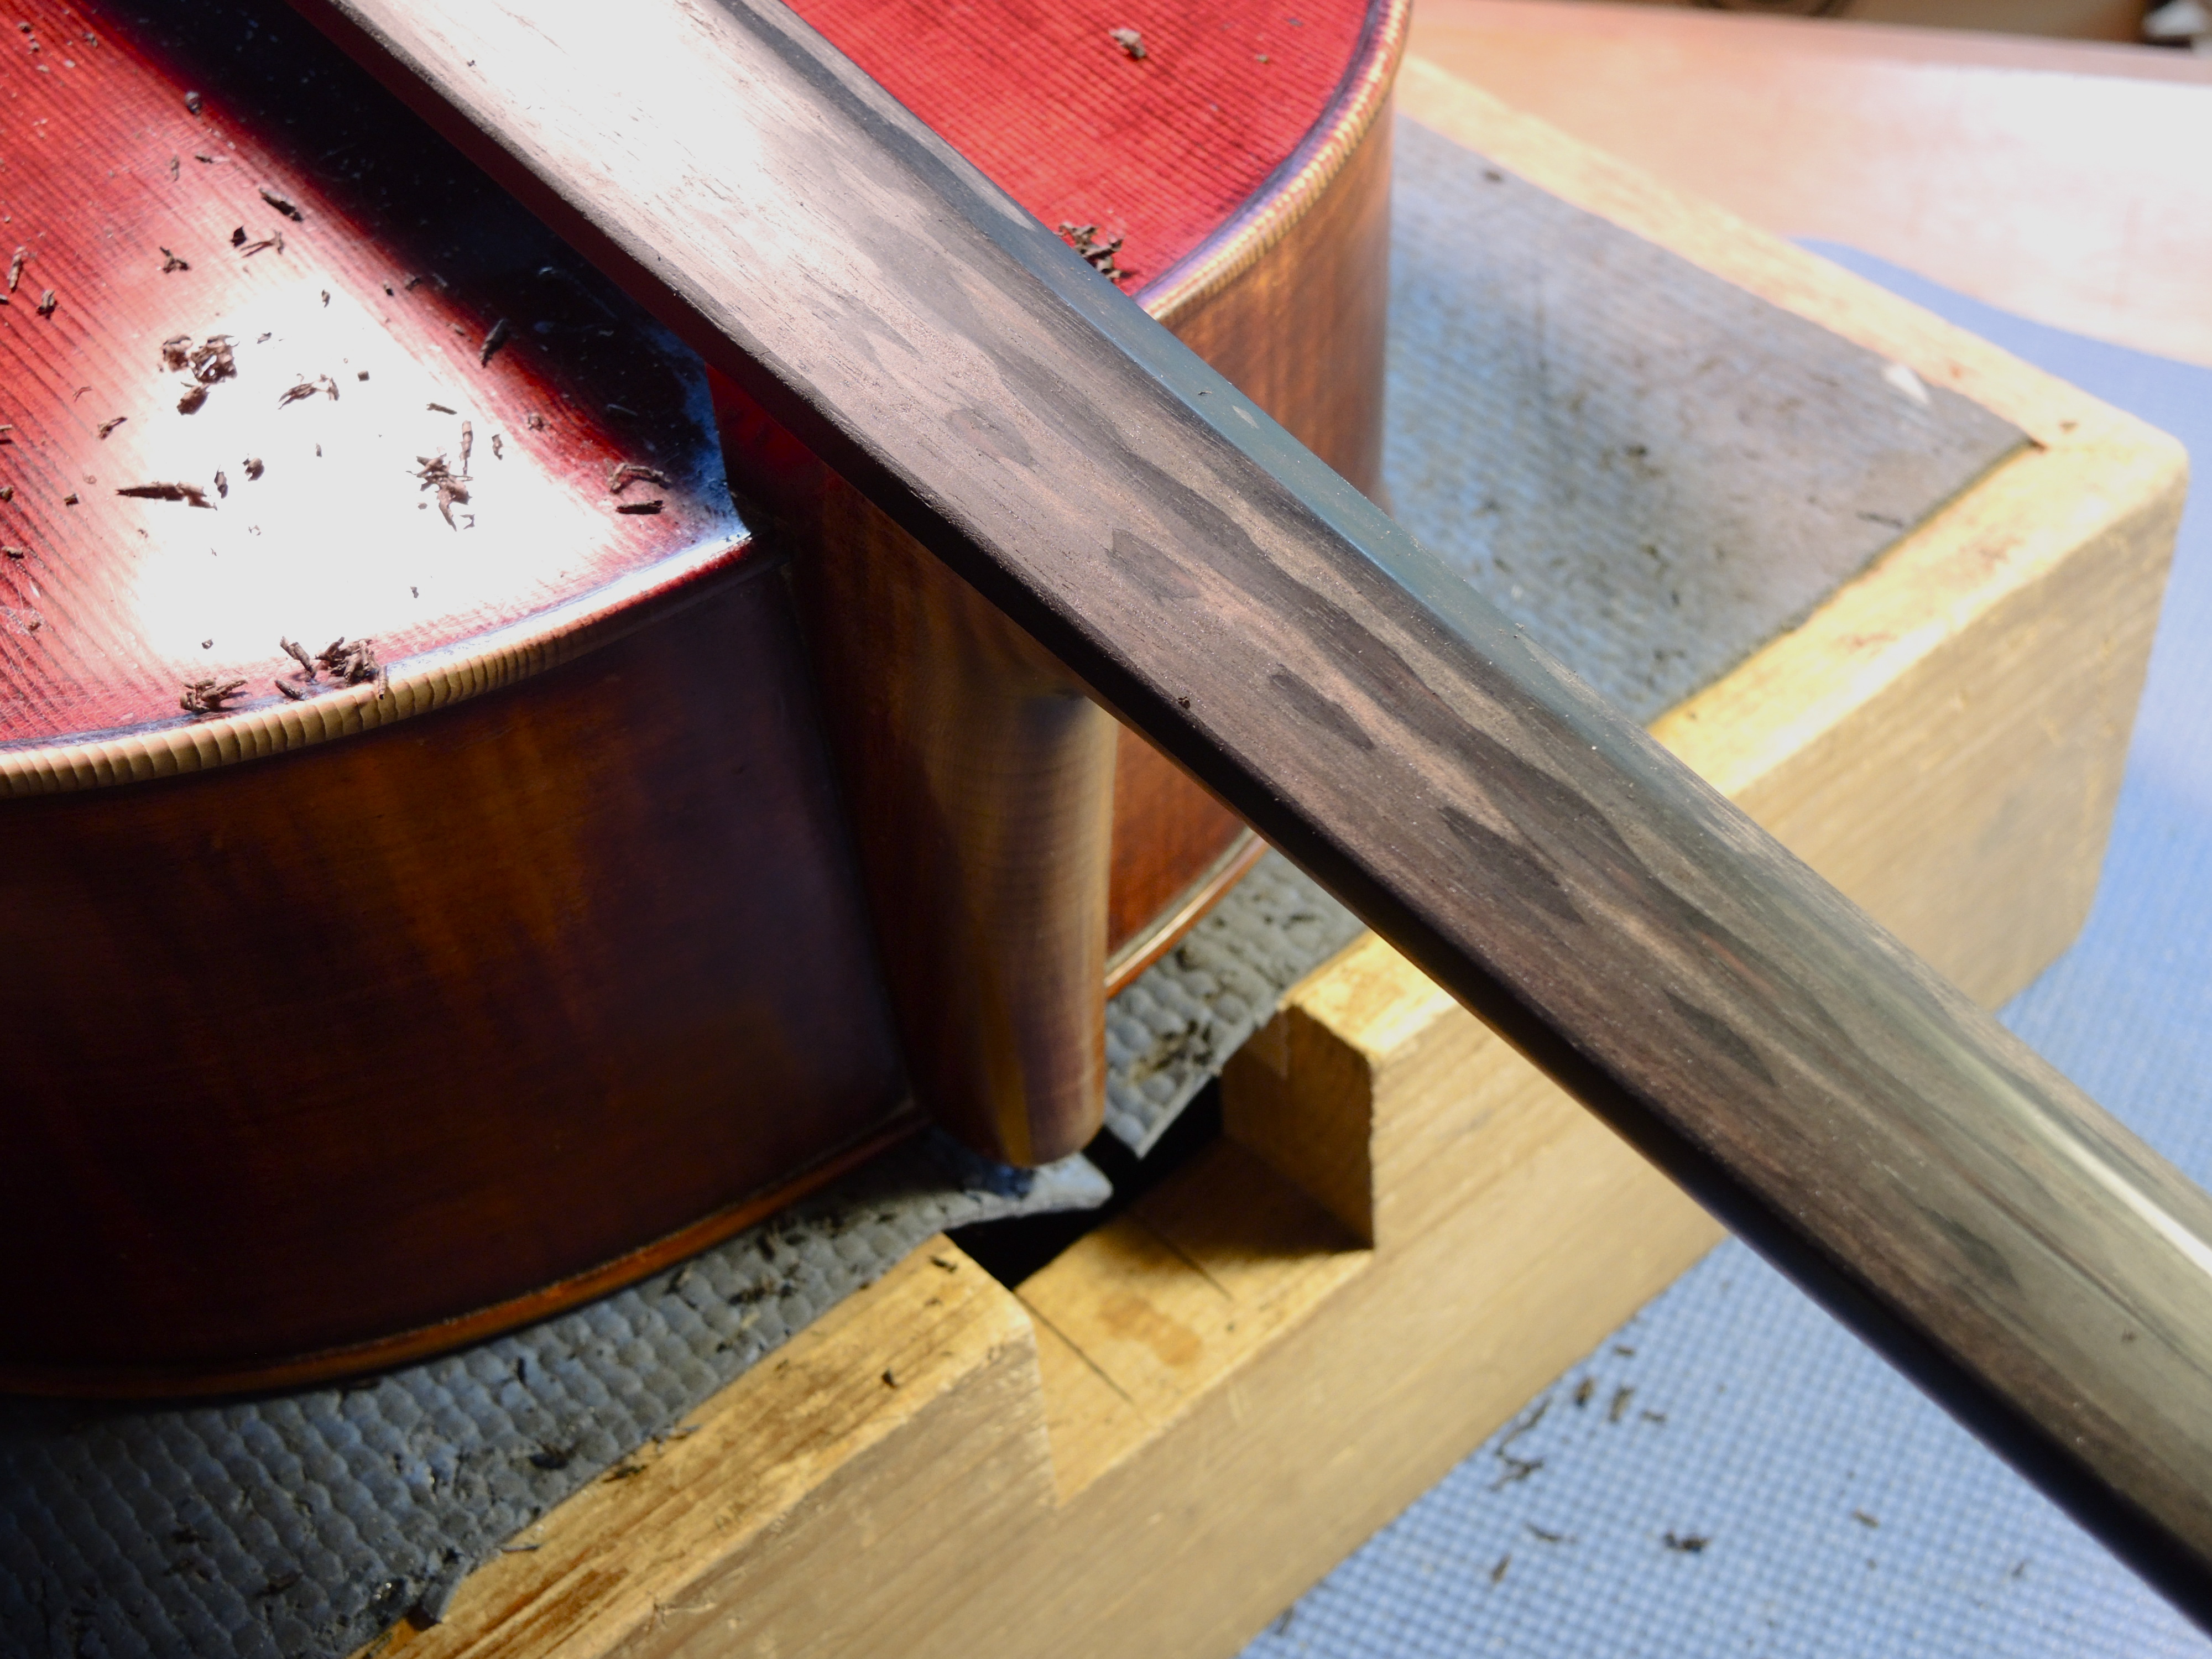
Excessive wear in a fingerboard can manifest as ruts, caused by pressing the strings against the surface of the fingerboard, and as pits between the strings, where the player’s fingers, with their superb callouses, land. A quick sighting down the neck reveals the telltale washboard effect.

DSCN0610

Closer inspection shows serious pitting and string ruts all the way up the fingerboard.

DSCN0611DSCN0614

This is lovely old German cello is a pretty extreme example – perfect for demonstration purposes! The fact is that fingerboard wear happens gradually. Often the player makes subtle adjustments over time to compensate for the discrepancies in the playing surface. The informed player knows to have the board checked periodically, and may even detect the symptoms of a worn board before it becomes unmanageable. Everyone else just blames the soundpost!

It’s true, the soundpost seems to take the blame whenever something mysterious is happening with an instrument. That’s  why a good luthier is also a diagnostician. A worn fingerboard can cause buzzing, obviously, but it can also result in the loss of clarity in tone production. And, it can wreak havoc with intonation. Can’t seem to nail those fifths anymore? Hmmm.

Fingerboards are generally made out of ebony – a very hard, dense wood that is black, sometimes with paler streaks. The fingerboard is meant to be resurfaced as needed. I have some clients that have this done every couple of years. Others go longer. Sometimes, as in the case of my German cello, MUCH longer!

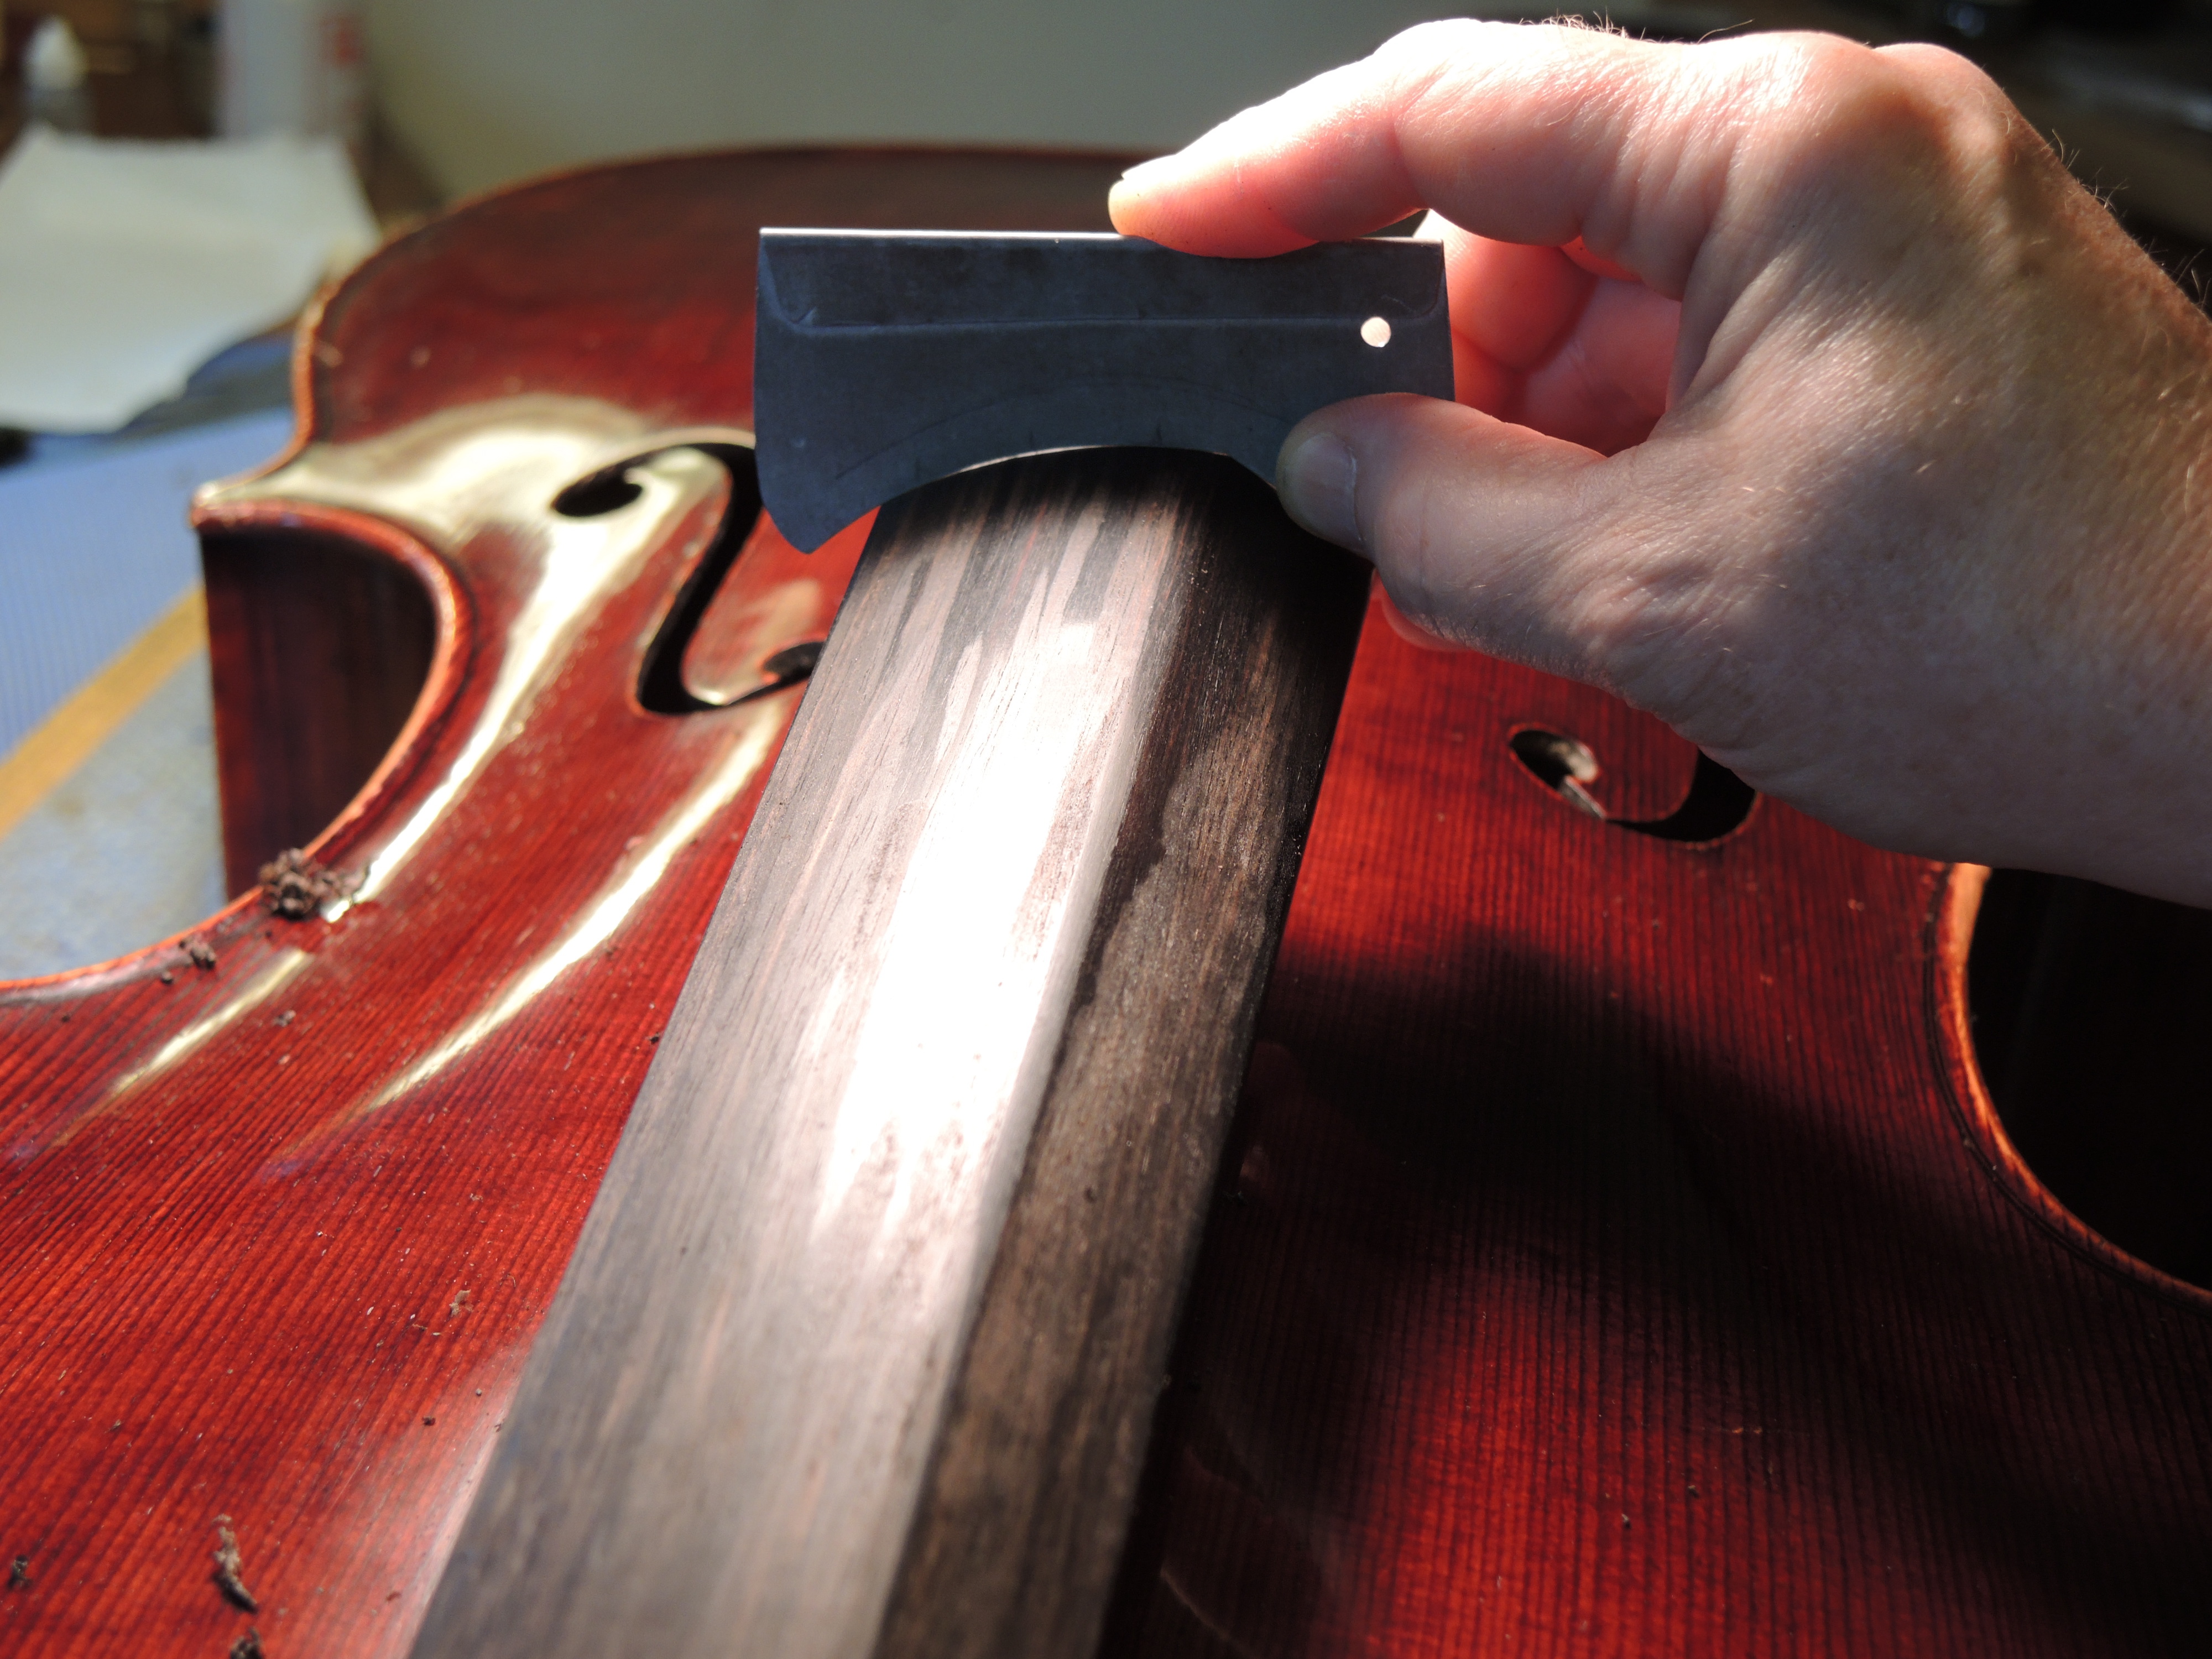
The shape of the fingerboard is carefully calculated. From end to end it has a gentle “scoop” which enables the  string to vibrate freely from whatever point it’s fingered. Too little scoop and the string buzzes, too much scoop and the string is difficult to press down. The arc across the fingerboard is also shaped precisely, using a template. The fingerboard arc needs to correspond properly to the bridge arc, so that the player experiences comfortable and even fingering.

The fingerboard is shaped with a sharp plane. The first few cuts into a badly worn board are always revealing.

DSCN0616DSCN0622

Here, I’m checking the arc against my template.

DSCN0625

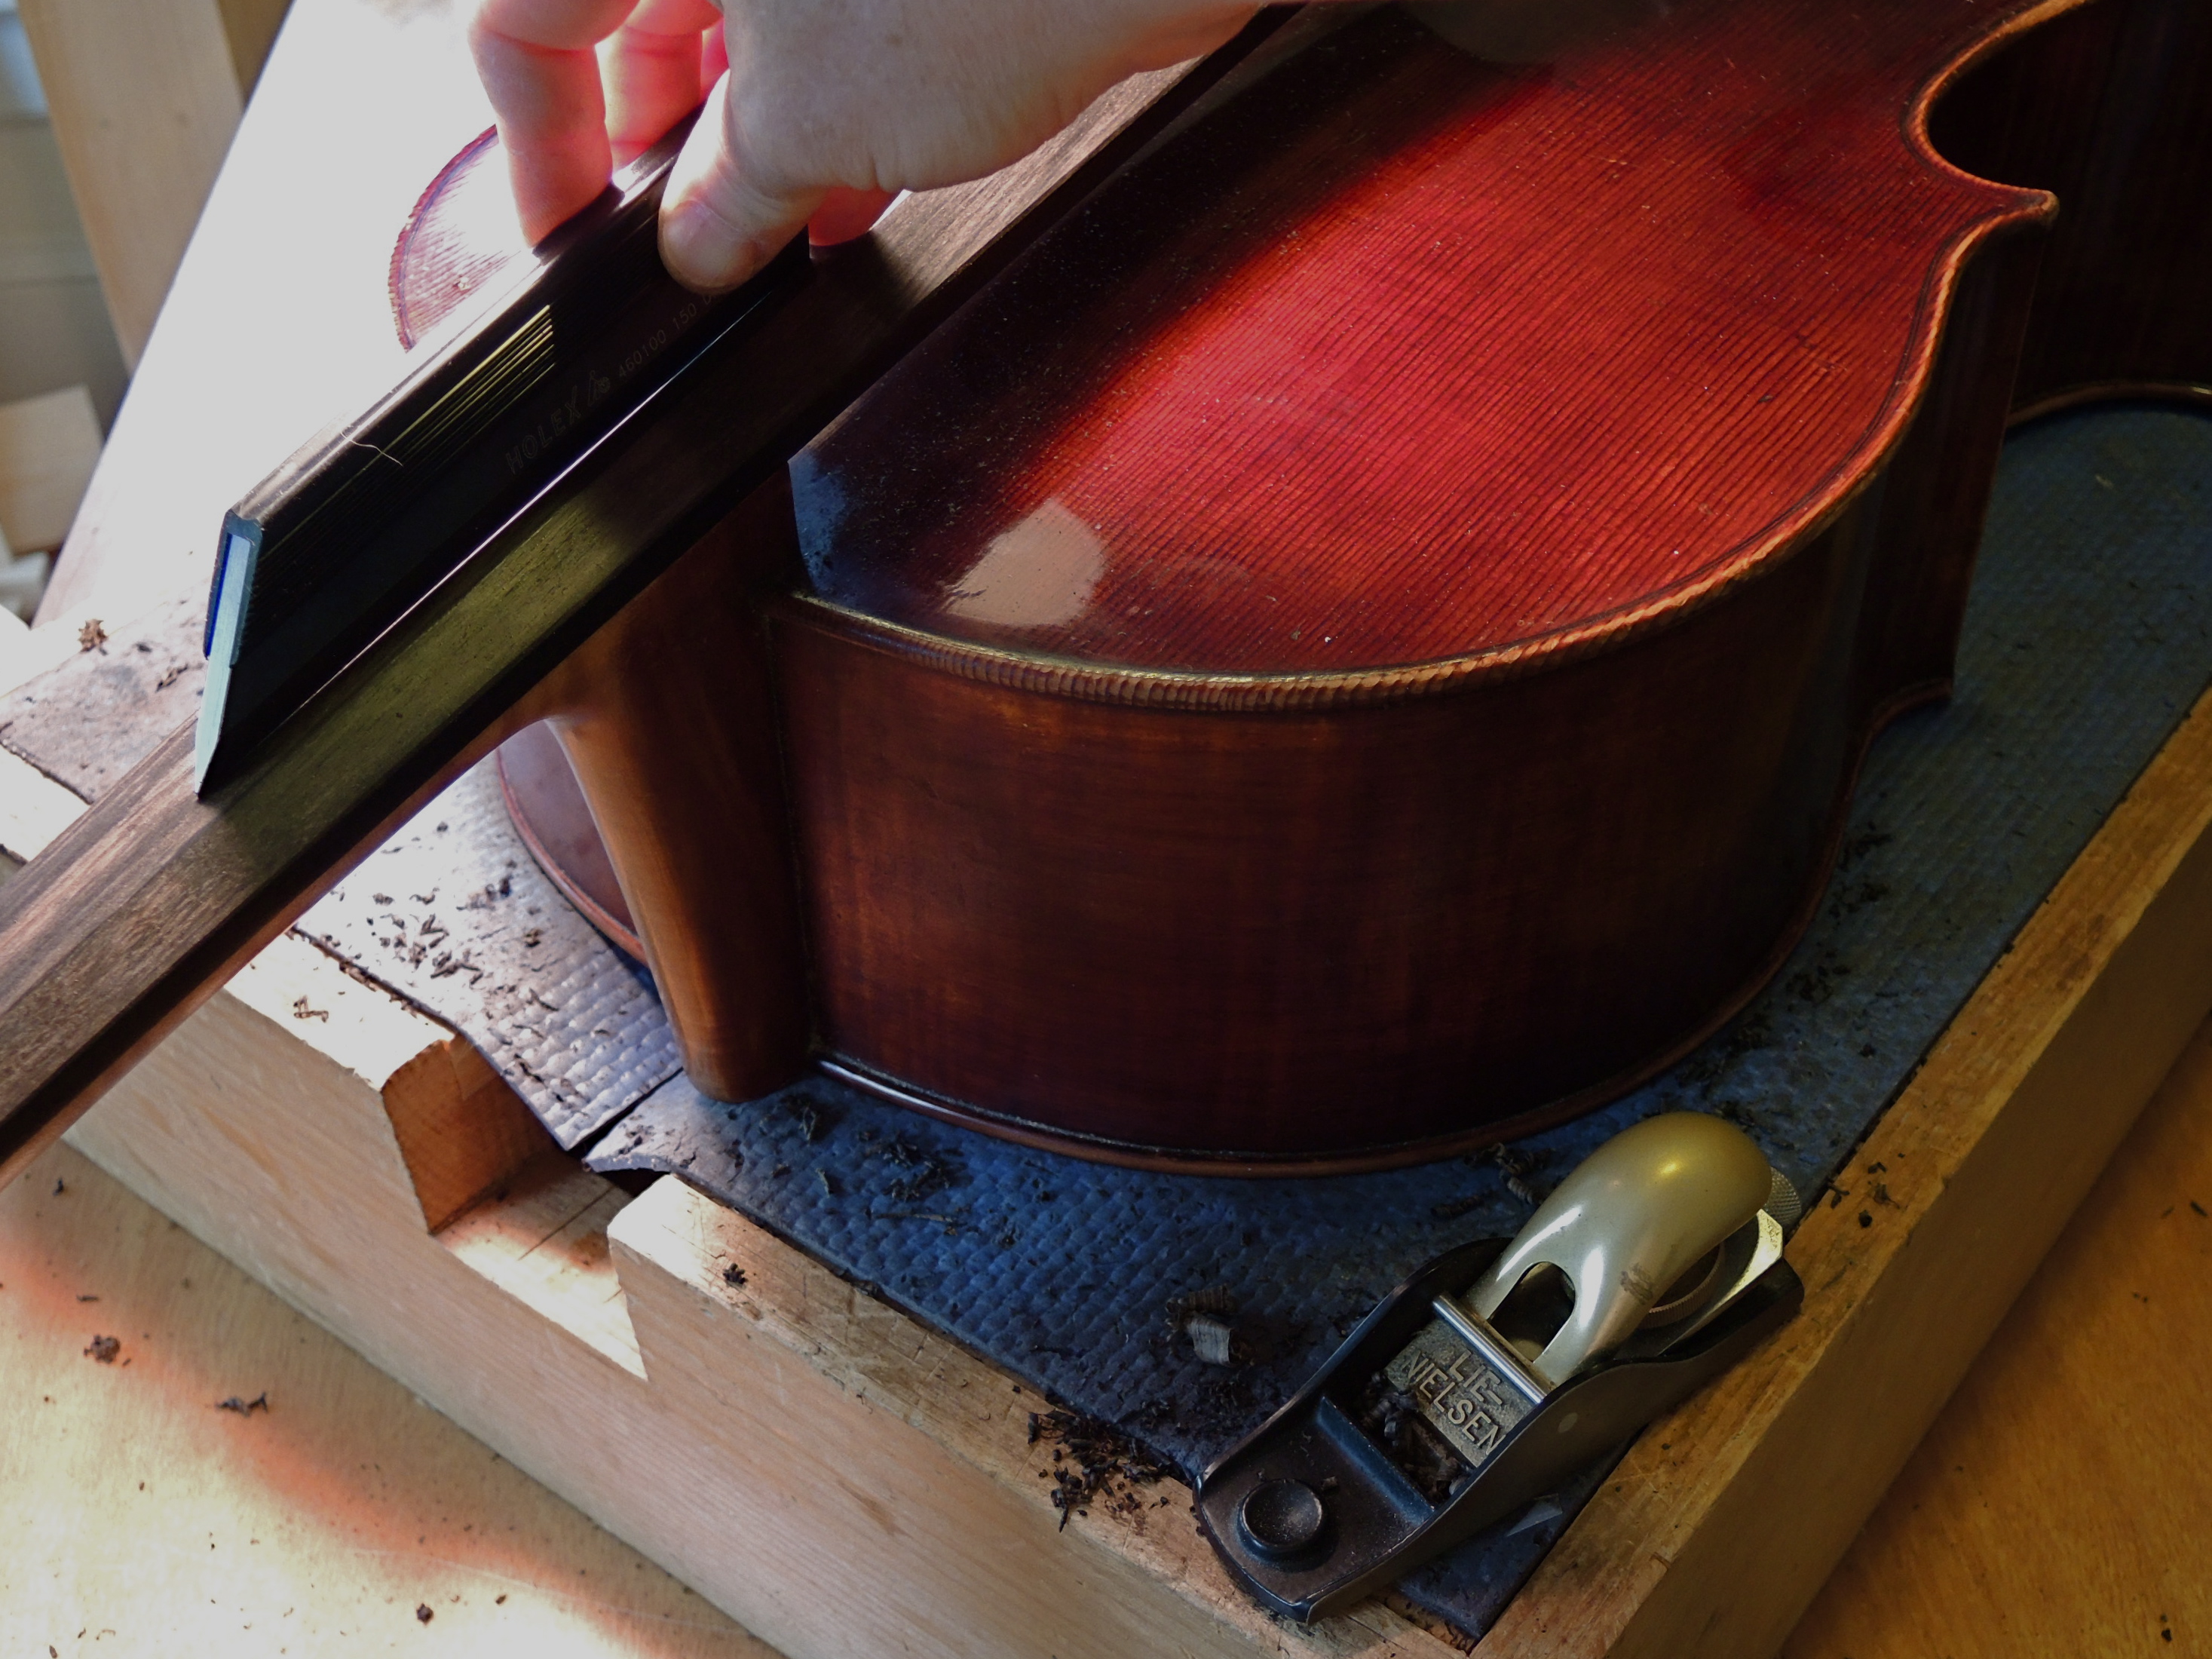
To evaluate the scoop, I first use a long straight edge. Then I use a short straight edge to detect any discrepancies. I like to see a sliver of light under the short edge, all along the length of the board. That’s my favorite  plane for the job – it’s a Lie-Nielsen block plane. I start with a heavier cut. Then, as I approach the desired shape, I back the blade off and proceed with a very light cut. This leaves a minimum of finish work to do with a scraper and fine sandpaper.

DSCN0632

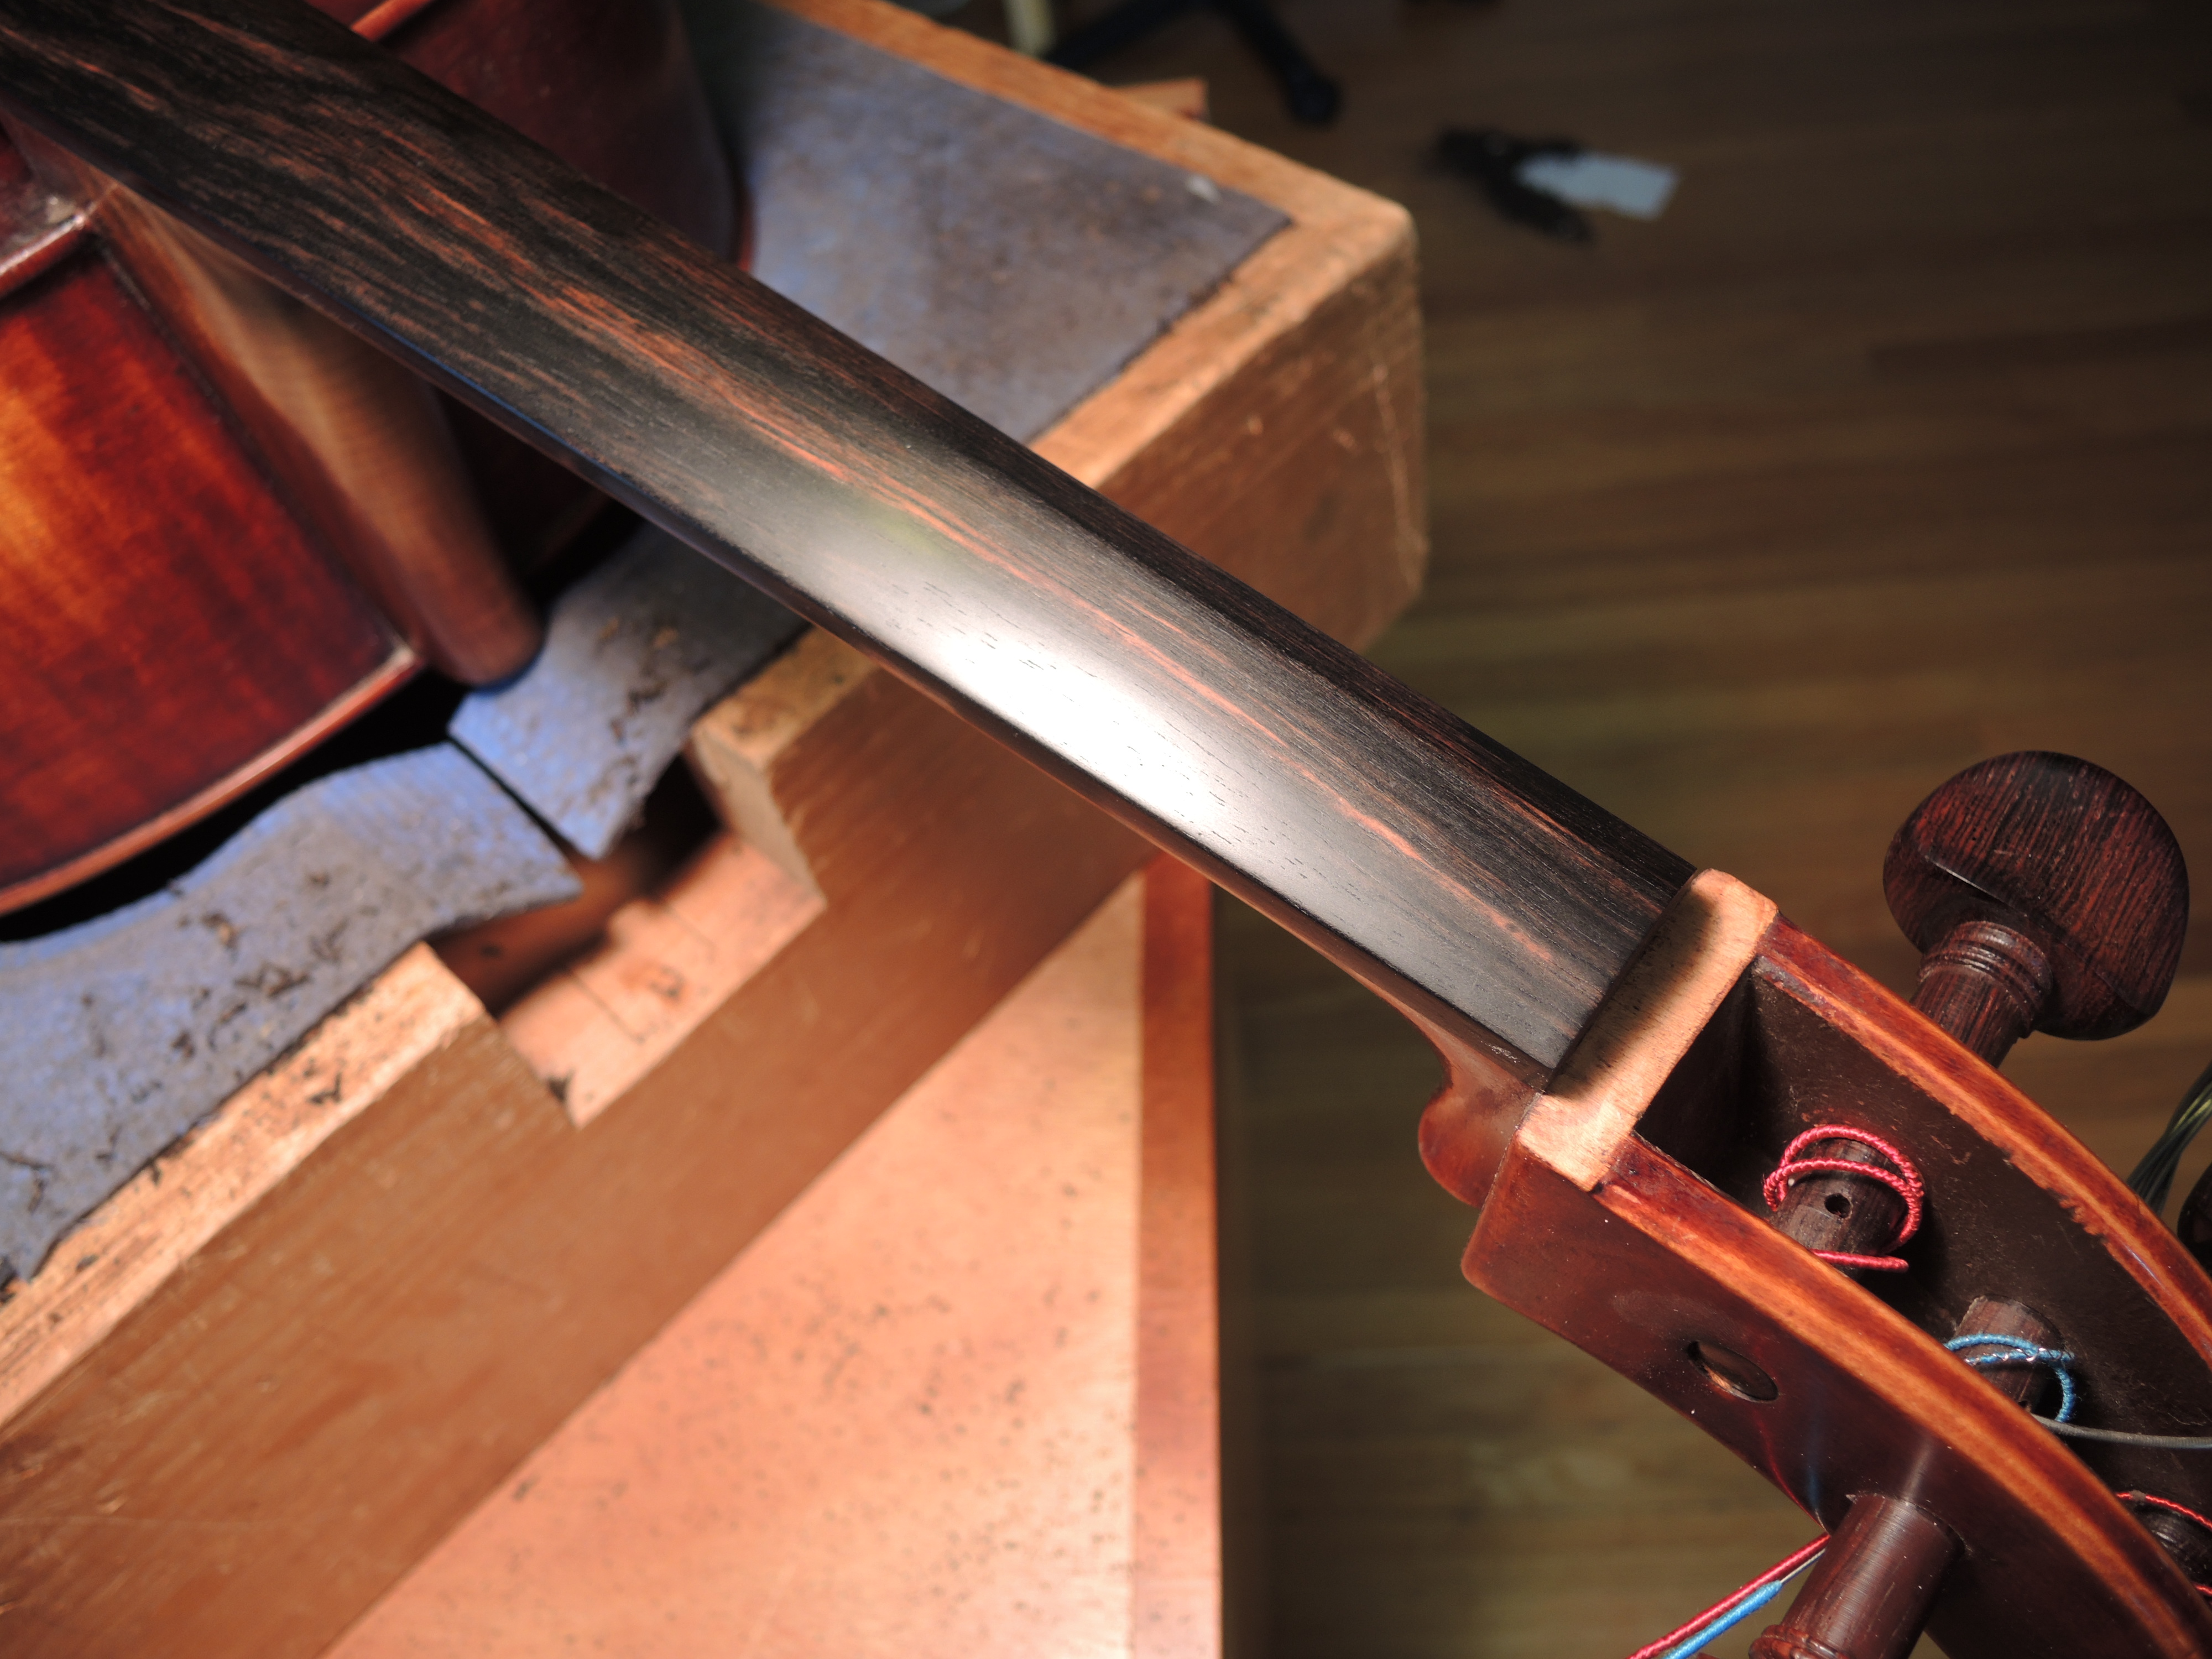
The fingerboard is polished with mineral oil and a bit of tripoli for a smooth, consistent surface.

DSCN0636DSCN0634

An accurate fingerboard can make a huge difference for a player. One happy client, Rebecca Hartka, had this to say recently:

Playing in tune is suddenly soo much easier since I just had my fingerboard smoothed down. It’s amazing to me that putting my fingers down over and over again can literally cause dips in my ebony fingerboard! And how much mayhem a wobbly fingerboard can cause in note consistency. Thanks Stacey Styles for the beautiful job! Phew!

DSCN0645

All dressed up now, and ready to go!

Free_iPad_Wallpaper__Includes_the_Scene_of_Highway_Makes_One_Feel_Fast_Speed_and_Great_Driving_Excitement

Read Full Post »

If only I could do as fast as I think. I have always wished for this particular super power. I would forego extraordinary strength, or the ability to shape shift, although that sounds like fun. I have NO interest in reading other people’s minds, and living with any kind of super hypersensitivity sounds like an incredible burden. Perhaps I would enjoy being able to control the weather, but I’m afraid I would only screw it up for somebody else. But if I could execute an idea as fast as I could think it, now that would be something.

Even as I say it, I sense the fatal flaw. I can see how my “see how it goes” approach to so many things would instantaneously become “see how it went”. Fine, perhaps, as I’m screwing together shelves and racks in the new workspace upstairs. Not so fine as I take the top off a two hundred year old fiddle.

In my work life, there are two kinds of “busy”.

DSCN0488 One kind of busy involves lots of phone calls, emails, client visits, adjustments, bow rehairs, seam glueing, general maintenance and repair work that has to happen before the dress rehearsal/recital/audition/studio session.

IMG_4541

IMG_4552_2

The other kind of busy is when the traffic through the door abates and I am able to get on with everything else – the larger restoration projects, work on instruments that I own, business projects that require a more expansive brain wave, including designing and building that new workshop. Balancing “Busy 1” and “Busy 2” has been one of the more difficult things that I have had to learn, as an independent violin restorer.

Lately, I’ve been riding a wave of Busy 1 and only thinking about Busy 2. I have no real superpowers, but I have the ability to sit at my bench and, while I work, think hard about what does and doesn’t work for me in a workspace. For instance, things that I require include, in no particular order:

1. Access to tools, priority given to those I use all the time.

2. Clear horizontal surfaces where I need them.

3. Ability to move about freely, without tripping over things. I HATE tripping over things.

4. Orientation toward natural light, without being subjected to glare or intense shadows.

5. A means to store tools without compromising their care and maintenance.

6. Ability to readily sort through parts and material especially repair wood.

7. Adequate electrical sources

8. Ability to shut the door on the workshop.

Things that will make me crazy and so are to be avoided at all costs:

1. Not being able to see what’s at the back of the shelf.

2. Having to get  down on my knees.

3. Backing my chair up into an open cabinet door.

4. Having to get out a flashlight.

5. Tripping over things. I HATE that.

6. Having to remove screws, as in having to access something that’s dropped behind the bench.

7. Not being able to readily sweep out the corners.

8. Having to move X, in order to set  down Y.

I don’t mind getting out the step ladder now and then, and I don’t mind the occasional trip to the attic to pick through the wood pile. And the occasional trip to the basement to use the big band saw or the tool grinder is just fine with me. But I don’t like things that land on the bench top because they have no other place to live. I dislike clutter, but I like a happy, reasonable mess.

Probably, by the time I actually post this, I will back in the Busy 2 groove, which will place me upstairs finishing some cabinets and hanging a door. My clients, with their freshly maintained and adjusted instruments will be in the throes of their own Busy 1 cycles. So it goes.DSCN0462

Read Full Post »

This is a follow up to my last post, Not Just Any Open Seam.

Helen commented: “In Australia, we experience very hot summers. Is it more likely for my violin to experience seam bursts”?

Hmm… I live at 42˚N. Helen, if I were to take a random guess, might live at 27˚S, which would place her in or near Brisbane. Please forgive me , Helen, if I’ve got it all wrong! In any case, I think we can explore this topic by making some generalizations, even if she is heading into a prodigal summer while I am inevitably crashing into a long desolate, lonely, cold and miserable winter. No hard feelings.

My initial response to Helen’s query is, “not necessarily.” A basic overview can be helpful in establishing a maintenance plan that may help in troubleshooting some of these seasonal headaches.

My first piece of advice is to find, if possible, a local (to you) violin restorer/maker with a good reputation and establish a rapport. It’s like finding a good doctor or car mechanic – you hope you never really need them, but if or when you do, it’s nice to have a relationship already established. By the same token, it may be smart to schedule a yearly check-up even if you don’t notice that anything is wrong. Your local luthier will have an opportunity to establish a “baseline” for your particular instrument. She or he  will also have insights into local climate-related issues and possibly a sense of what other string players in your area experience as a result.

Beyond that, it’s good to be educated! Here in New England, USA, we have hot humid summers and cold dry winters. Rapid changes in climate conditions, especially humidity, can be stressful for wooden instruments. Your instrument will be happiest if you can protect it from sudden and extreme changes in temperature and humidity. Frequently, I tell my clients “if you are comfortable, your instrument is probably comfortable.” The thing to remember is that humans adjust more quickly to environmental changes. Your instrument may need a little more time and coddling than you are likely to allow yourself.

Your instrument case is a micro-environment. Take advantage of it! Arrive at your destination 15 minutes early and allow your instrument to warm up or cool down in its case before you introduce it to a radically different environment. If you are experiencing dry weather, or if you are moving into a dry environment, add a case humidifier.

The interior of an aircraft, for instance, is notoriously dry. Use a case humidifier! If you are getting onto a plane in Brisbane, in January and landing 24 hours later in Boston, be sure to have a humidifier in your case to help mediate the transition. And keep that humidifier moist. Boston is cold and dry in January! So, a case humidifier can be a very useful tool for mediating cold and/or dry conditions. By the way, anyone who knows me, knows I am not crazy about the kind of humidifier that is inserted into the f hole of an instrument. I see too much interior water damage in instruments.

The trip from Boston to Brisbane in January might be a little safer. Generally, moving from a dry environment to a humid environment is less traumatic in terms of structure, although there can be tonal ramifications. Generally speaking, if I am executing an important gluing operation, eg assembling the top of an instrument, I will want to do it in a dry environment. When humidity is introduced, I may be in for an adjustment, but I will have most likely avoided the possibility of wood cracking.

So what about in the summer? Instruments seams are more likely to open up when the wood dries out in the winter. However, wood moves both ways. I’ve seen seams open up in the summer, too. Also, hide glue can soften in the heat. Consider where you store your instrument – hopefully away from a heat source and out of direct sunlight. An instrument should NEVER be left in a hot car in the summer. If it has to be in the car for a while in moderate but sunny weather, throw a white sheet over it. There is sense in keeping your instrument in a white case.

In the summer, I advise my clients to air condition the room in which their instruments live most the time, if possible. Similarly, in the winter, humidify. Don’t go crazy! Most of us move in and out of different environments and the idea is to MEDIATE, not control everything. Which is impossible anyway.
Mediate, mediate, mediate!

Read Full Post »

Today I had a client in with a violin in need of gluing. While that in itself is nothing notable, there is an aspect of this encounter that may qualify as a teaching moment, especially apropos to those of us in the Northern Hemisphere who are heading into the heating season.

Violin family instruments are put together with hot hide glue, which has unique properties that are particularly advantageous in some circumstances. I’m not a “science guy” so I can’t answer questions about crystalline structure or tensile strength as opposed to other kinds of strength. I do know, for instance, that drywall screws have incredible holding power unless you whack’em sideways with a hammer, and for some reason, I am reminded of this when I think about violins and hide glue.

Hide glue, made from animal byproducts, is essentially the same stuff that’s been used for hundreds of years in the assembly and repair of violin family instruments. The remarkable characteristics of this adhesive include its strength and its weakness. We have a wealth of instruments with top and back center joints that have retained their integrity for hundreds of years. Be thankful. Then we have the treble side upper bout and the lower bass side seams that, on so many instruments seem to open up on a regular basis. Again, be thankful.

Wood moves seasonally, especially here in New England. In moist weather, it swells. In dry weather it shrinks. Plain and simple. In my house here in Holyoke, the oak floors creak in the winter and in the summer, I can’t close the doors on the antique cherry corner cupboard without risking not being able to open them again until October. In my last house, the oak floors in my living room developed summer speed bumps that would have been the envy of any gated community.

An instrument seam glued with hide glue will break apart when stressed. This is a good thing in mid-winter when the heat’s been on and the wood shrinks. It’s preferable to having the wood itself crack. Having open seams glued is a normal part of violin/viola/cello maintenance. This characteristic of hide glue is also the reason that it is even possible to disassemble an instrument to do interior repairs. So we’re thankful, right?

That said, if a violin maker/restorer is smart, and skillful, he or she will take advantage of the properties of the materials at hand, in this case I’m considering the glue. Hot hide glue can be mixed in ways that varies its strength. A fresh pot of glue will be strongest. With repeated heatings, its strength diminishes. The strength can also be altered depending on the proportion of  water used in the batch. Theoretically, one would be very smart to use the strongest glue, say, for the center joints in the top and back, for setting the neck joint, and for joining fresh cracks. It may be smart to use a weaker glue mix for securing the fingerboard, and assembling the top, which could be subject to seasonal stresses. Remember, an open seam is preferable to a crack.

Speaking as a restorer, we like the fact that hide glue is reversible. It may seem counter intuitive, but the reversibility of hide glue actually increases the chance that an instrument will live a very long life.

Back to my client, who was smart to call in an emergency. She was concerned with the lower block area of her violin, which looked like this (violin is viewed with the back up, so we can see the area where the tailpiece is anchored by the end button):

Indeed, the glued seam had released, but in this case, the loose seam extended over the lower block, leaving the body of the instrument vulnerable to the longitudinal string tension. I suspect that the end grain of the lower block was improperly sized on this relatively “new” instrument, before the top was glued on, causing the area to separate.

One can see from the photo how the string tension has compressed the body from end to end, and the button/rib assembly has abandoned the original glue line. The lower block is no longer secured to the top, and the spruce top is now bearing more than its share of structural tension. Not a good scenario, structurally speaking, BUT one that is easily remedied at this stage. When I loosened the string tension, my client and I both heard the lower rib/block area pop back into place.

This story ends with a simple gluing and a happy violinist! The moral of the story is that all open seams are not created equal. This particular seam opening demanded immediate attention due to the structural issues it presented.

Read Full Post »

Here is a story that no violin restorer in their right mind would share with the public. It may have actually happened to a younger me, or it may have happened to someone else. In either case, the experience was horrifying, but the outcome was actually fortuitous, and certainly edifying. Unfortunately, I have no photos of the actual event, since I may not have been there, but if it seems particularly useful, I will throw in some sketches. Thank you Smith College for the degree in Art.

.

Some background: woodworms are little bugs; worms, ie before they become grownup bugs, which I think are moths around the time they start thinking of having little bugs of their own (Elizabeth, my friend the biologist, where are you?). Anyway, they are greedy little freeloaders at best. Their favorite meal consists of protein, protein, protein. They will pick all the sausage out of the Jambalaya, so do not invite them over for dinner. Even though they are called WOODworms, they will always eat the horsehair on your bow first. Then, their next favorite thing in your violin case is glue (hide glue, that is) if they can get at it. They’ll eat your violin when they are done with dessert. They can do some serious damage. Take a look at this:

  .

When they get around to eating the wood, they will prefer the tenderest cuts. They will eat their way along the fast lane (soft summer grain) and only make the arduous exit across the hard winter grain to re-enter on the southbound lane if the gastronomical landscape is worth a second visit. Pay dirt is having dessert with dinner, such as when a poorly fitted lining holds a pocket of old glue. Then the whole family comes out. Woodworm heaven: would you like maple or spruce with your ice cream tonight?

The other thing you need to know about is that we violin restorers frequently employ the use of plaster casts to support an instrument top while it’s being worked on. The plaster is poured directly on the instrument with a barrier between, usually a thin layer of latex. There are varying methods for drawing the latex down onto the instrument top, before the plaster is actually poured. These days, thanks to my experience in England with master restorer Jean-Jacques Fasnacht, I use a film of latex thinner than what is commercially available. It is so thin that the weight of the plaster as it’s poured is enough to gently force the latex down, assuring a very detailed cast, indeed.

This is actually a cello top prepared for casting, since I may not have been there for the viola in question (we’re getting to that).

Alternately, one can use some kind of vacuum system. I experimented a lot with this a while back, before I studied in England – some kind of box, a small vacuum of some sort, and holes in the box so you can regulate the suction.

Now back to my story. There was a very old viola having quite a bit of work done –  lots of cracks, including a soundpost crack on the top.  Maybe a little arching correction, possibly some edge doublings. The bass bar, while not perfect, looked adequate, so it was left in place. It made sense to make a cast. So the young, unsuspecting violin restorer made the proper preparations: mixed the plaster, engaged the tried and true vacuum system….and watched horrified as the instrument top collapsed, in a split second, with a crack at the bass bar that ran nearly the entire length of the top! After administering appropriate emergency procedures (fresh air and possibly, a gin and tonic), it became evident that this disaster had been waiting to happen. One might even go so far as to say it was very lucky that it happened under these circumstances, and not, say, while performing the Brahms Sonata No.1 in f minor. Very unromantic.

Once upon a time, some lucky bug found the glue joint between the less-than-perfectly fitting bass bar and the viola top and proceeded to act like it was on the payroll for Boston’s Big Dig. Here is my (extrapolated, of course) rendition:

There was little more than air and sawdust underneath the bass bar. The worm’s front door, and presumably some back door, had been overlooked. In the end, the fatal flaw was revealed and the appropriate repairs were made: a long “finger patch” was fitted, replacing the worm runs with healthy wood, and a new, properly fitting  bass bar installed (no glue-filled gaps). Everyone was happy, including the woodworm who had exited years before, oblivious to the havoc wreaked in its wake.

So what can YOU do to avoid having an inadvertent role in a pathetic story like this? PLAY YOUR INSTRUMENT!!! Or at least look it over regularly. Woodworms, ie the adult moths, are most likely to find their way in to instrument cases that are sitting around neglected for long periods of time. If you see multiple hairs on your bow broken at the same place, check your case for signs of uninvited activity. If you’re still suspicious, vacuum it out, and call the doctor!

Read Full Post »

%d bloggers like this: