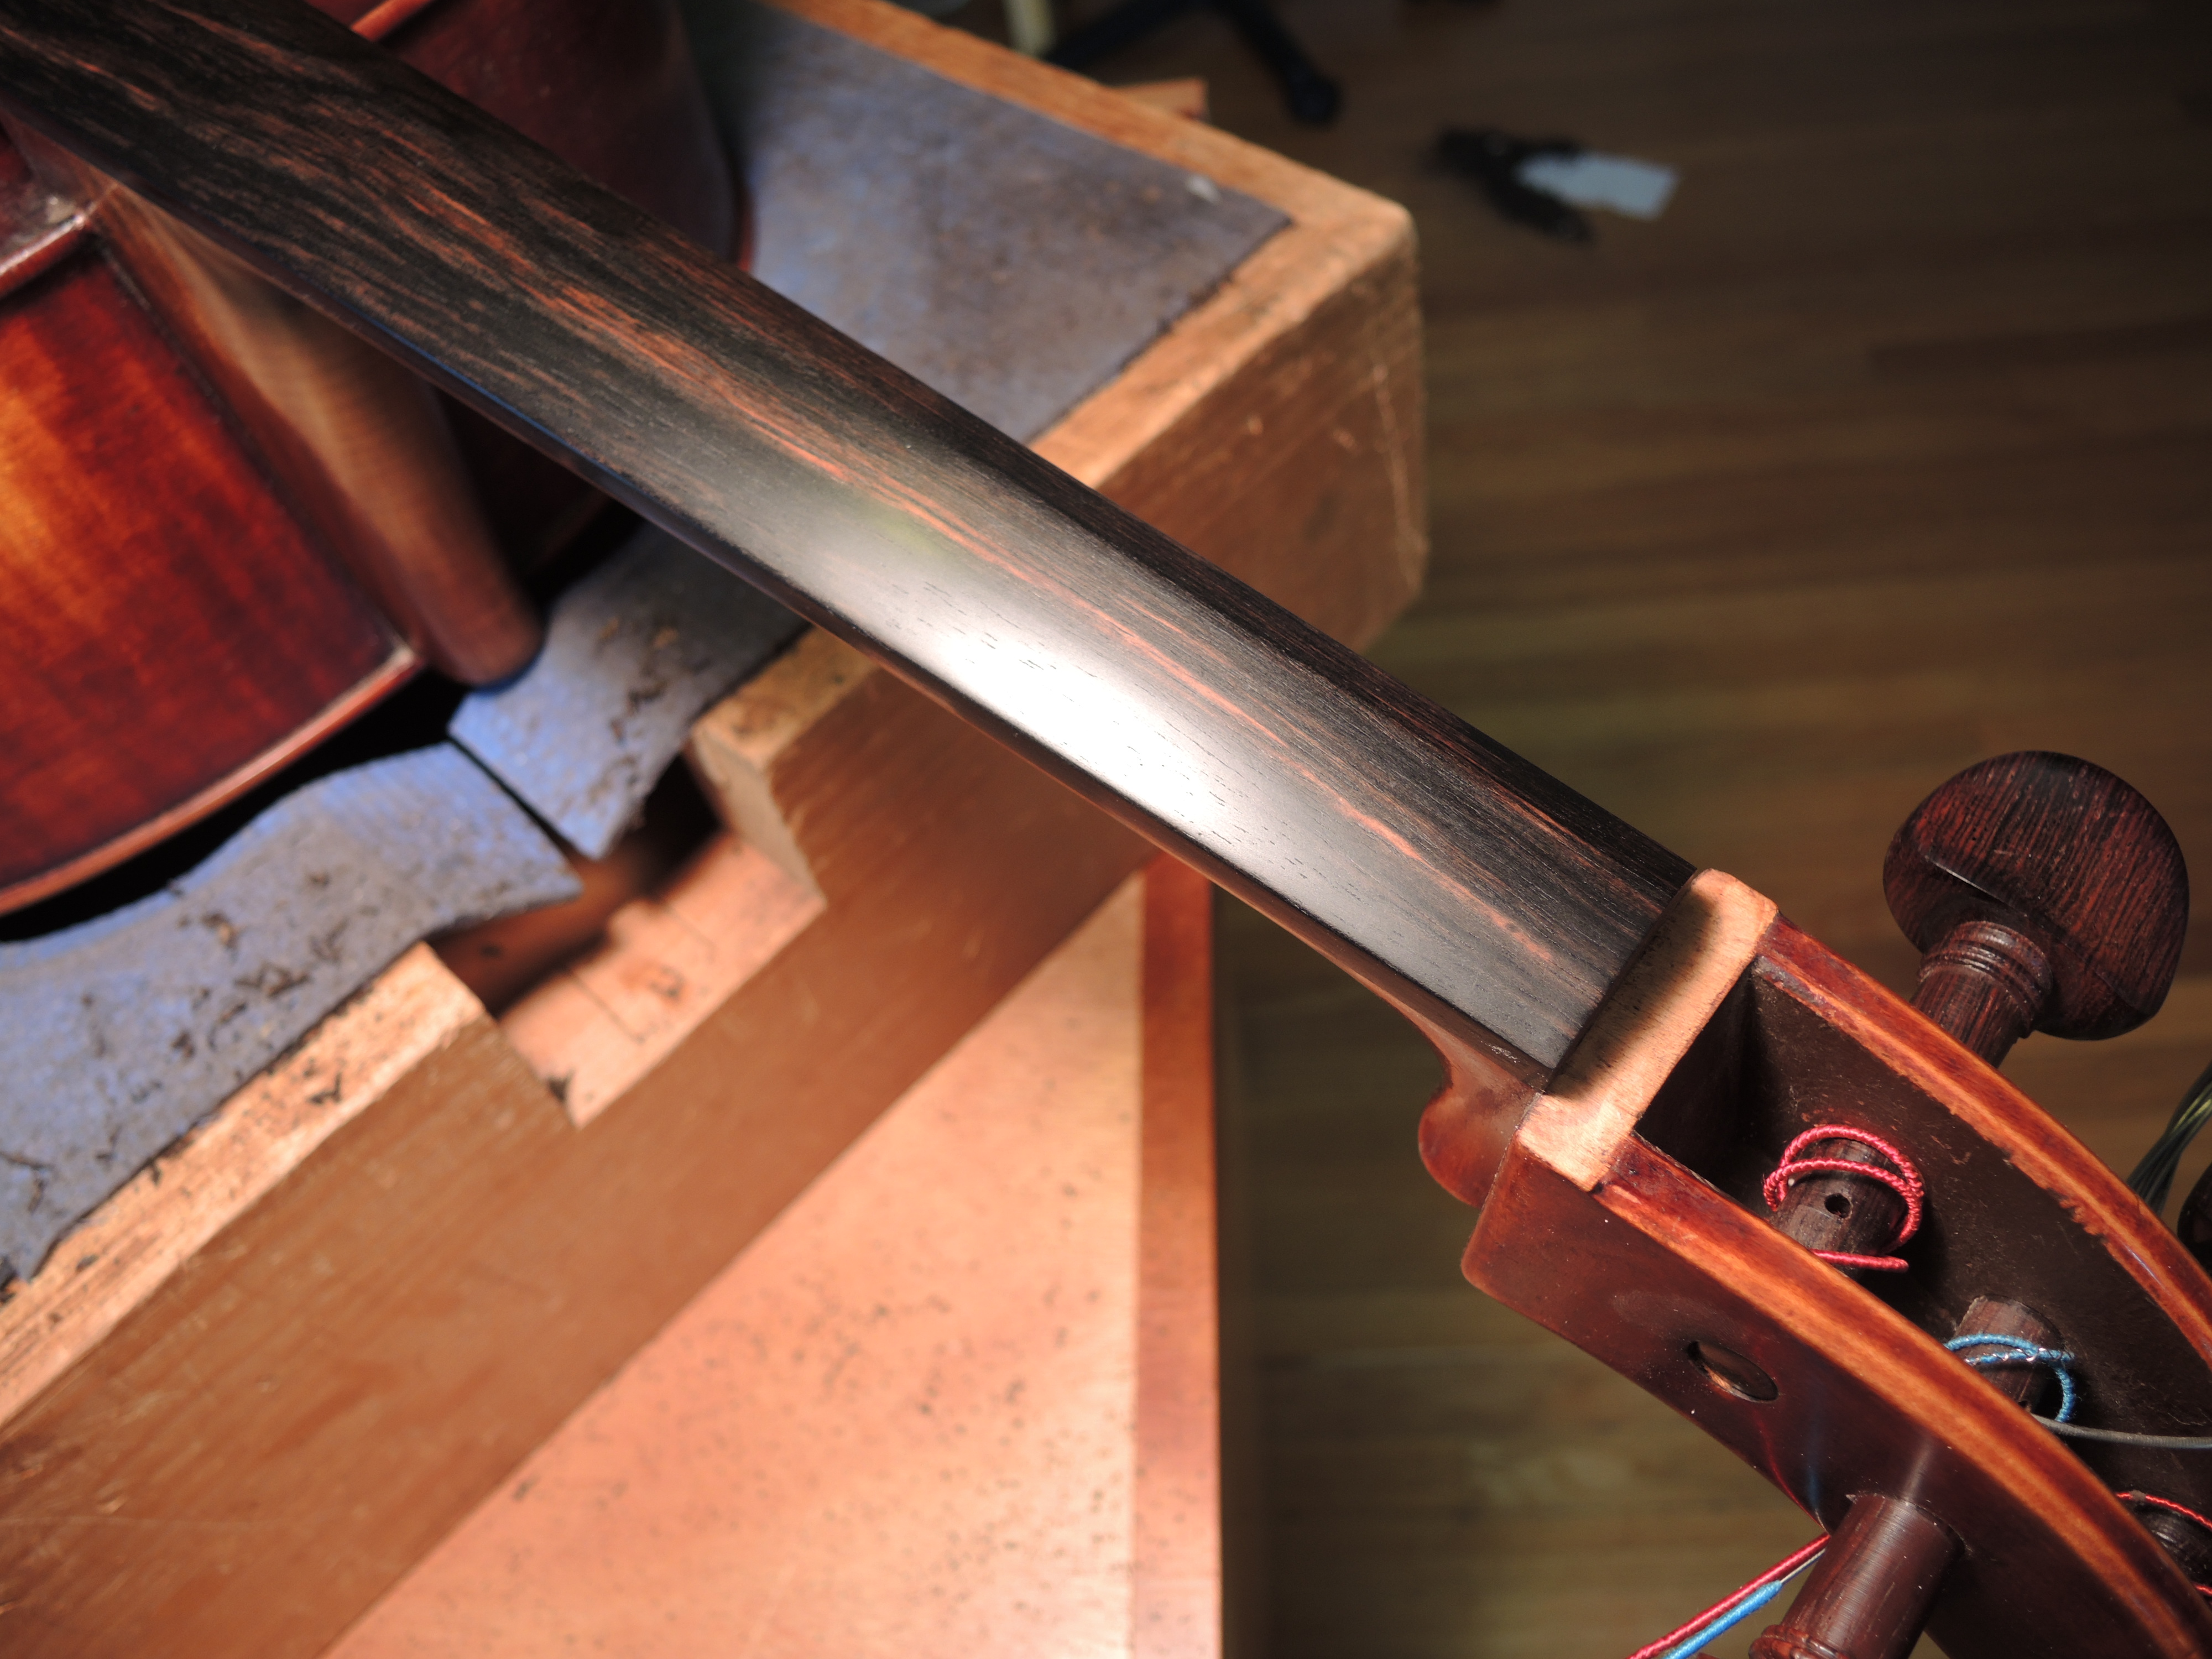
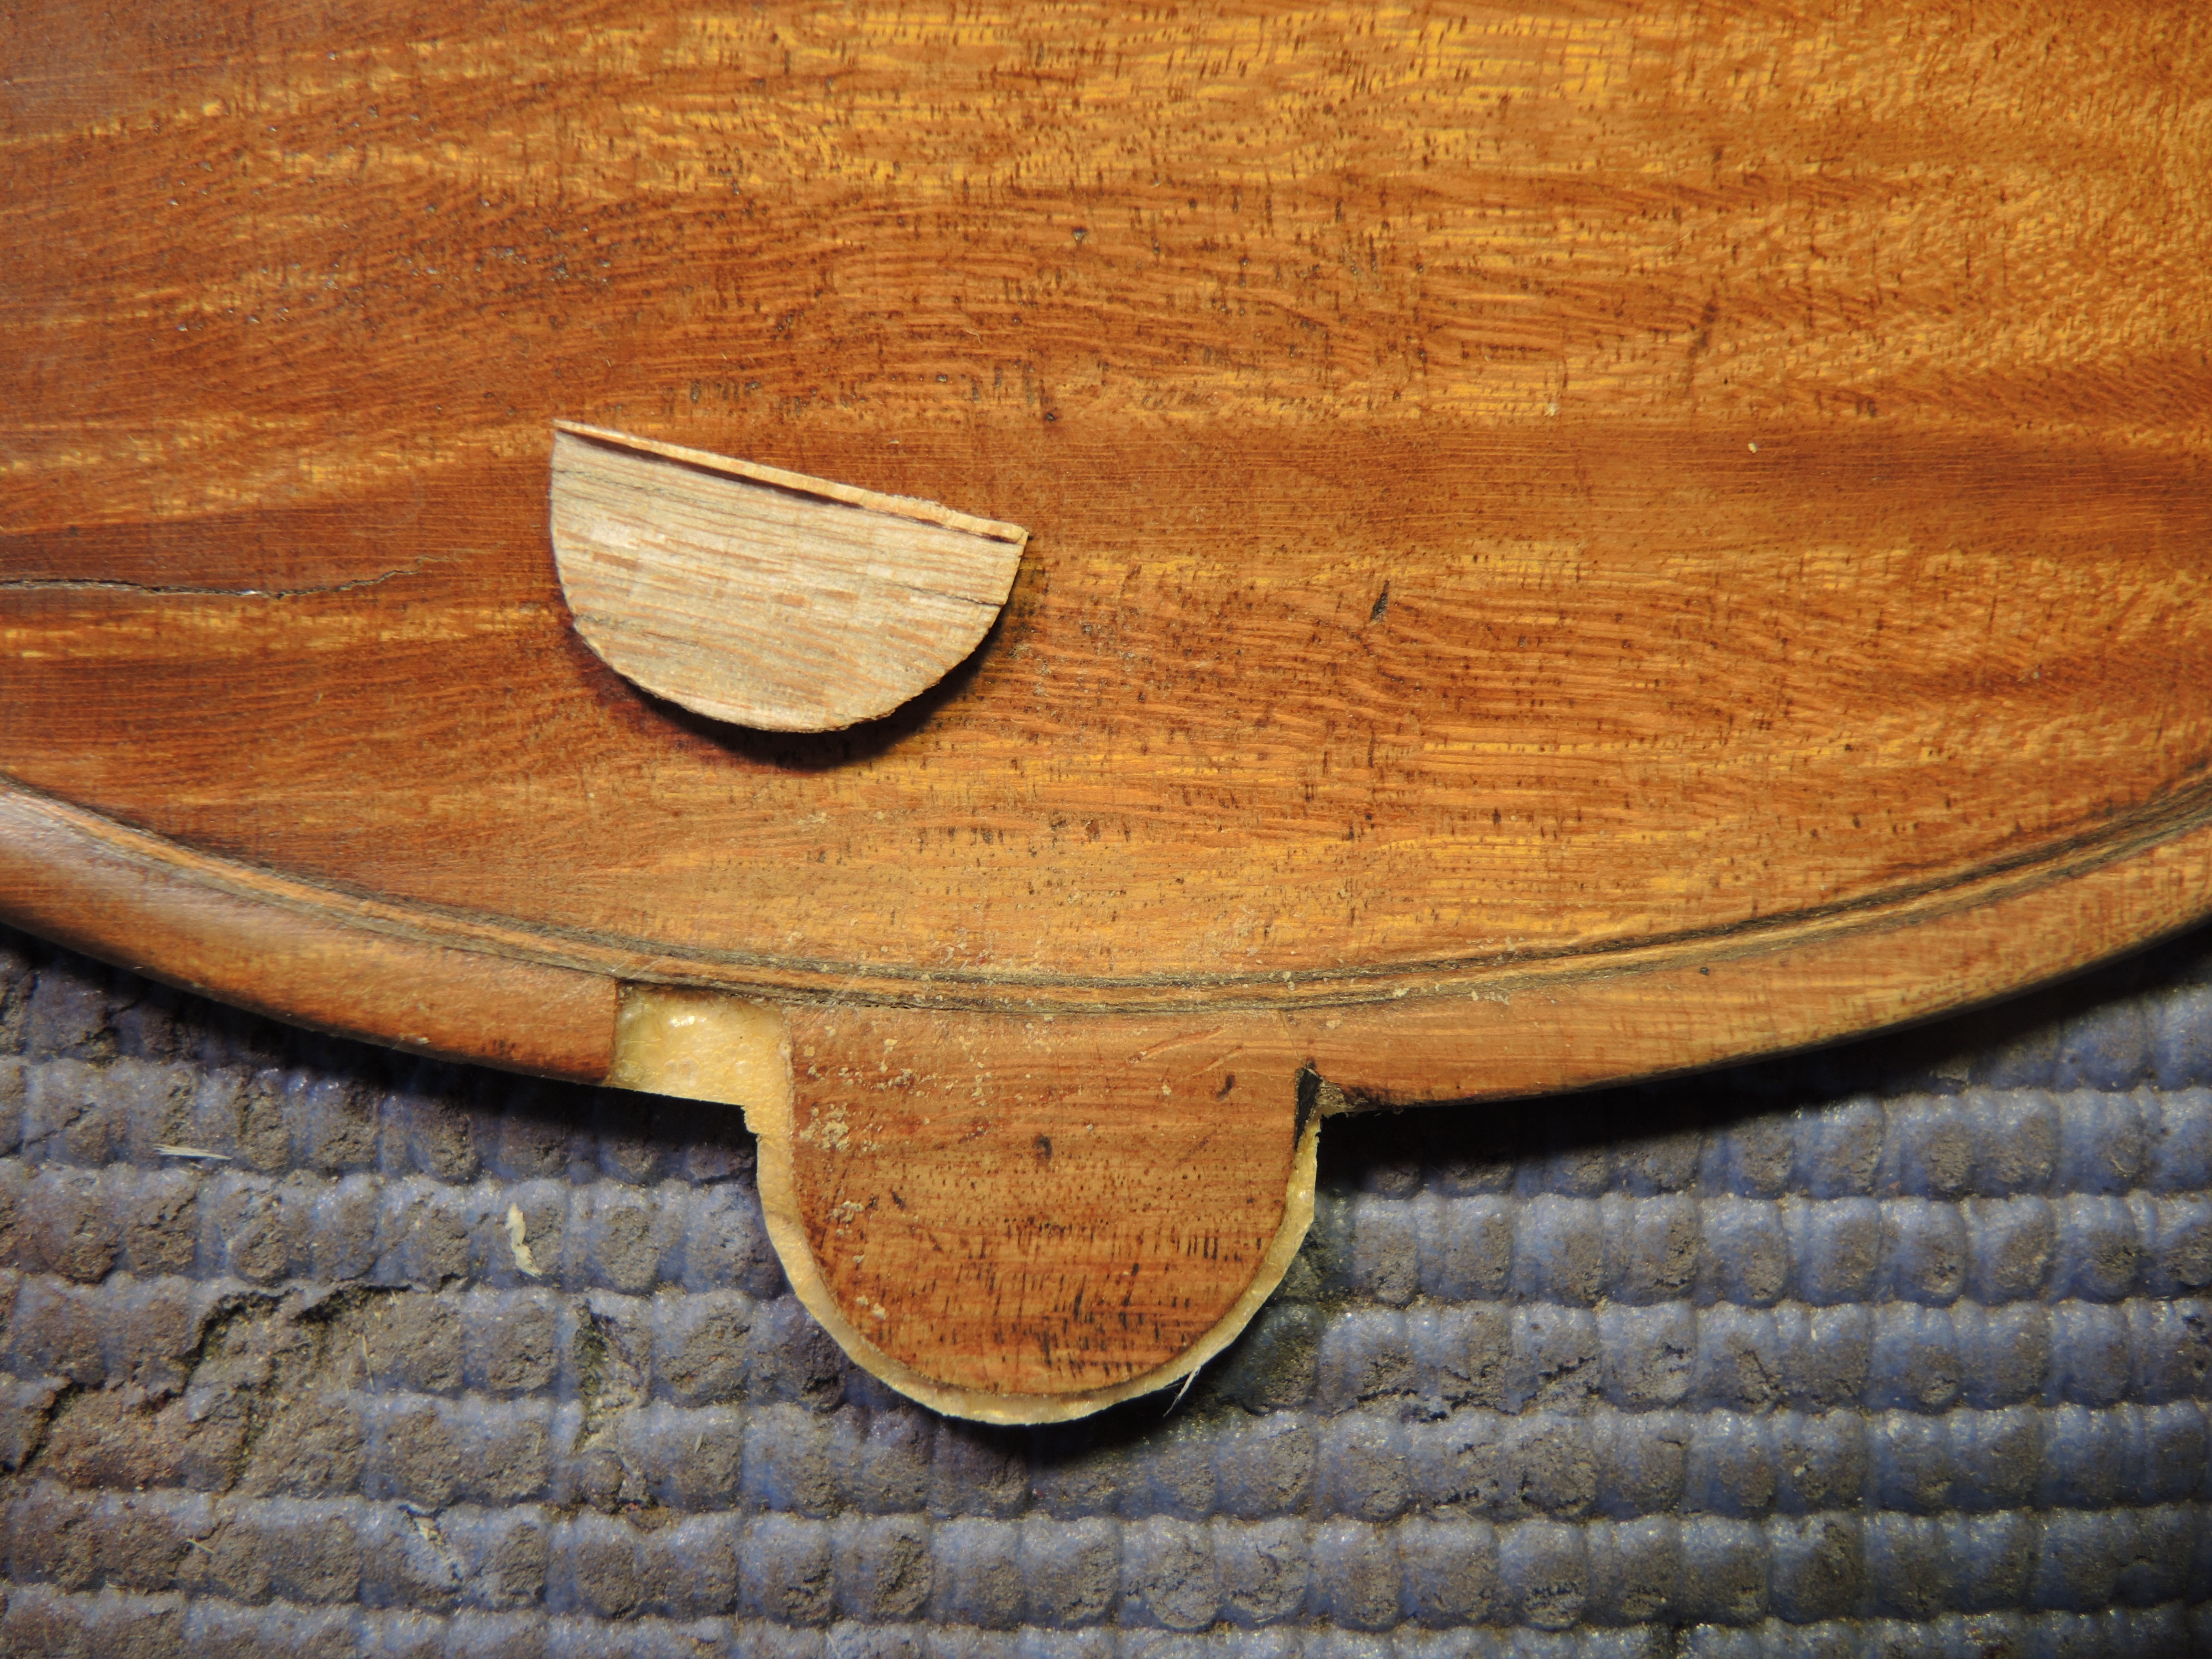
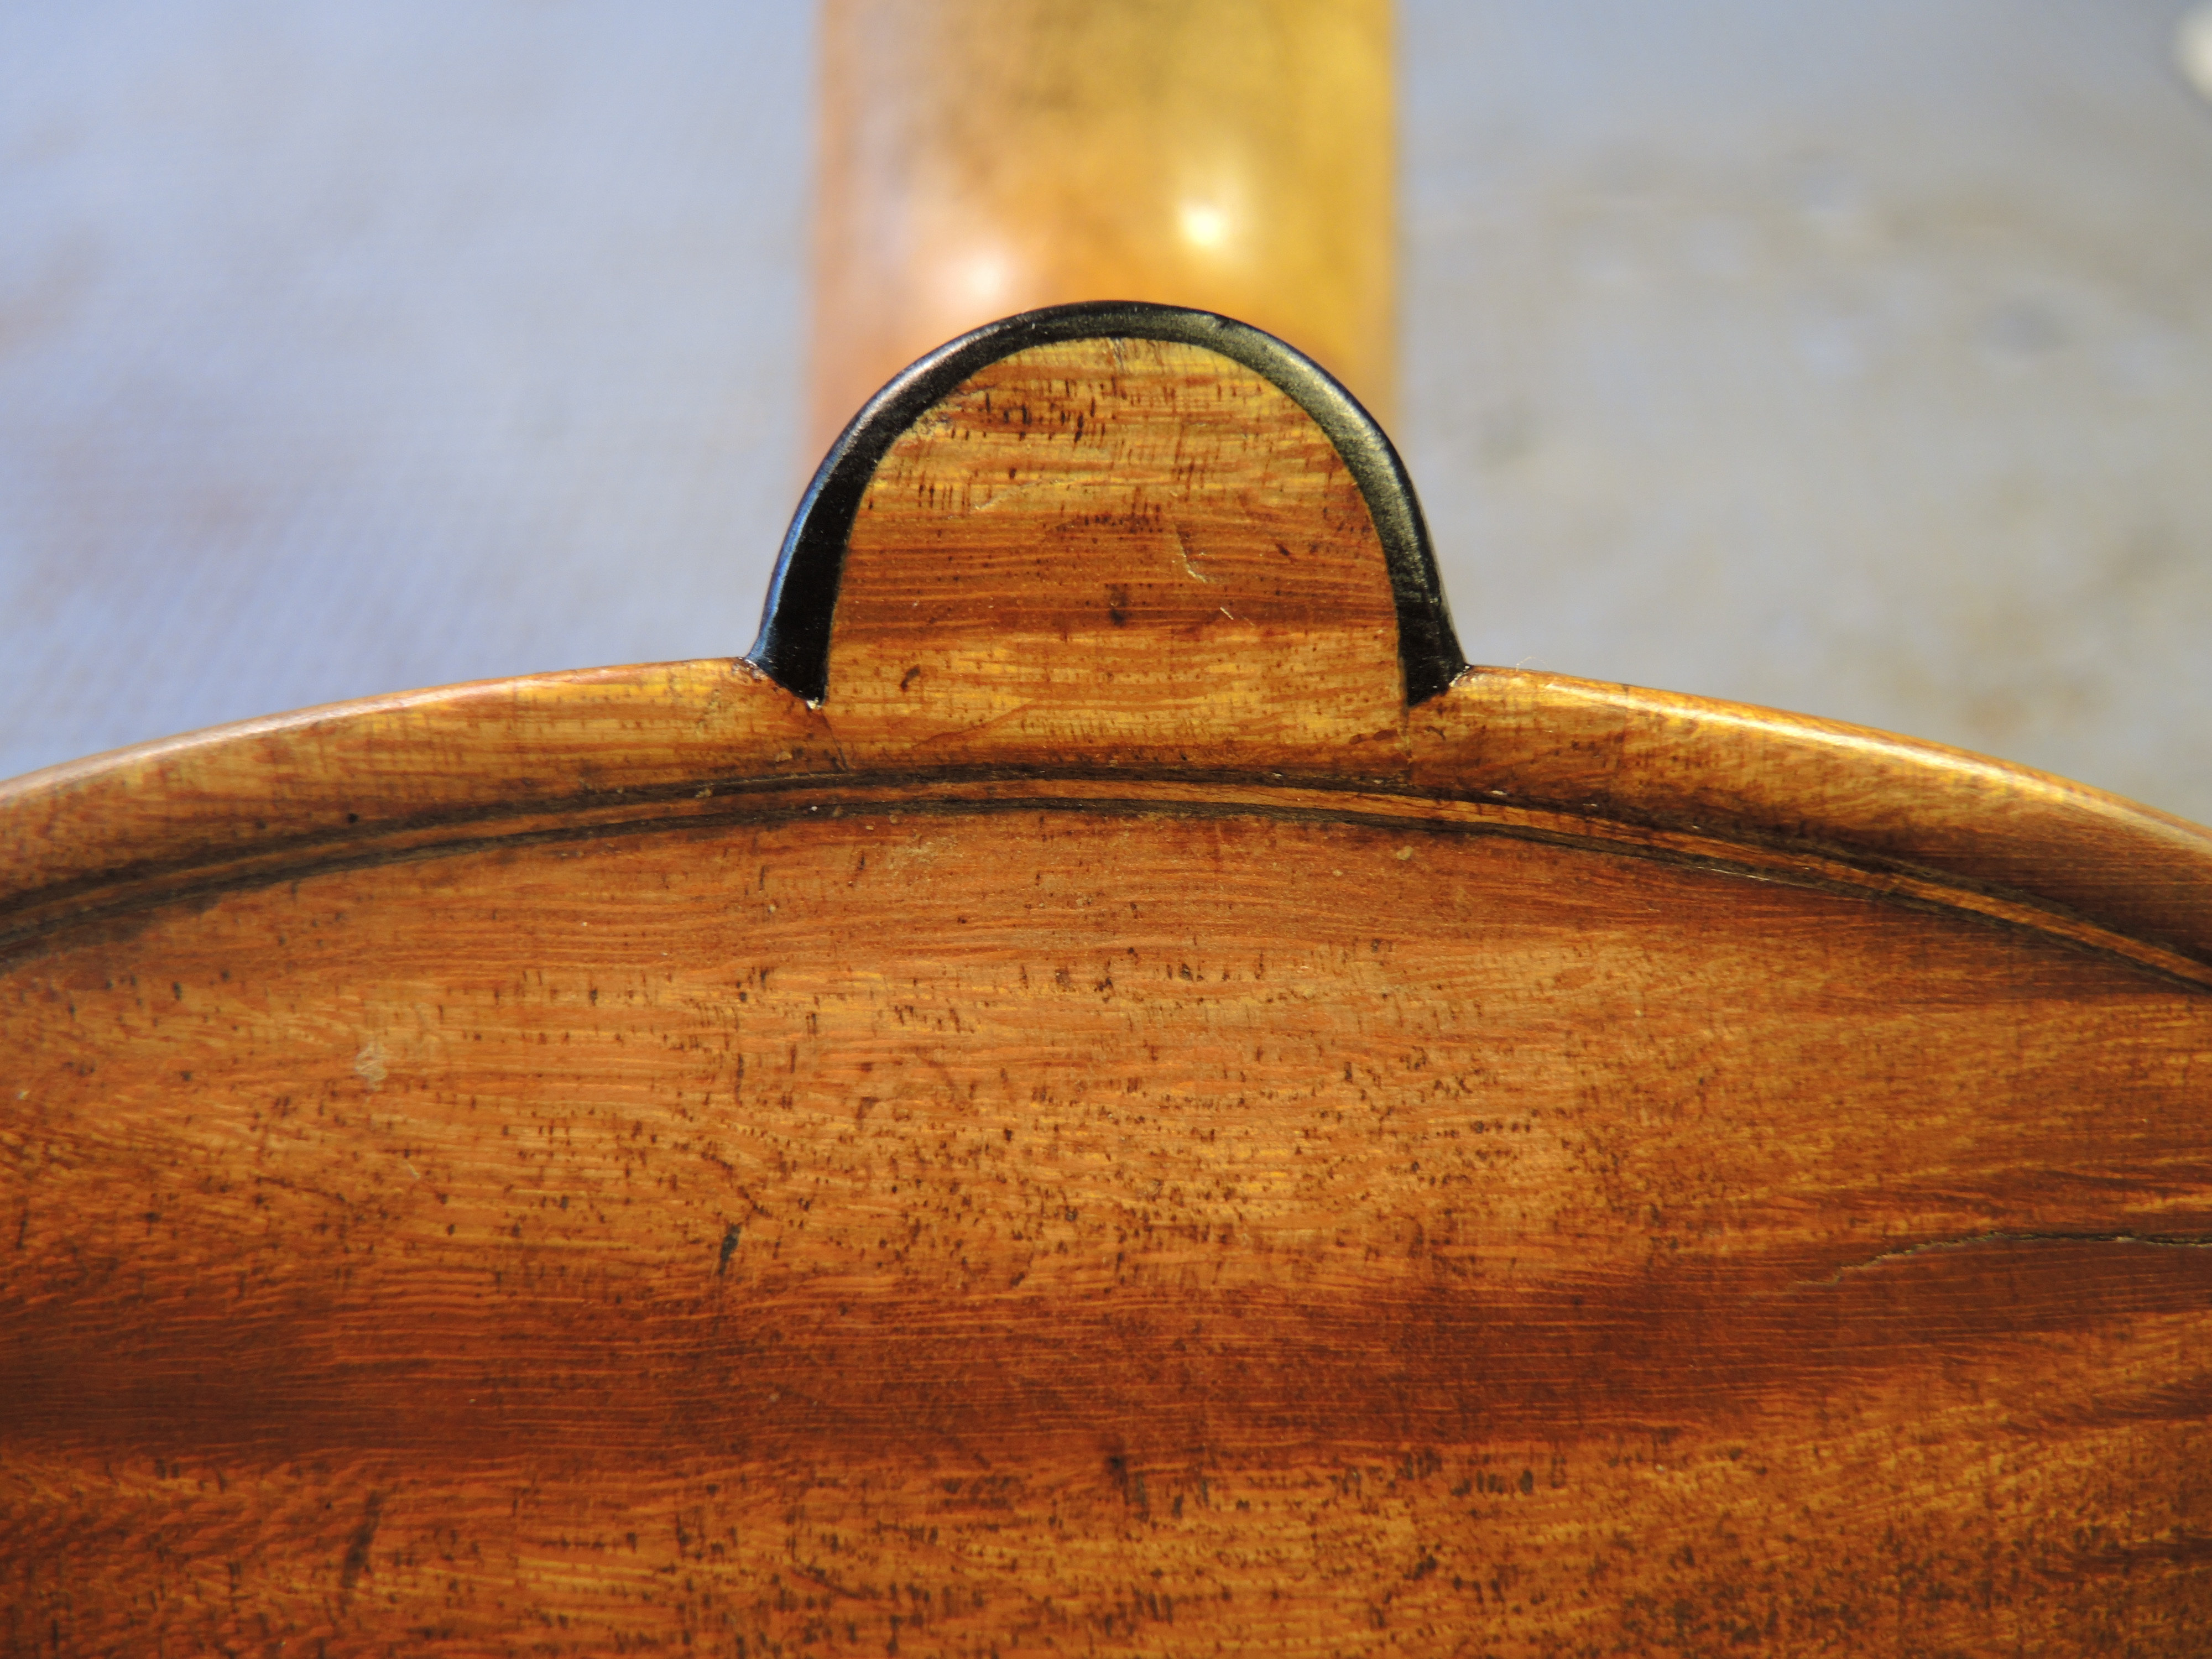
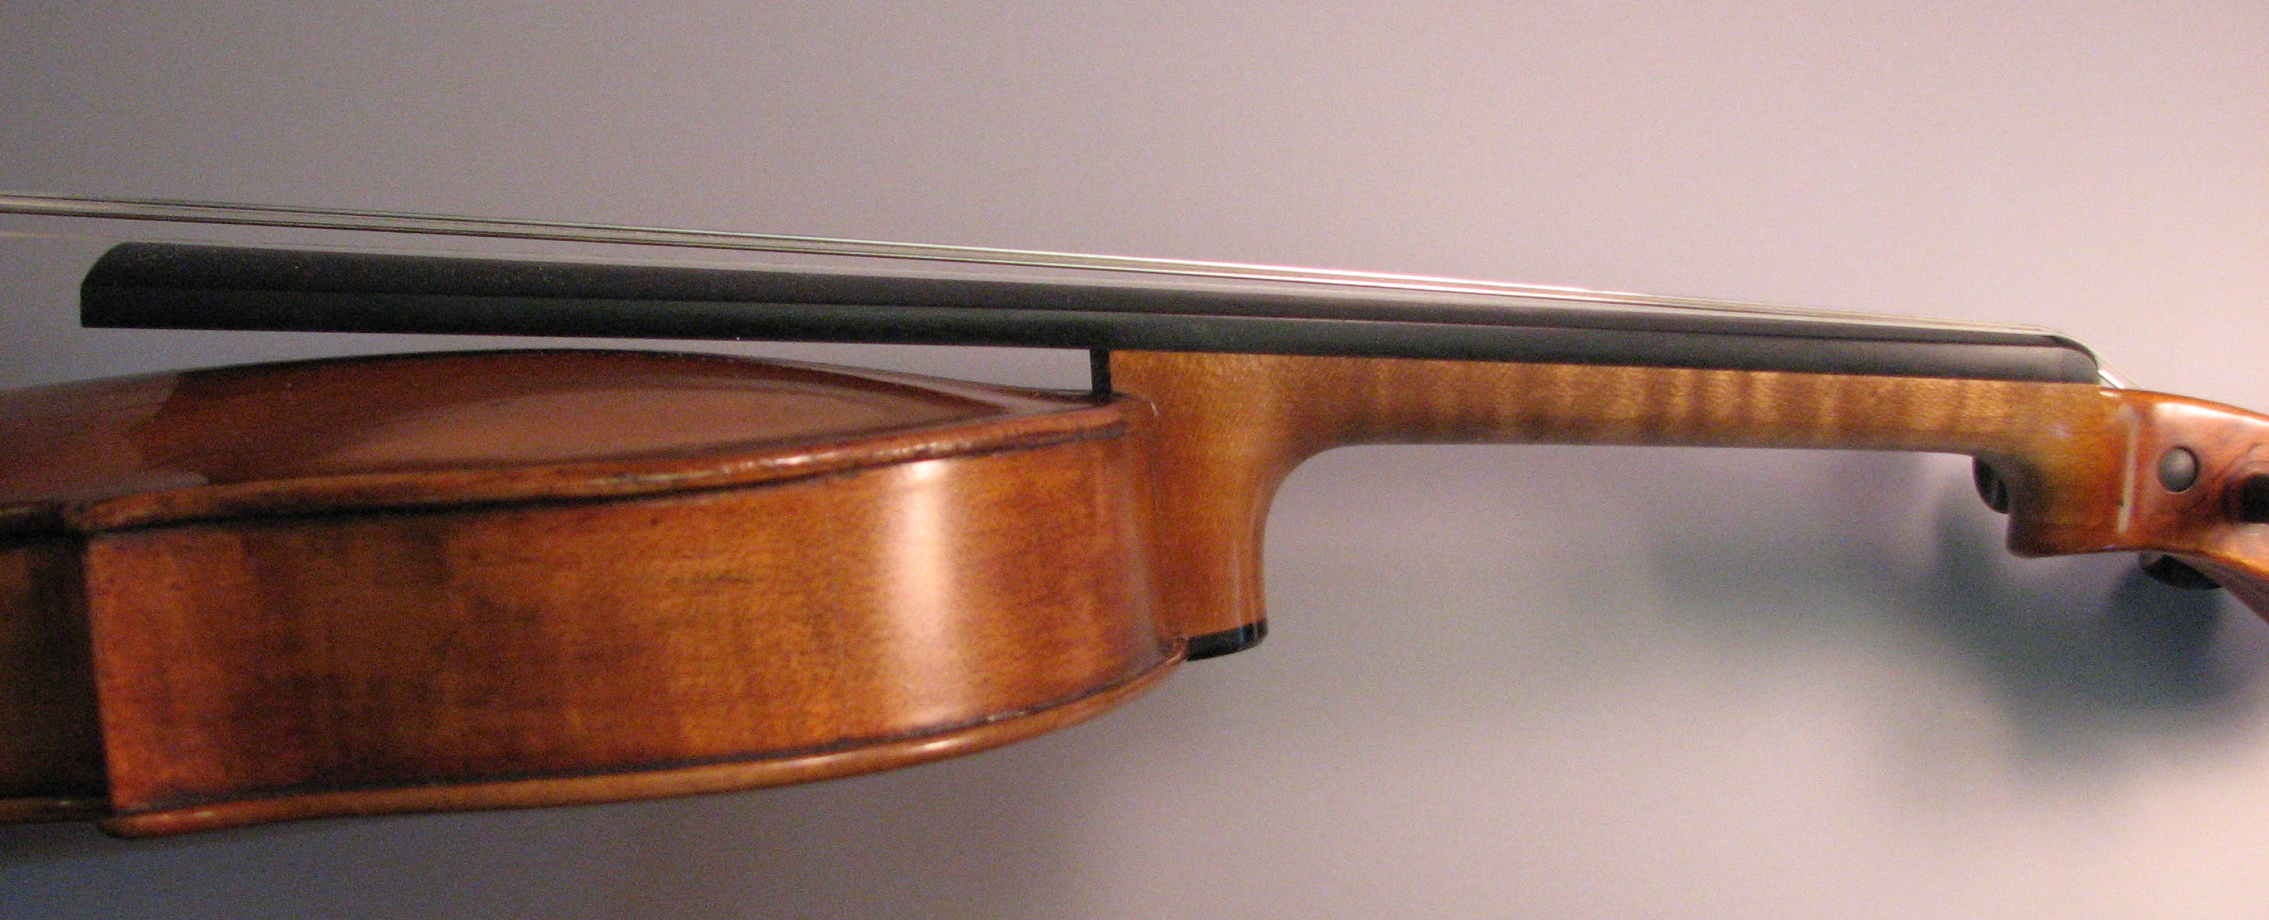
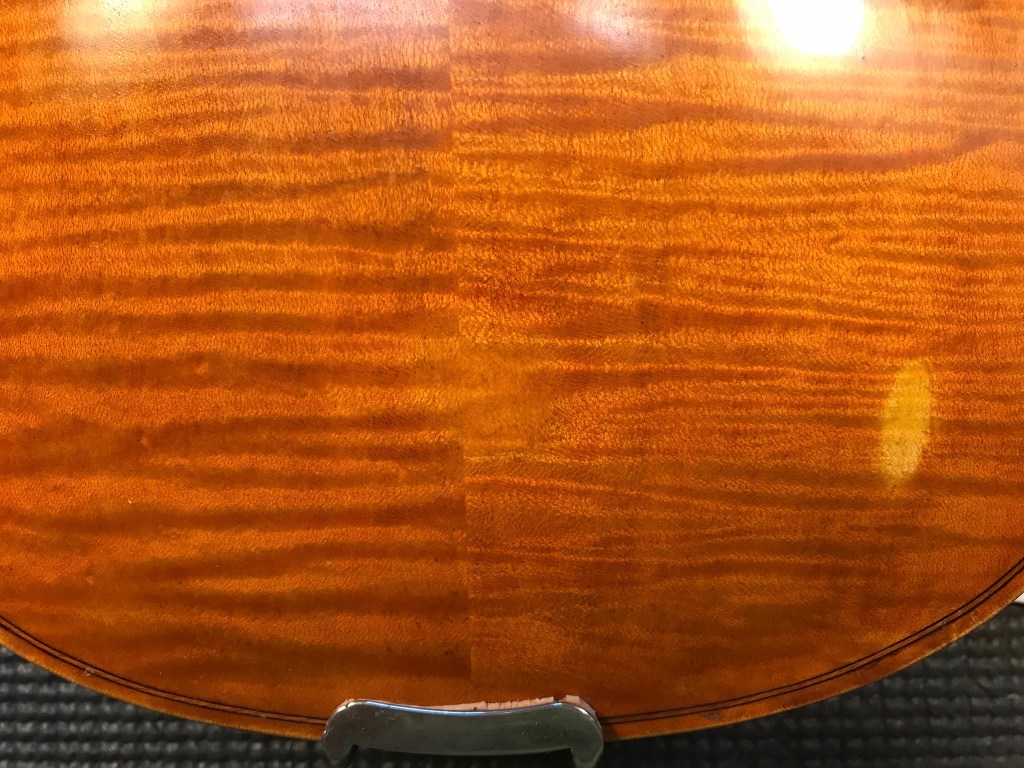
Recently I accepted a challenge. Here’s a violin made by Cesare Castelli in Ascoli Piceno, 1964. It had been well maintained, clearly taken care of and showing only light wear in all the places one might expect, except for this nastiness on the lower back:
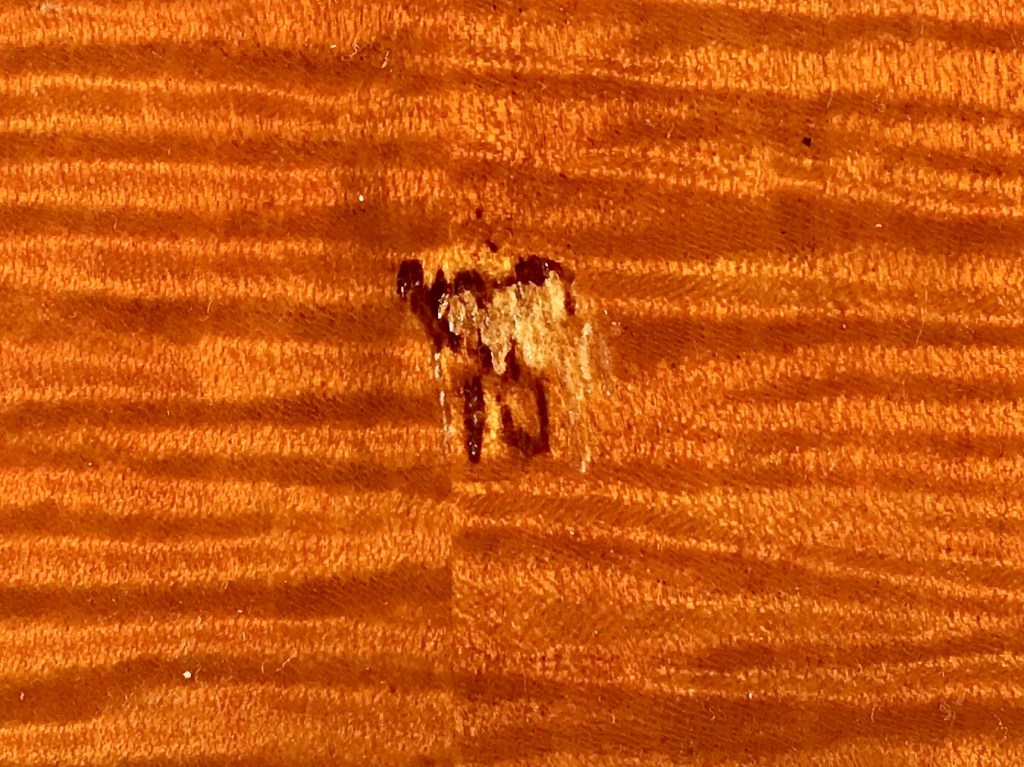
Ouch, that’s an eyesore! This is a retouch job that would be hard to pull off for reasons I will explain. So I went for it.
Many years ago, my teacher wisely implored his students not to take on a retouch problem if we were not confident that we could seriously improve what was already there. Good advice I think. Being a teacher now myself, I try to expand on this idea by emphasizing the importance of analyzing a problem first, in order to recognize the challenges and make a realistic assessment of the likelihood of success. No one’s talking about perfection here. Perfection does not exist. And if you think it does, it will freeze you in your tracks. We try to get as close as possible though.
Several things make this square inch of tortured violin real estate problematic in terms of varnish restoration.
First, the overall look of the violin is uniform. The varnish is not shaded or antiqued in any way, either by time or design. The color is light, favoring yellow and orange, and very transparent. There are no other evident repairs to this instrument. In all, there is very little to visually distract from the injury on the back. This means there will also be very little to distract from the newly improved retouching.
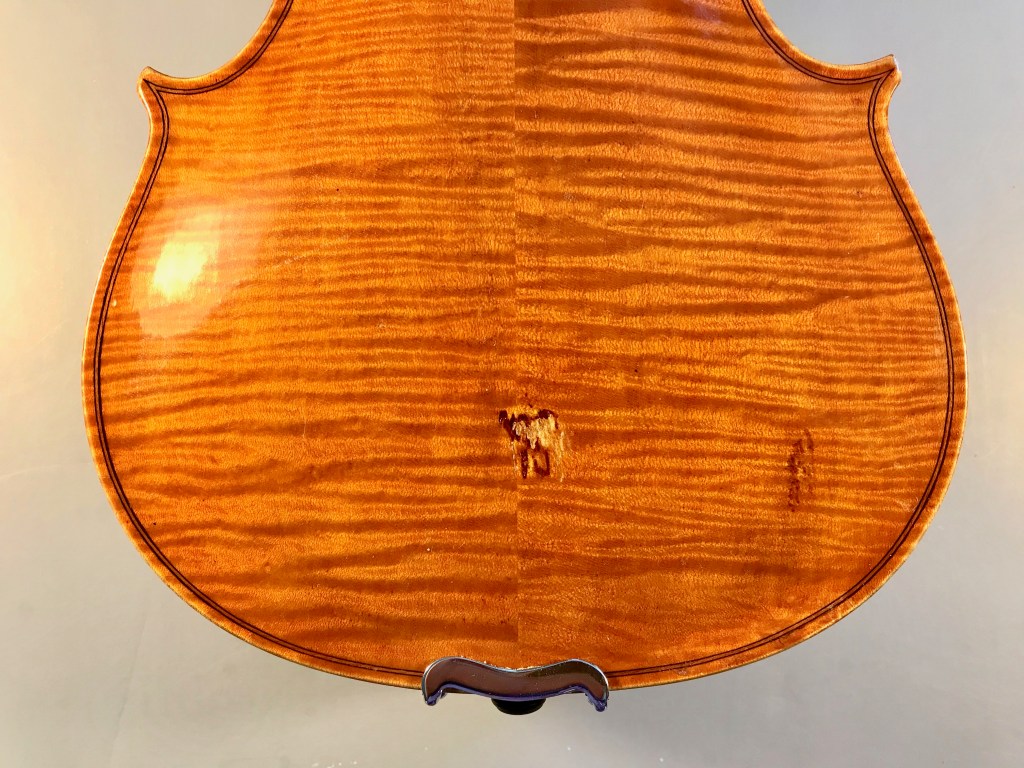
When scoping out a potential retouch job, I will always look for visual characteristics that I can use to subtly hide or deemphasize the repaired area. An easier retouching project might be darker in color, with prominent grain lines, lots of patina and plenty of visual features like flecks, rays and blemishes. This violin doesn’t leave me much to work with.
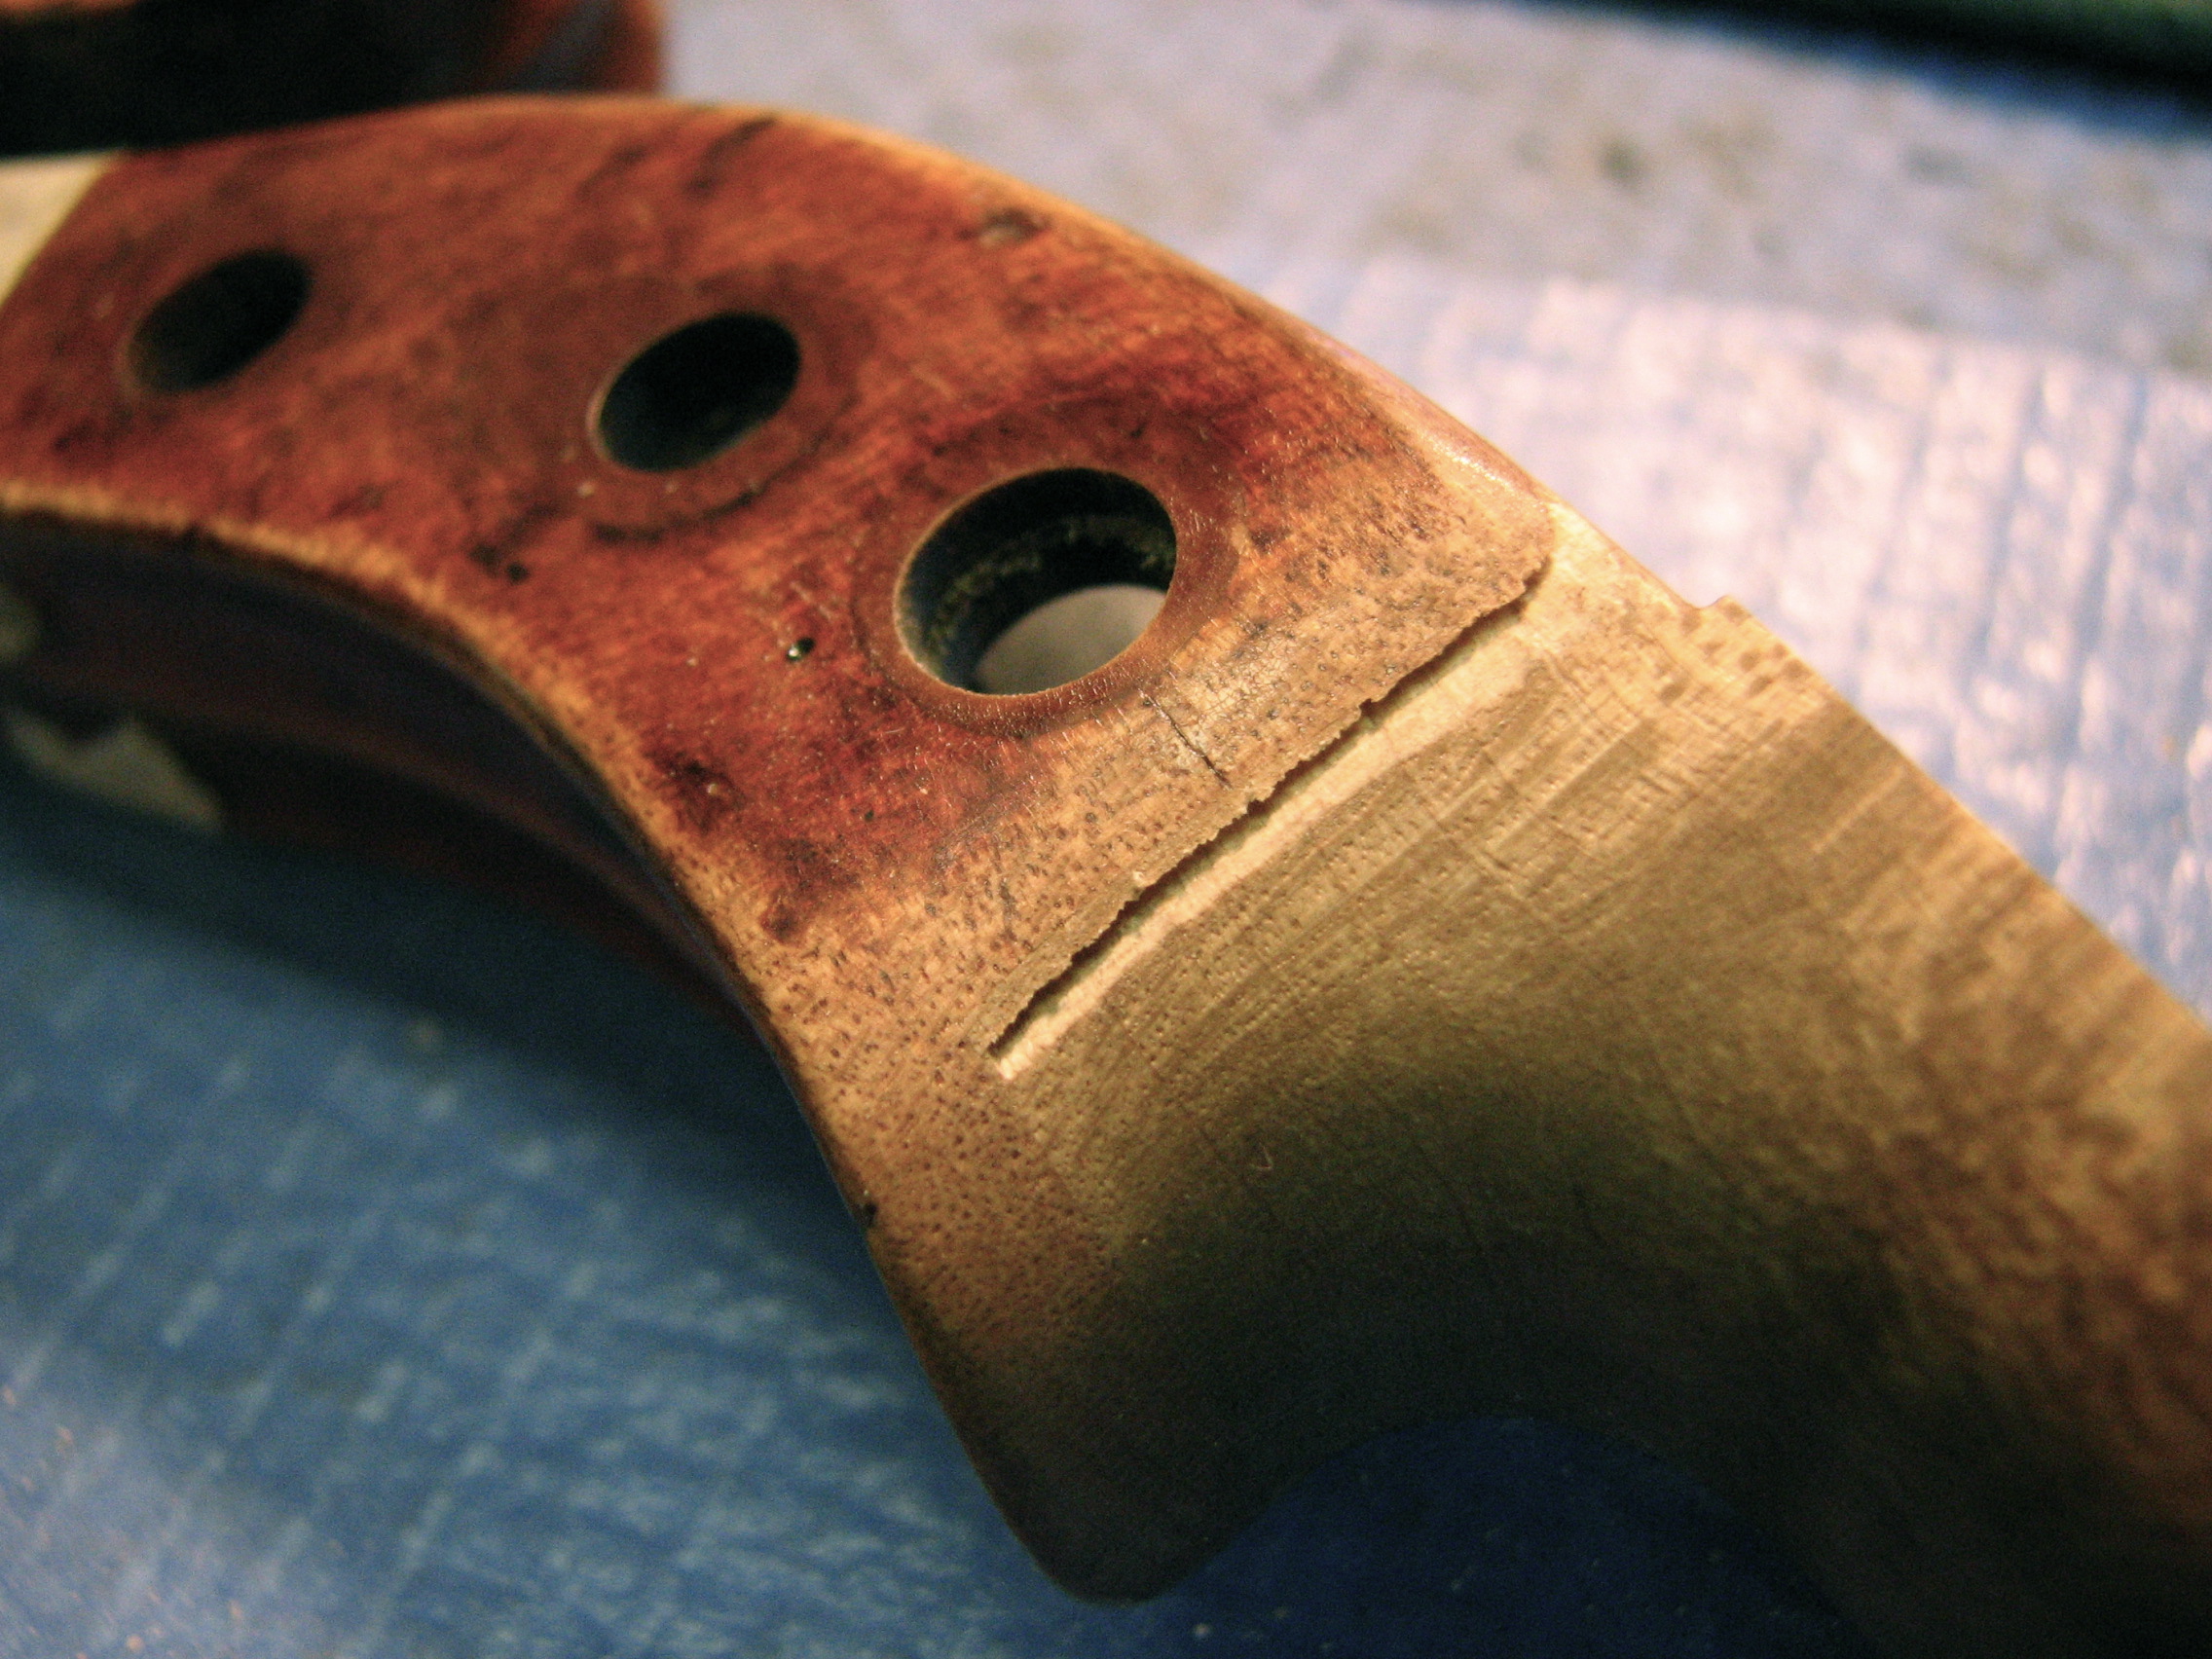
Additionally, and unfortunately, the damage is deep and ragged. Someone has attempted to what, fix it? maybe with a burn in shellac stick? Whatever. All that garbage has to come out first before any new materials are applied. I am at least thankful that the original varnish surface isn’t terribly textured and the level of gloss shouldn’t be too hard to replicate.

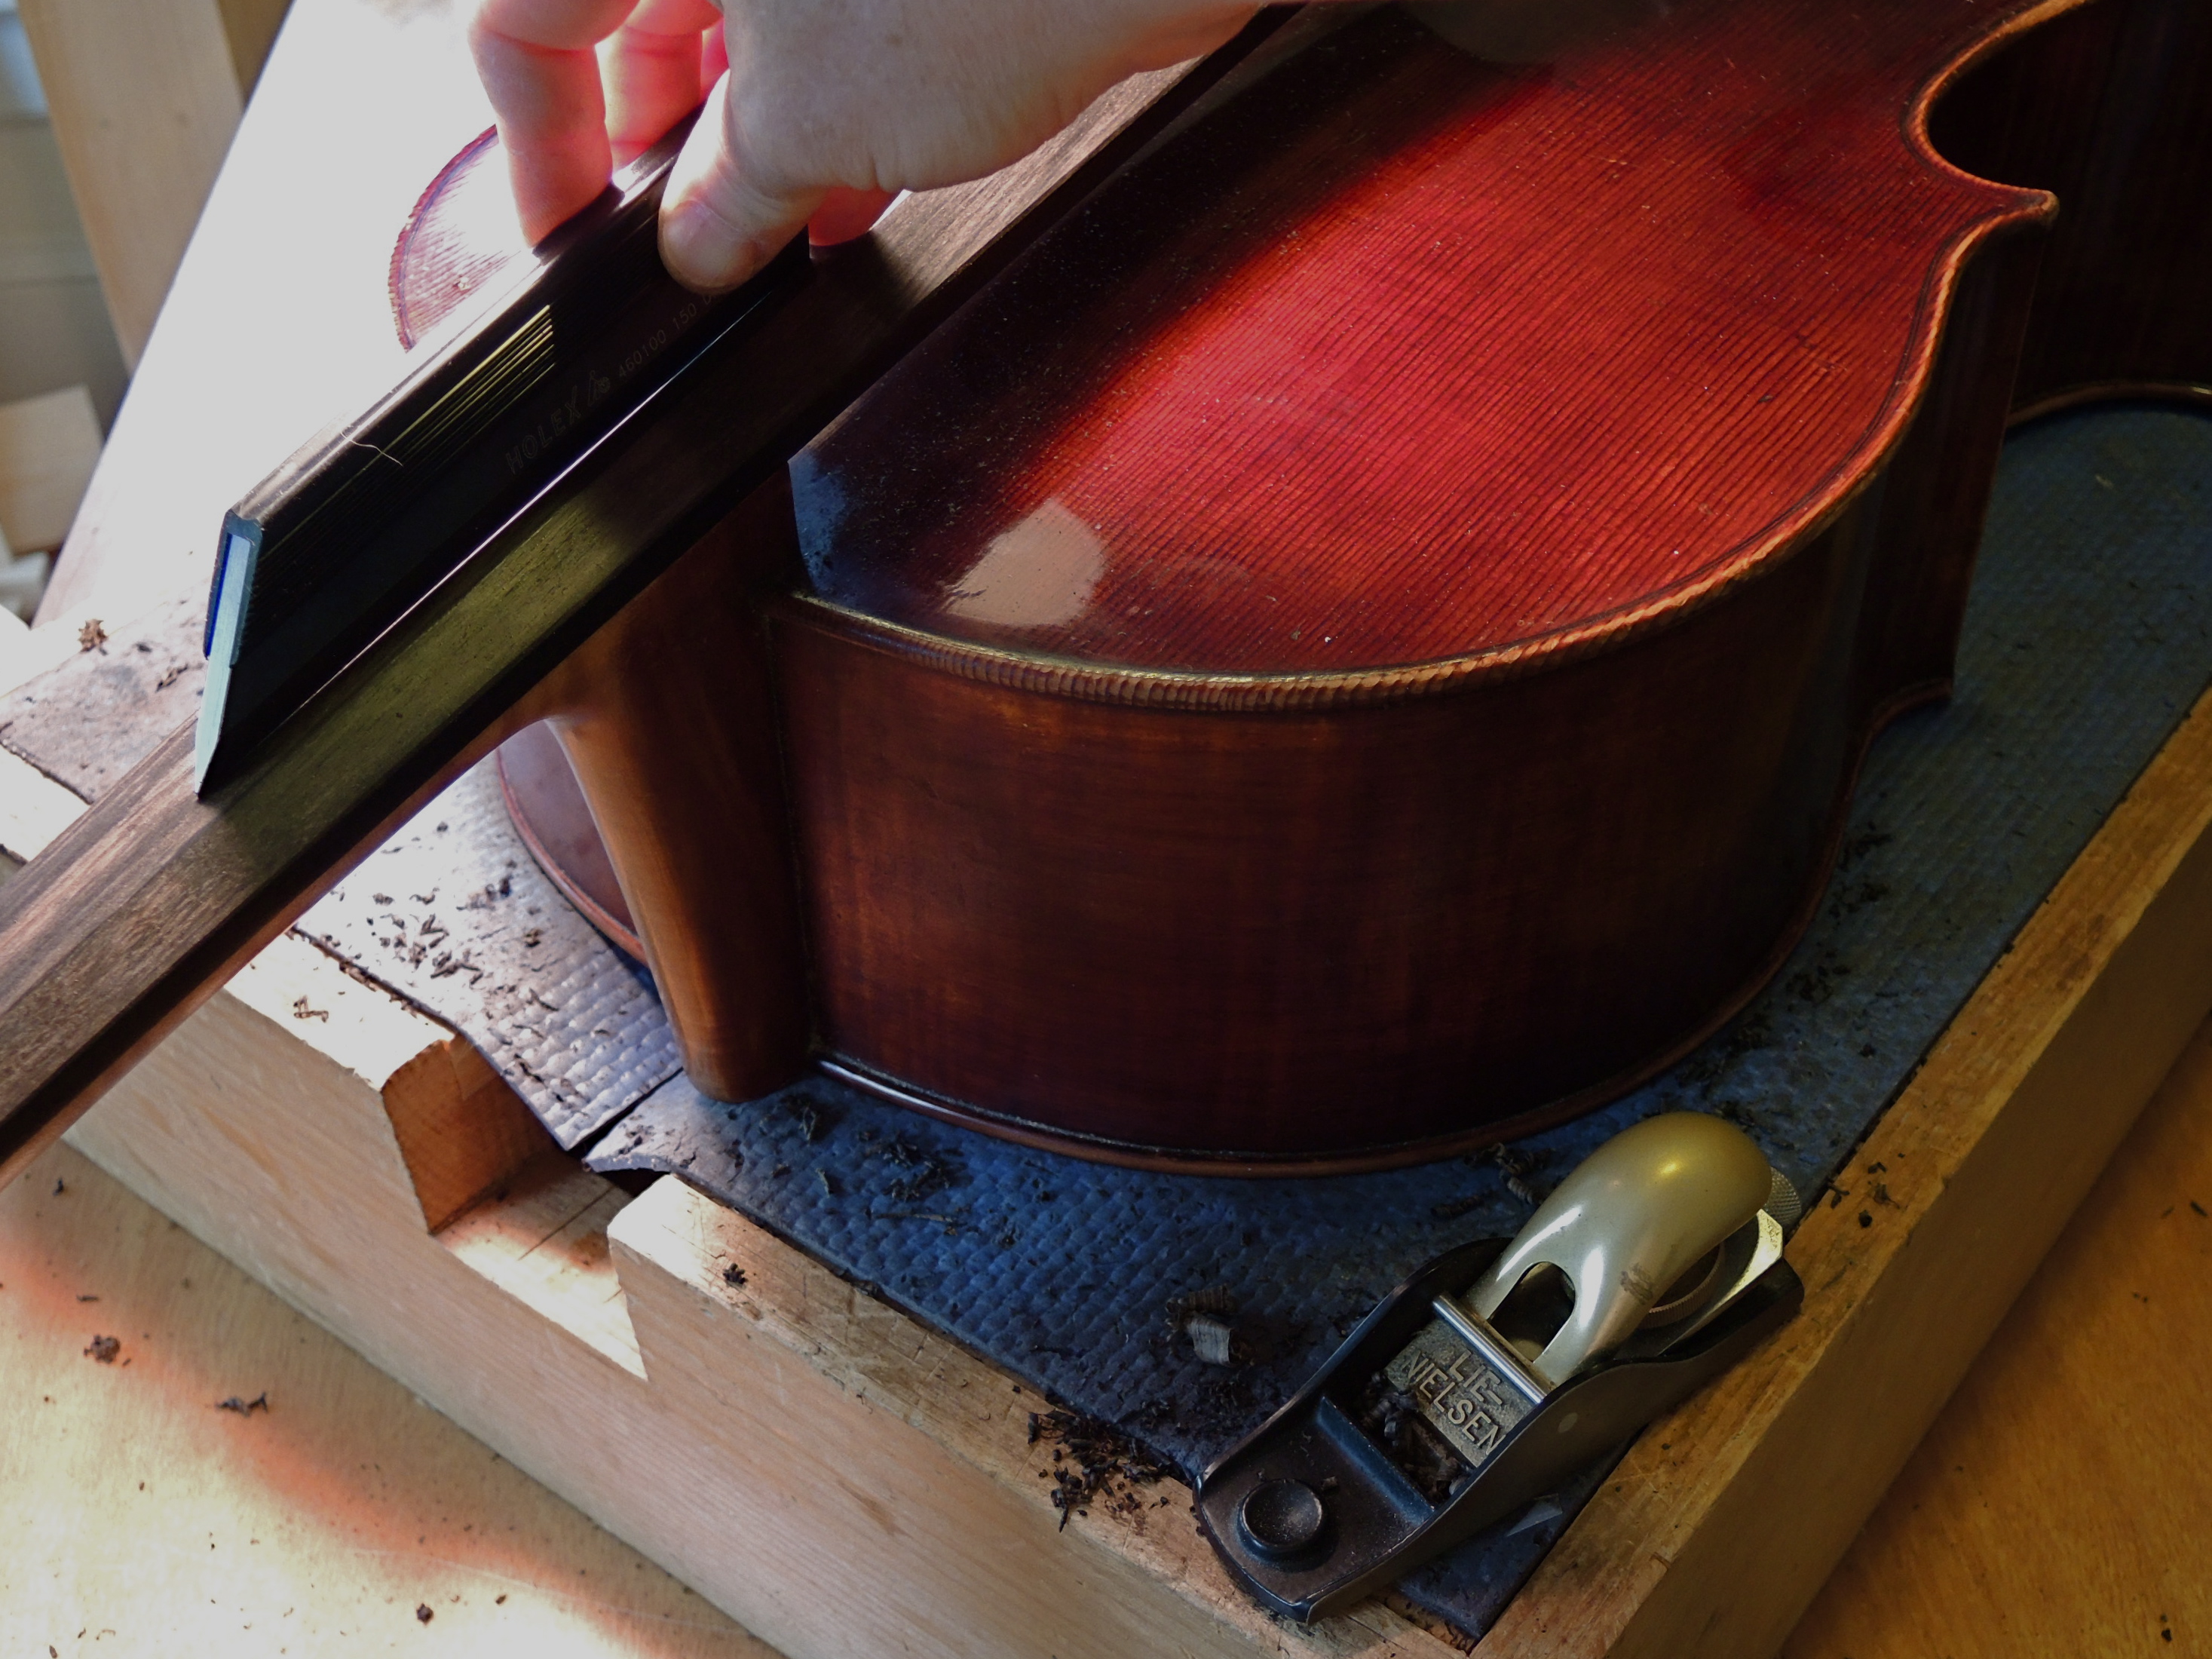
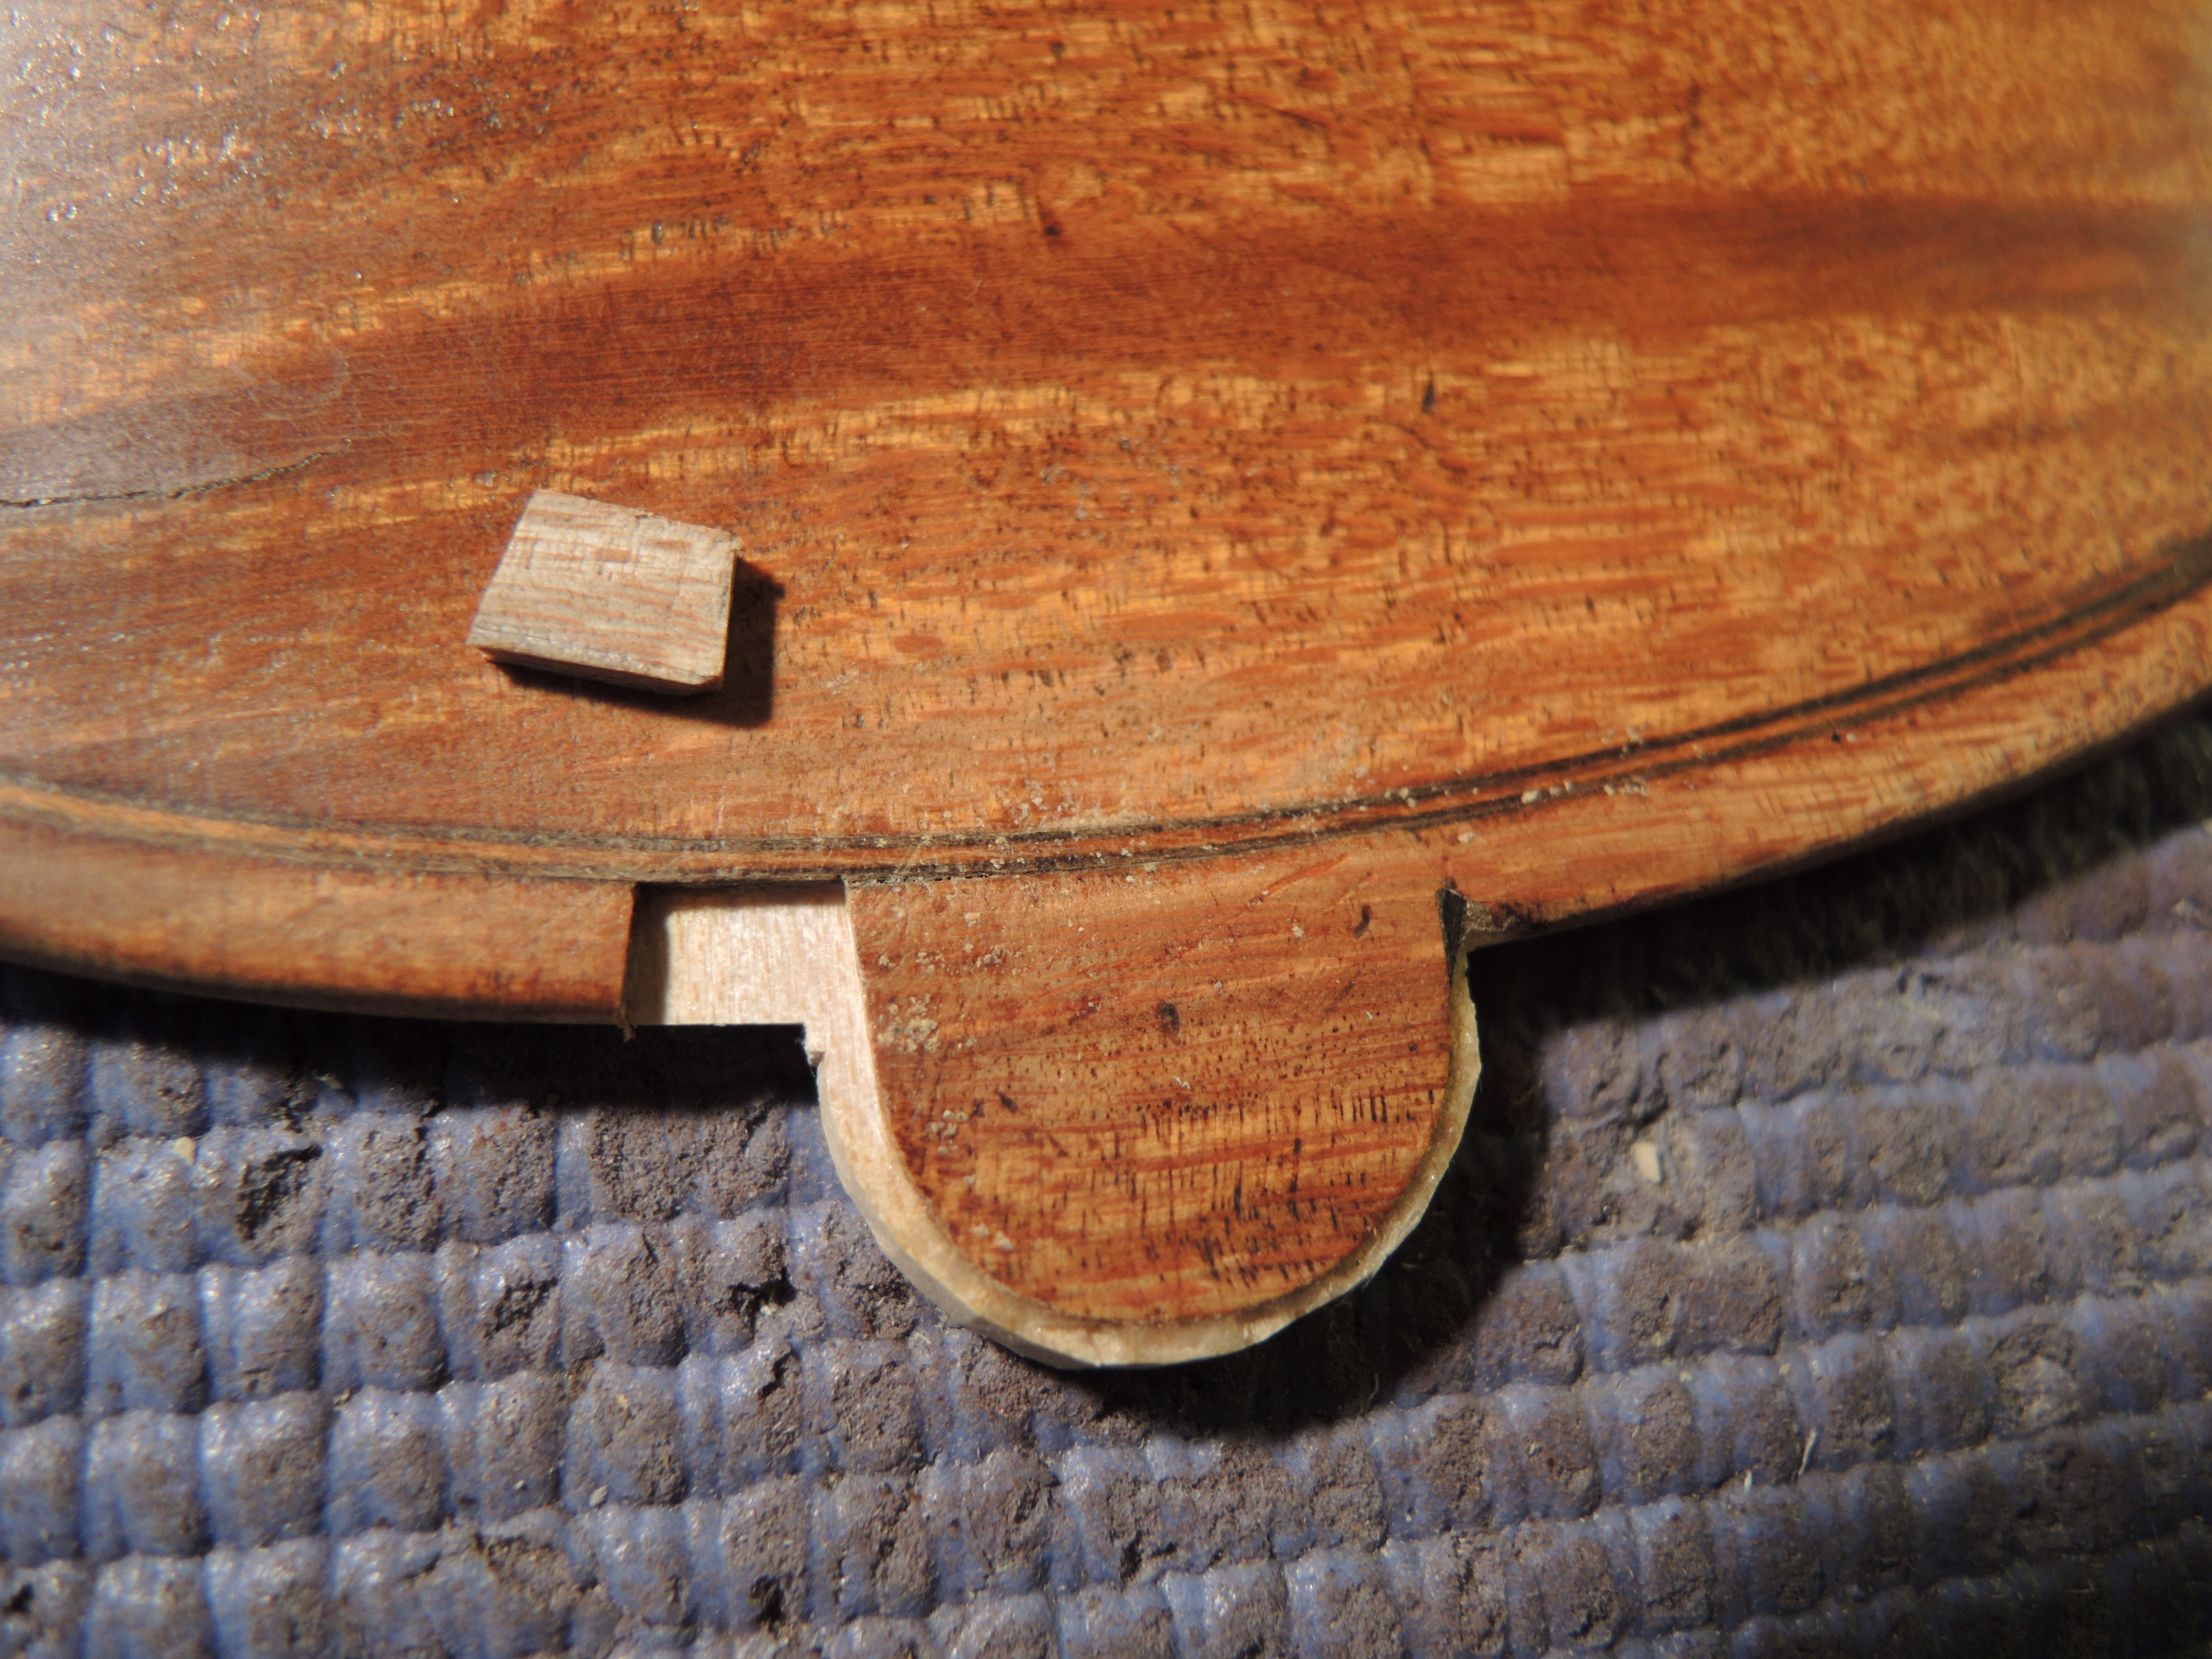
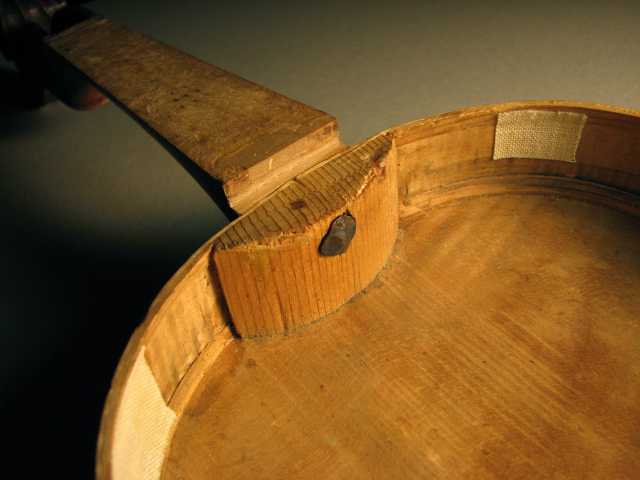
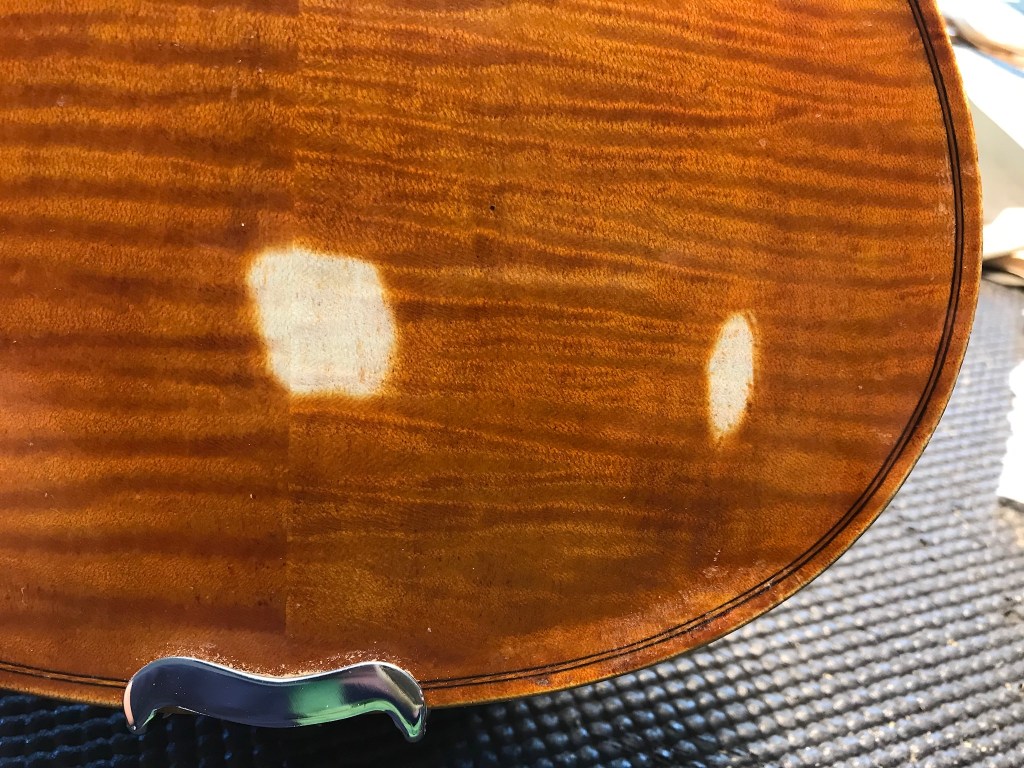
I always start with cleaning the instrument as a way to get to know what I am looking at as a whole. Most importantly and specific to the area I’m retouching, I don’t want to embed any dirt or grime as I apply new materials. Removing the old “retouching” was done mechanically. I found that I could pick out the old dark bits with a dental pick, knife tip and even a short length of e string stuck in the end of a bit of soundpost material. Thankfully there was nothing really embedded in the wood. I supplemented with a soft brush and de-ionized water to keep the unwanted bits flushed away and to keep the wood fibers raised.
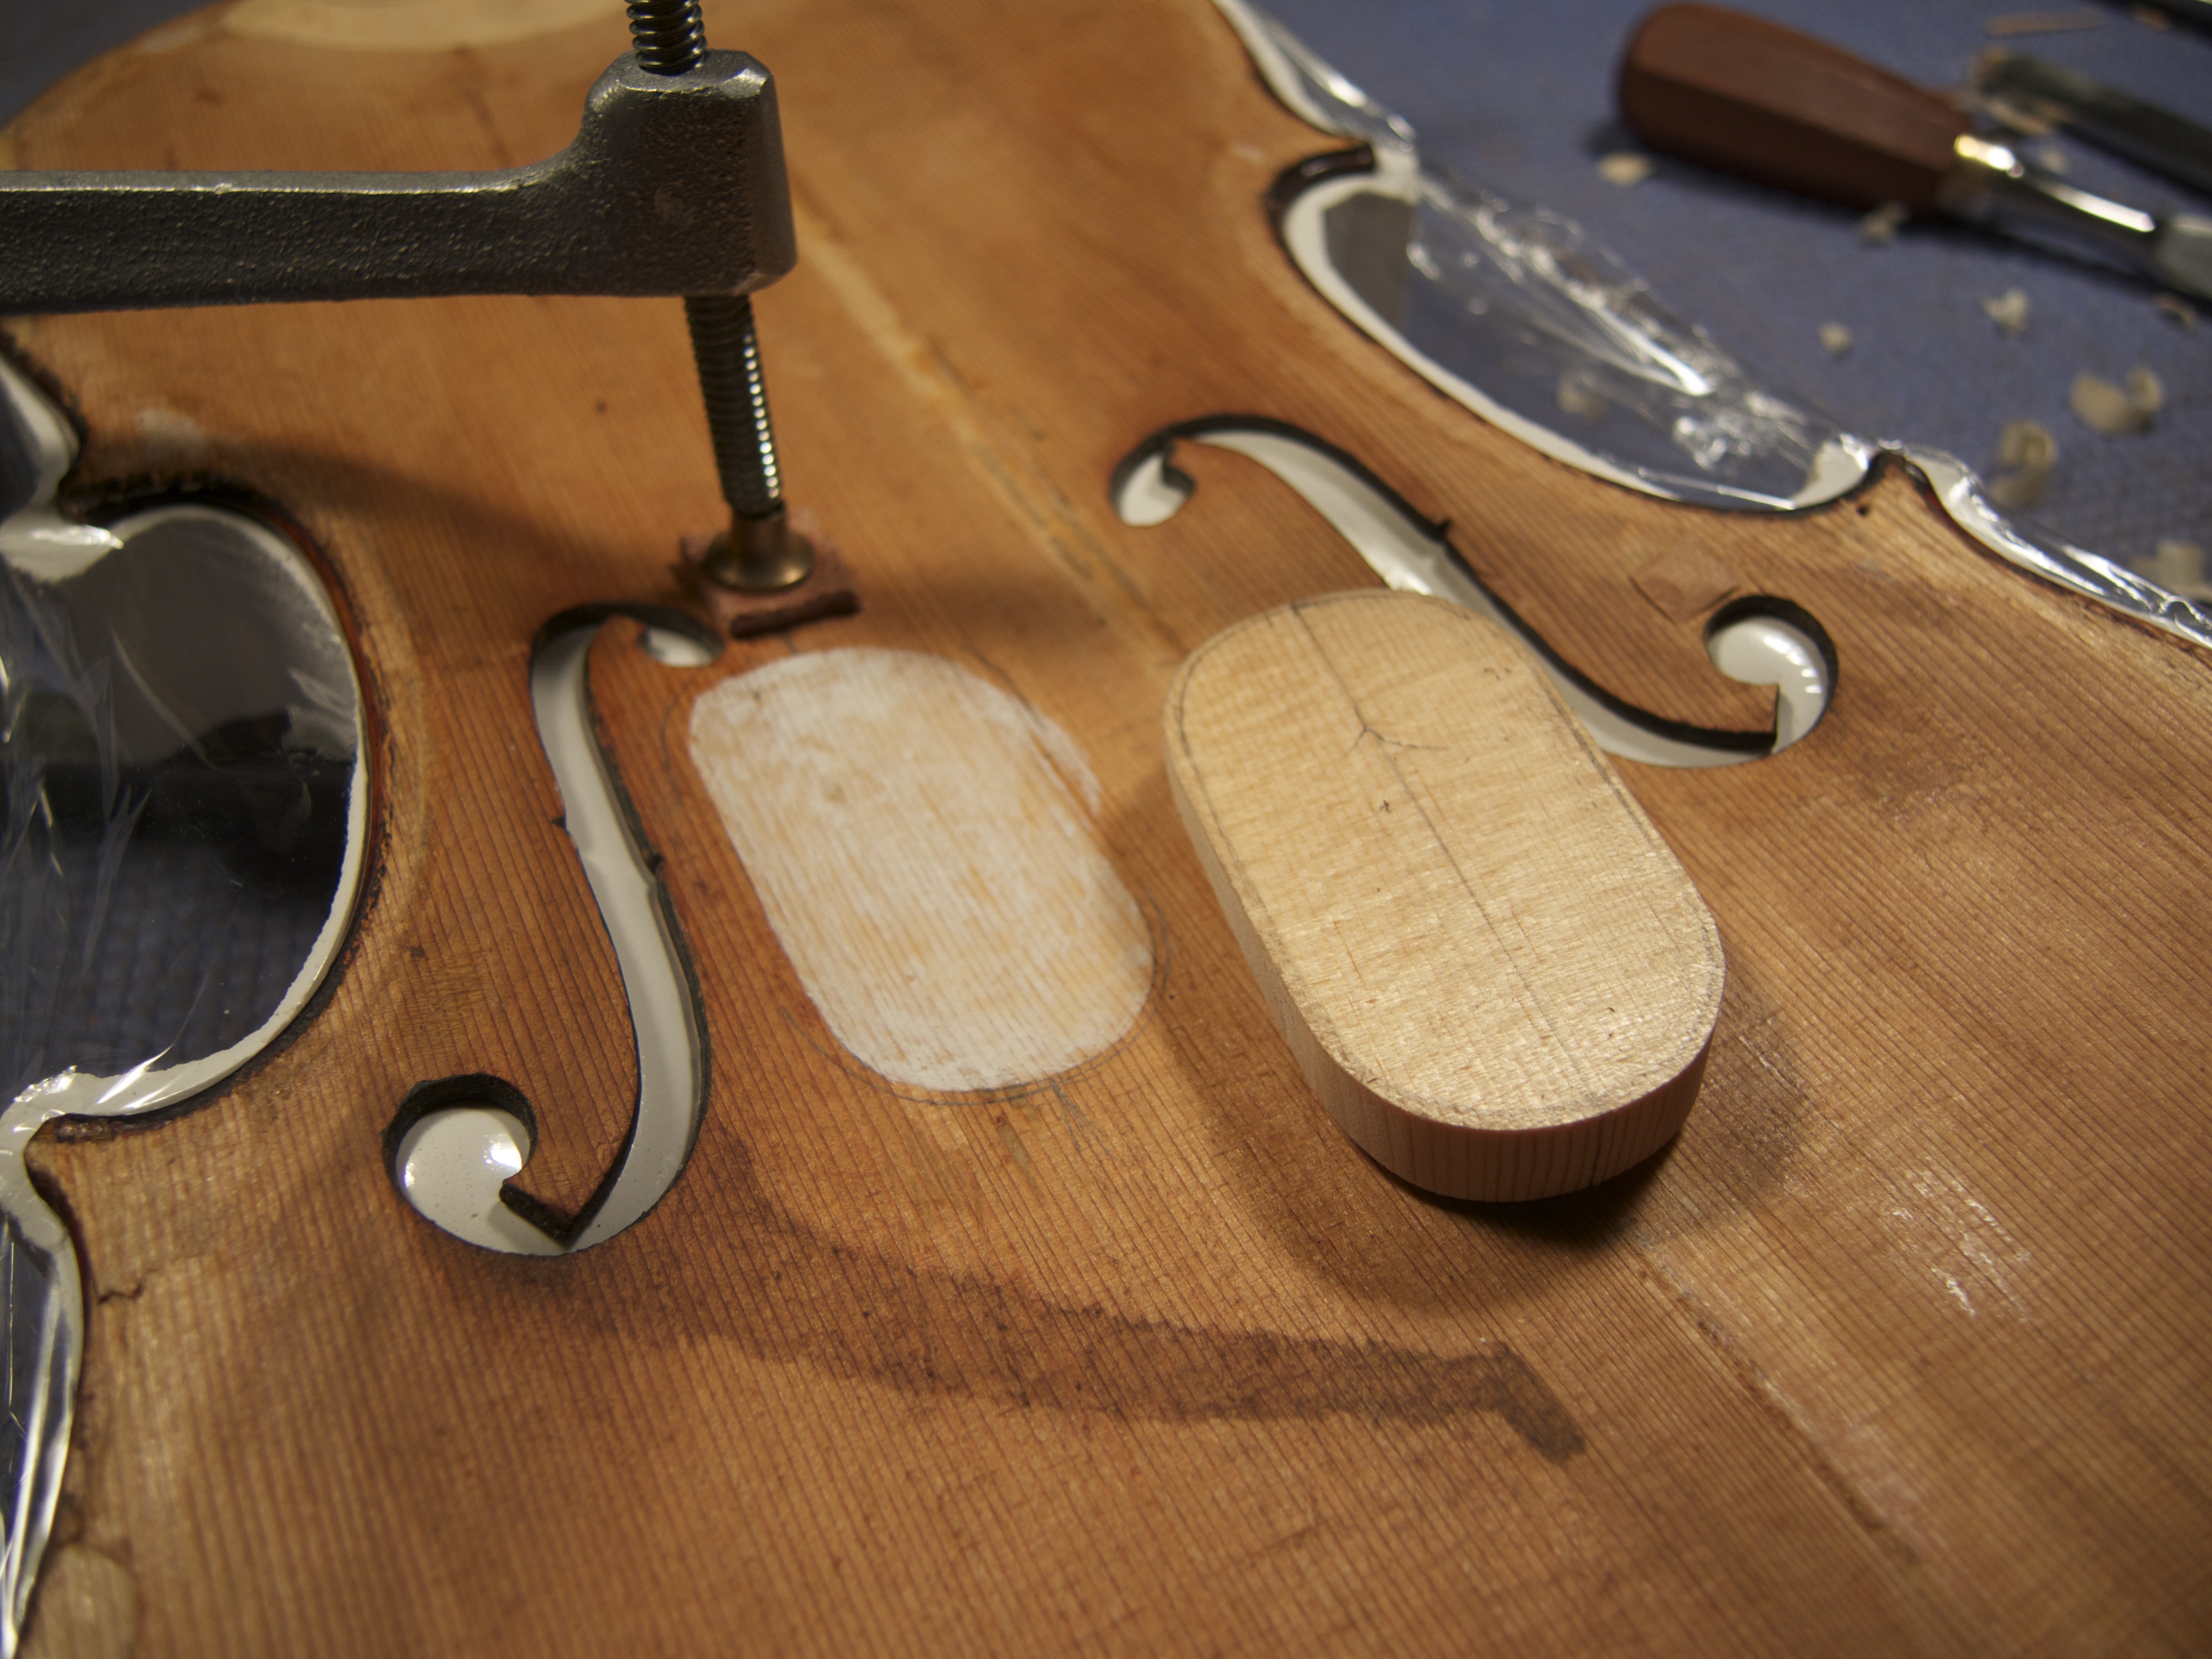
With the well- intentioned but visually reprehensible garbage removed, I knew I would be facing the next problem. The depth of the damage would require filling and the torn and ragged wood fibers would inevitably cast micro shadows that would make me very unhappy later on. Normally I would probably just drop in varnish filler and rely on color and opacity to cover the tracks, but because of the light and transparent varnish, I decided to judiciously remove some wood to smooth out the bottom of my retouching area and minimize or soften the micro shadows that might be cast there.
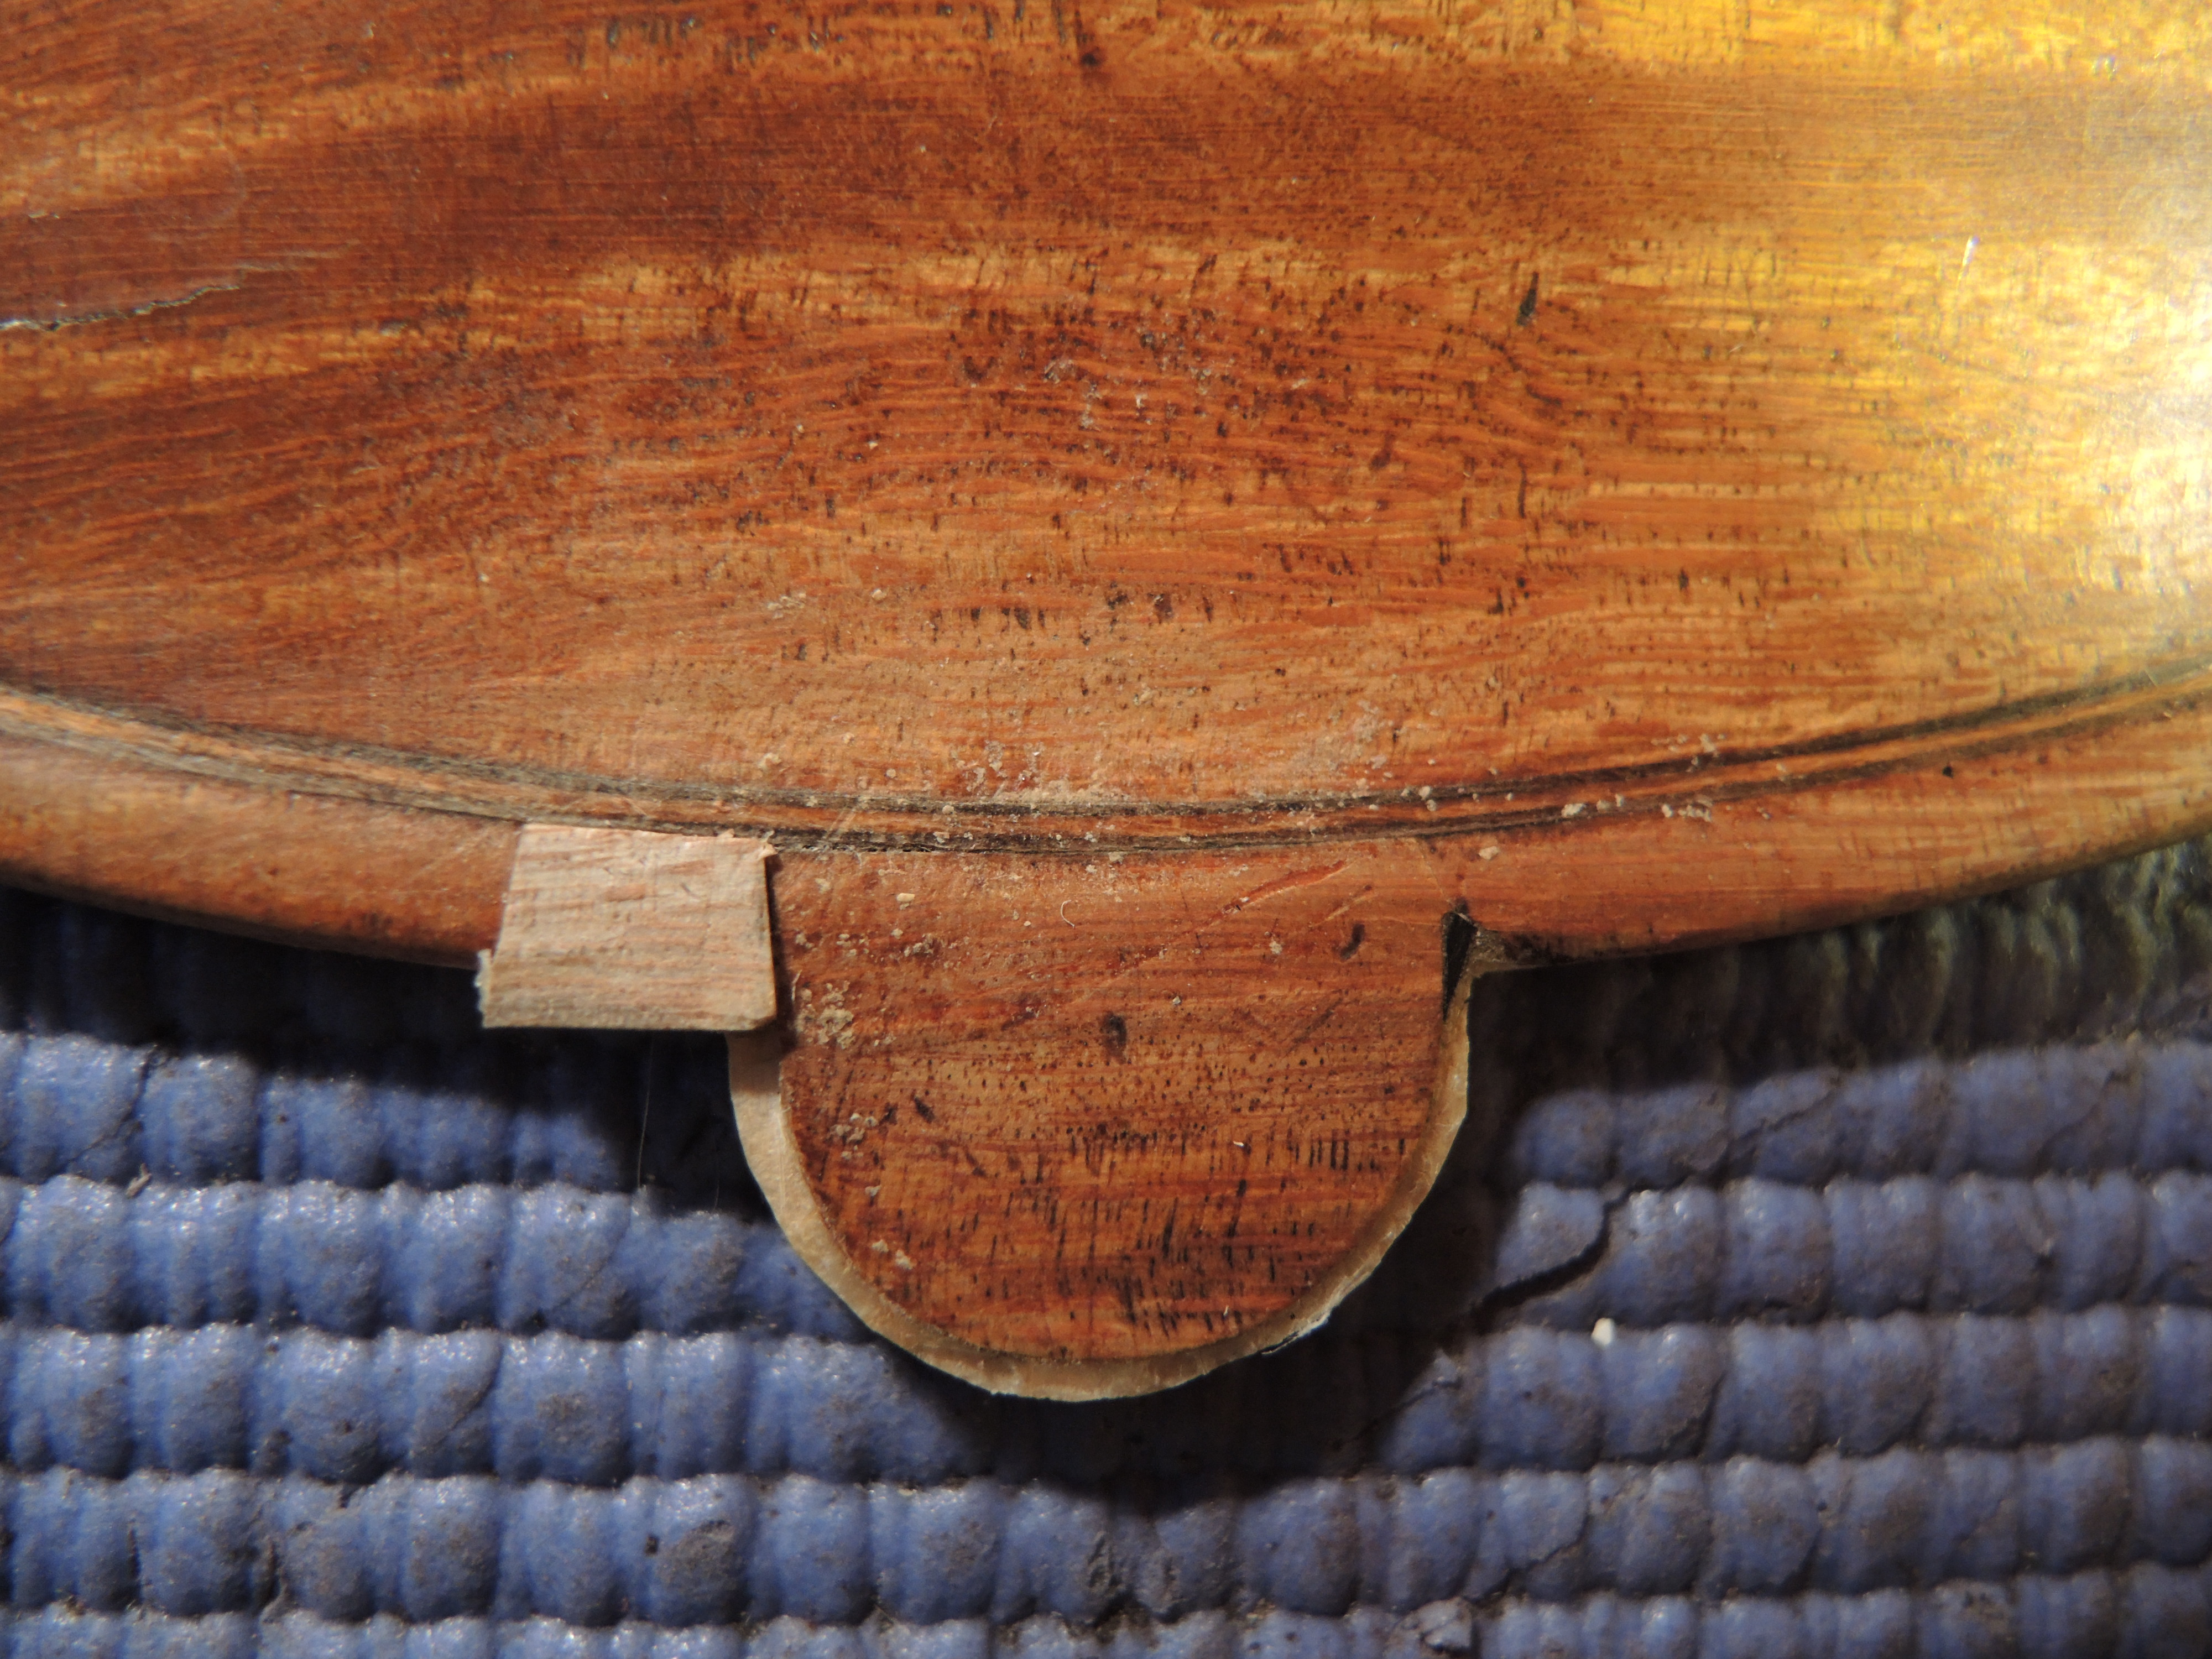
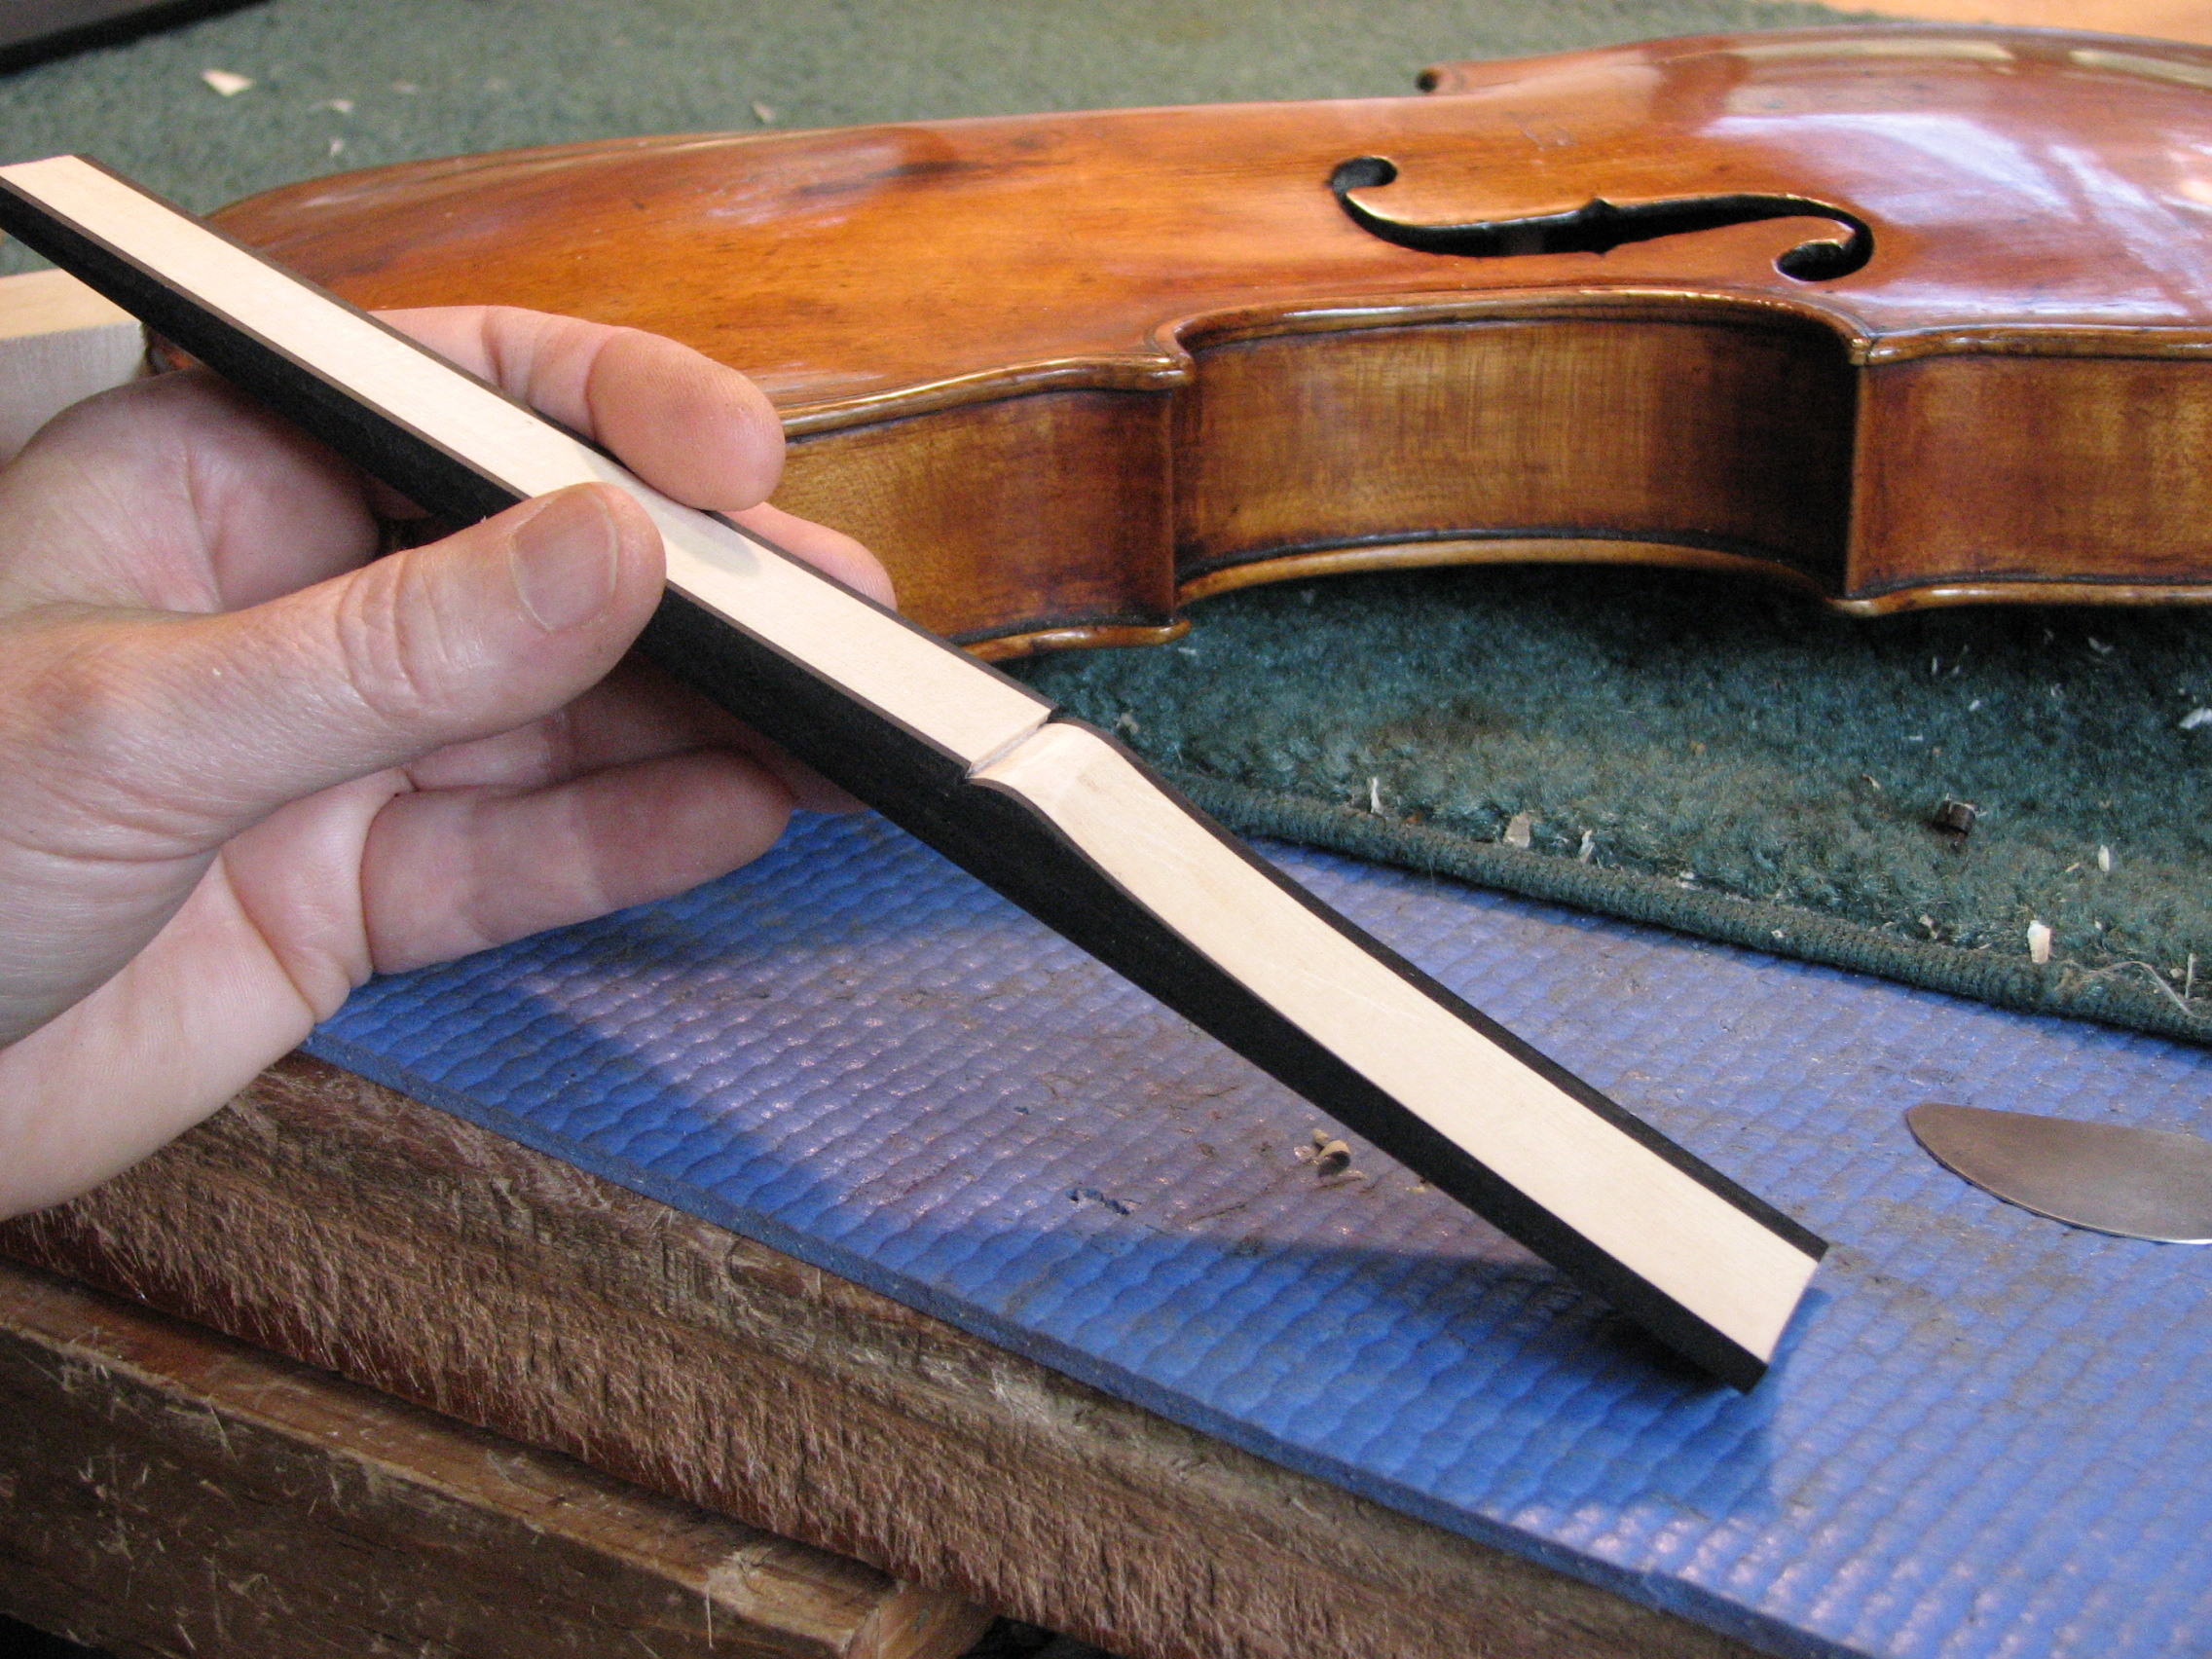
A light clear glue sizing followed. Then, when dry, a little burnishing and shellac sealer prepared the area for the varnish filler and color that I hoped would level the area while allowing the wood itself to reflect through.
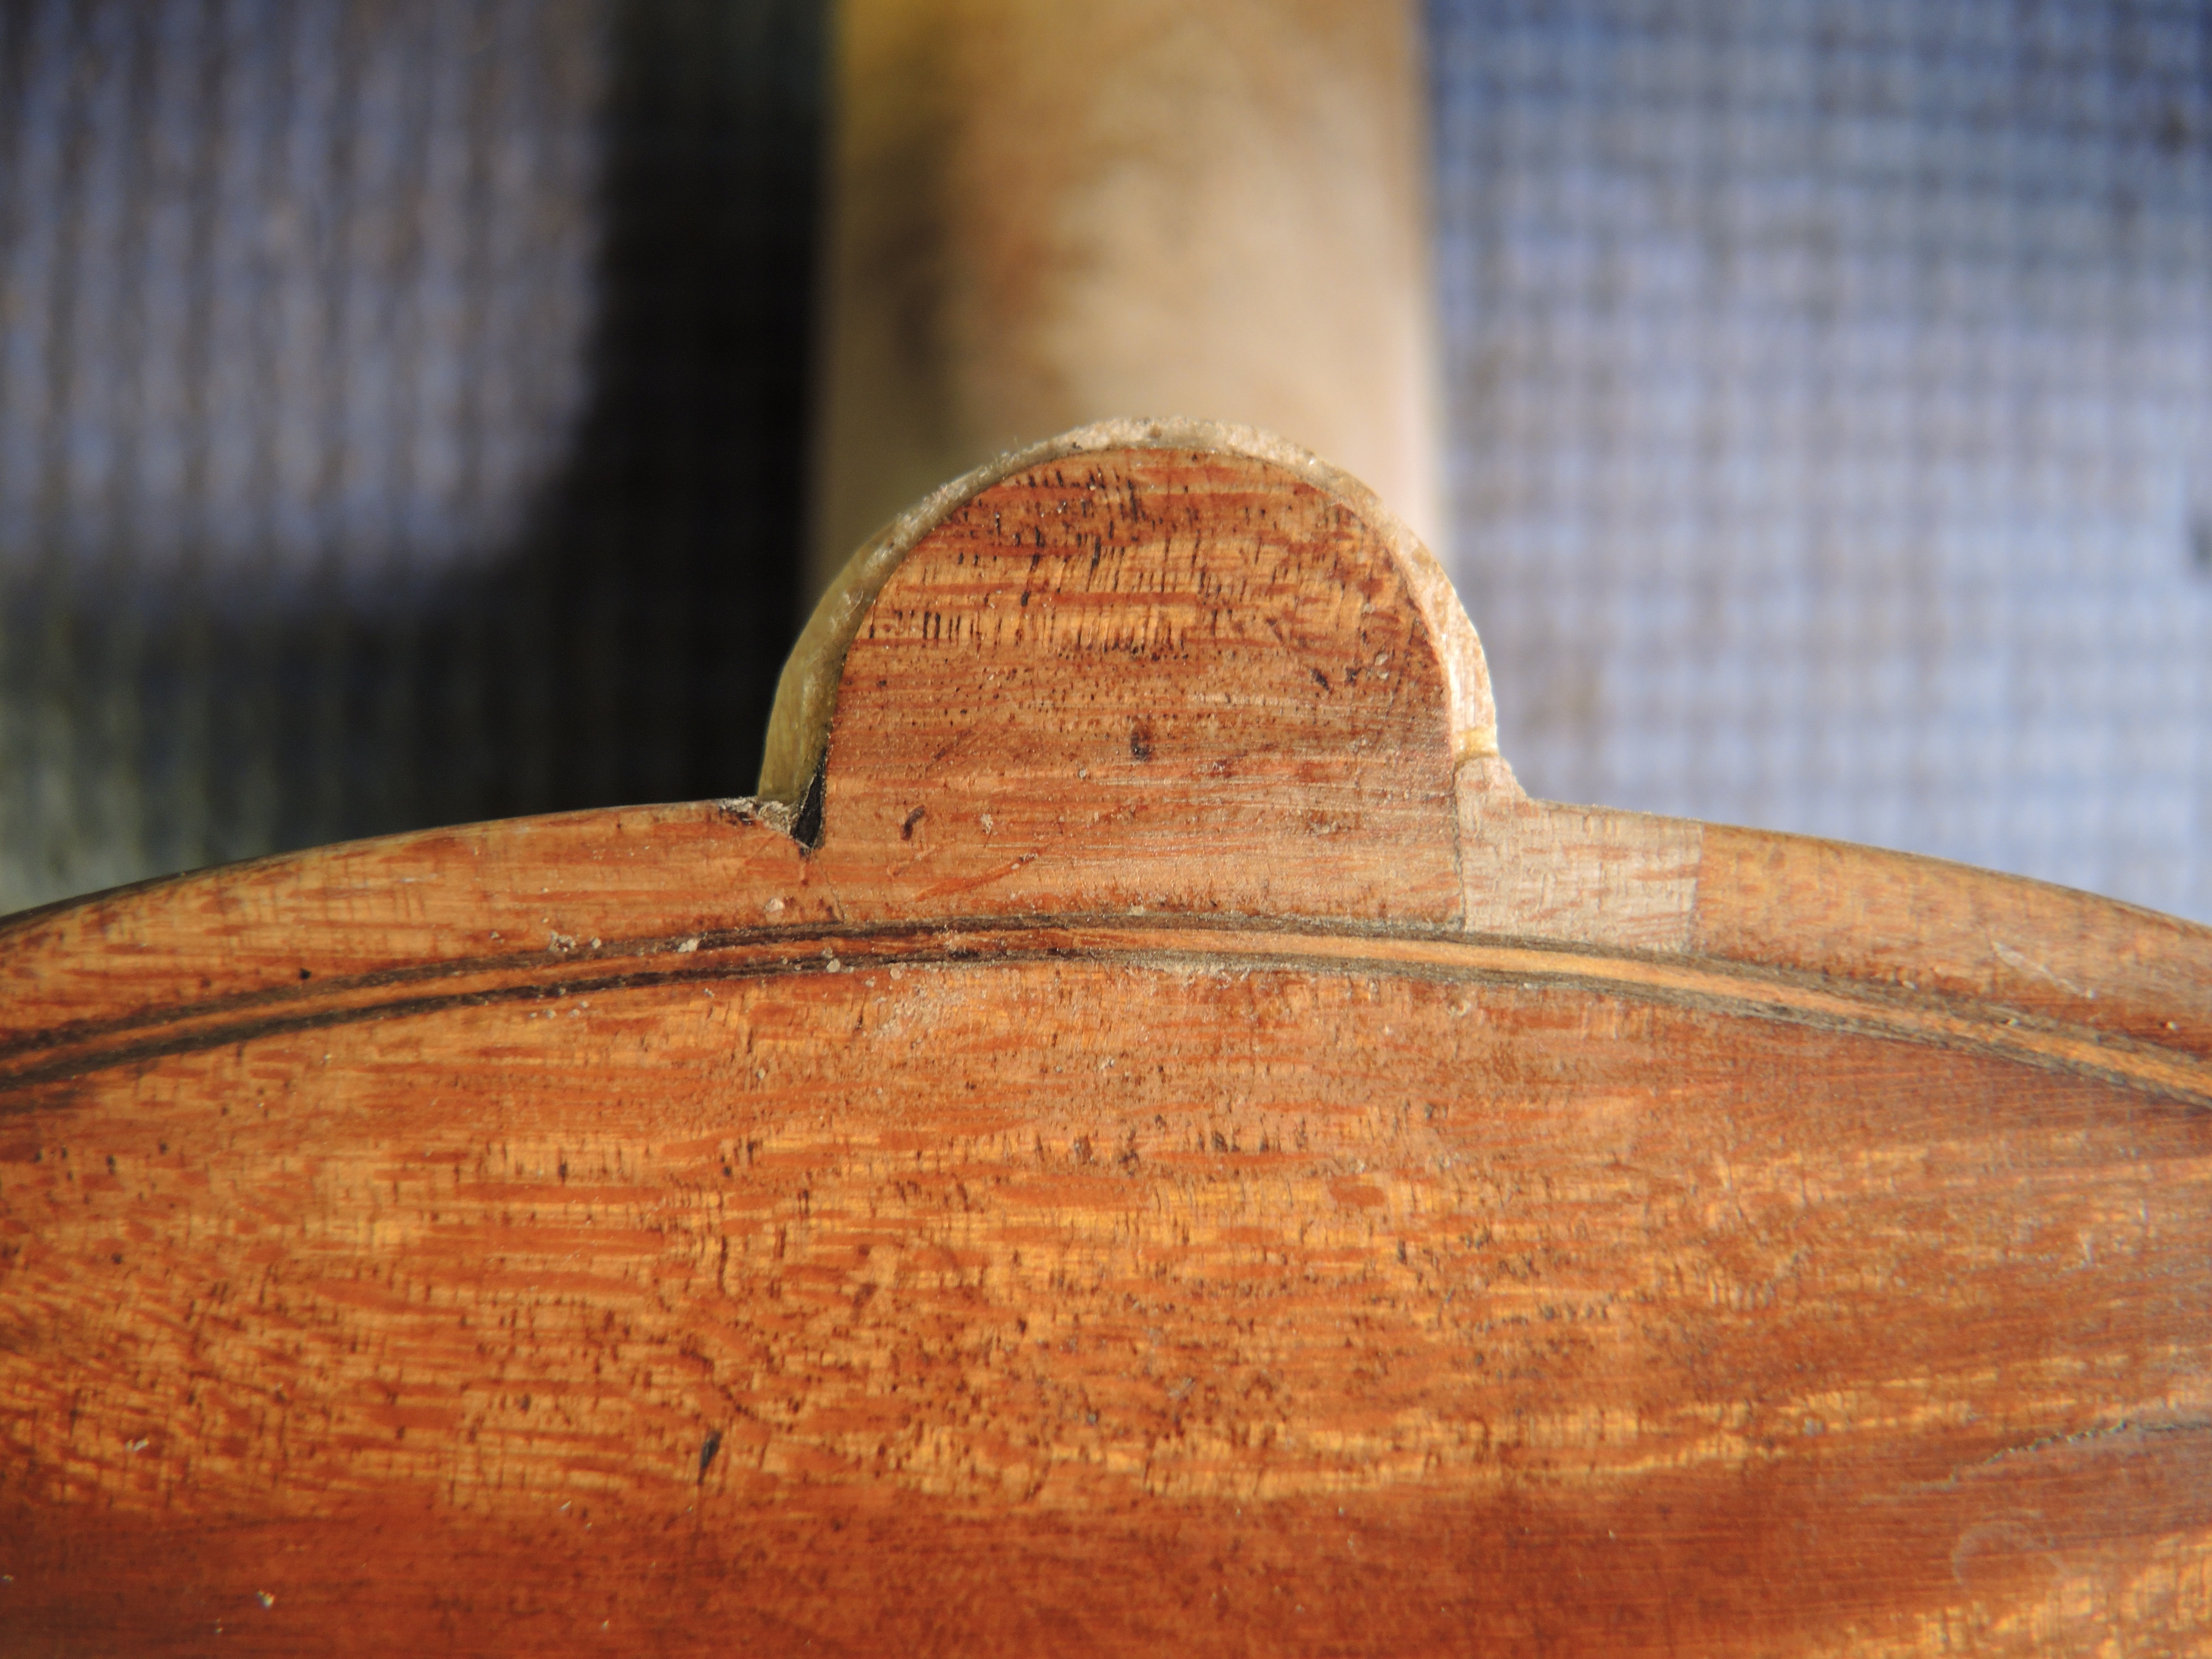
I began dropping my filler varnish into the bottom of the cavity I’d created. The filler is my retouch varnish, a bit on the thick side, with aluminum hydroxide added for bulk. It was crucial to maintain the transparency of the filler, so I was careful not to add too much aluminum hydroxide which can make a varnish cloudy if used in excess. Still, several applications were required. In between coats, I carefully leveled the driedfiller with a scraper and micromesh, and then buffed lightly with tripoli and water to keep my retouch area approximately equal in luster to the surrounding area as I went along. My intention was to fill and level the void in the wood with clear varnish and then build colored varnish on top to match the original.
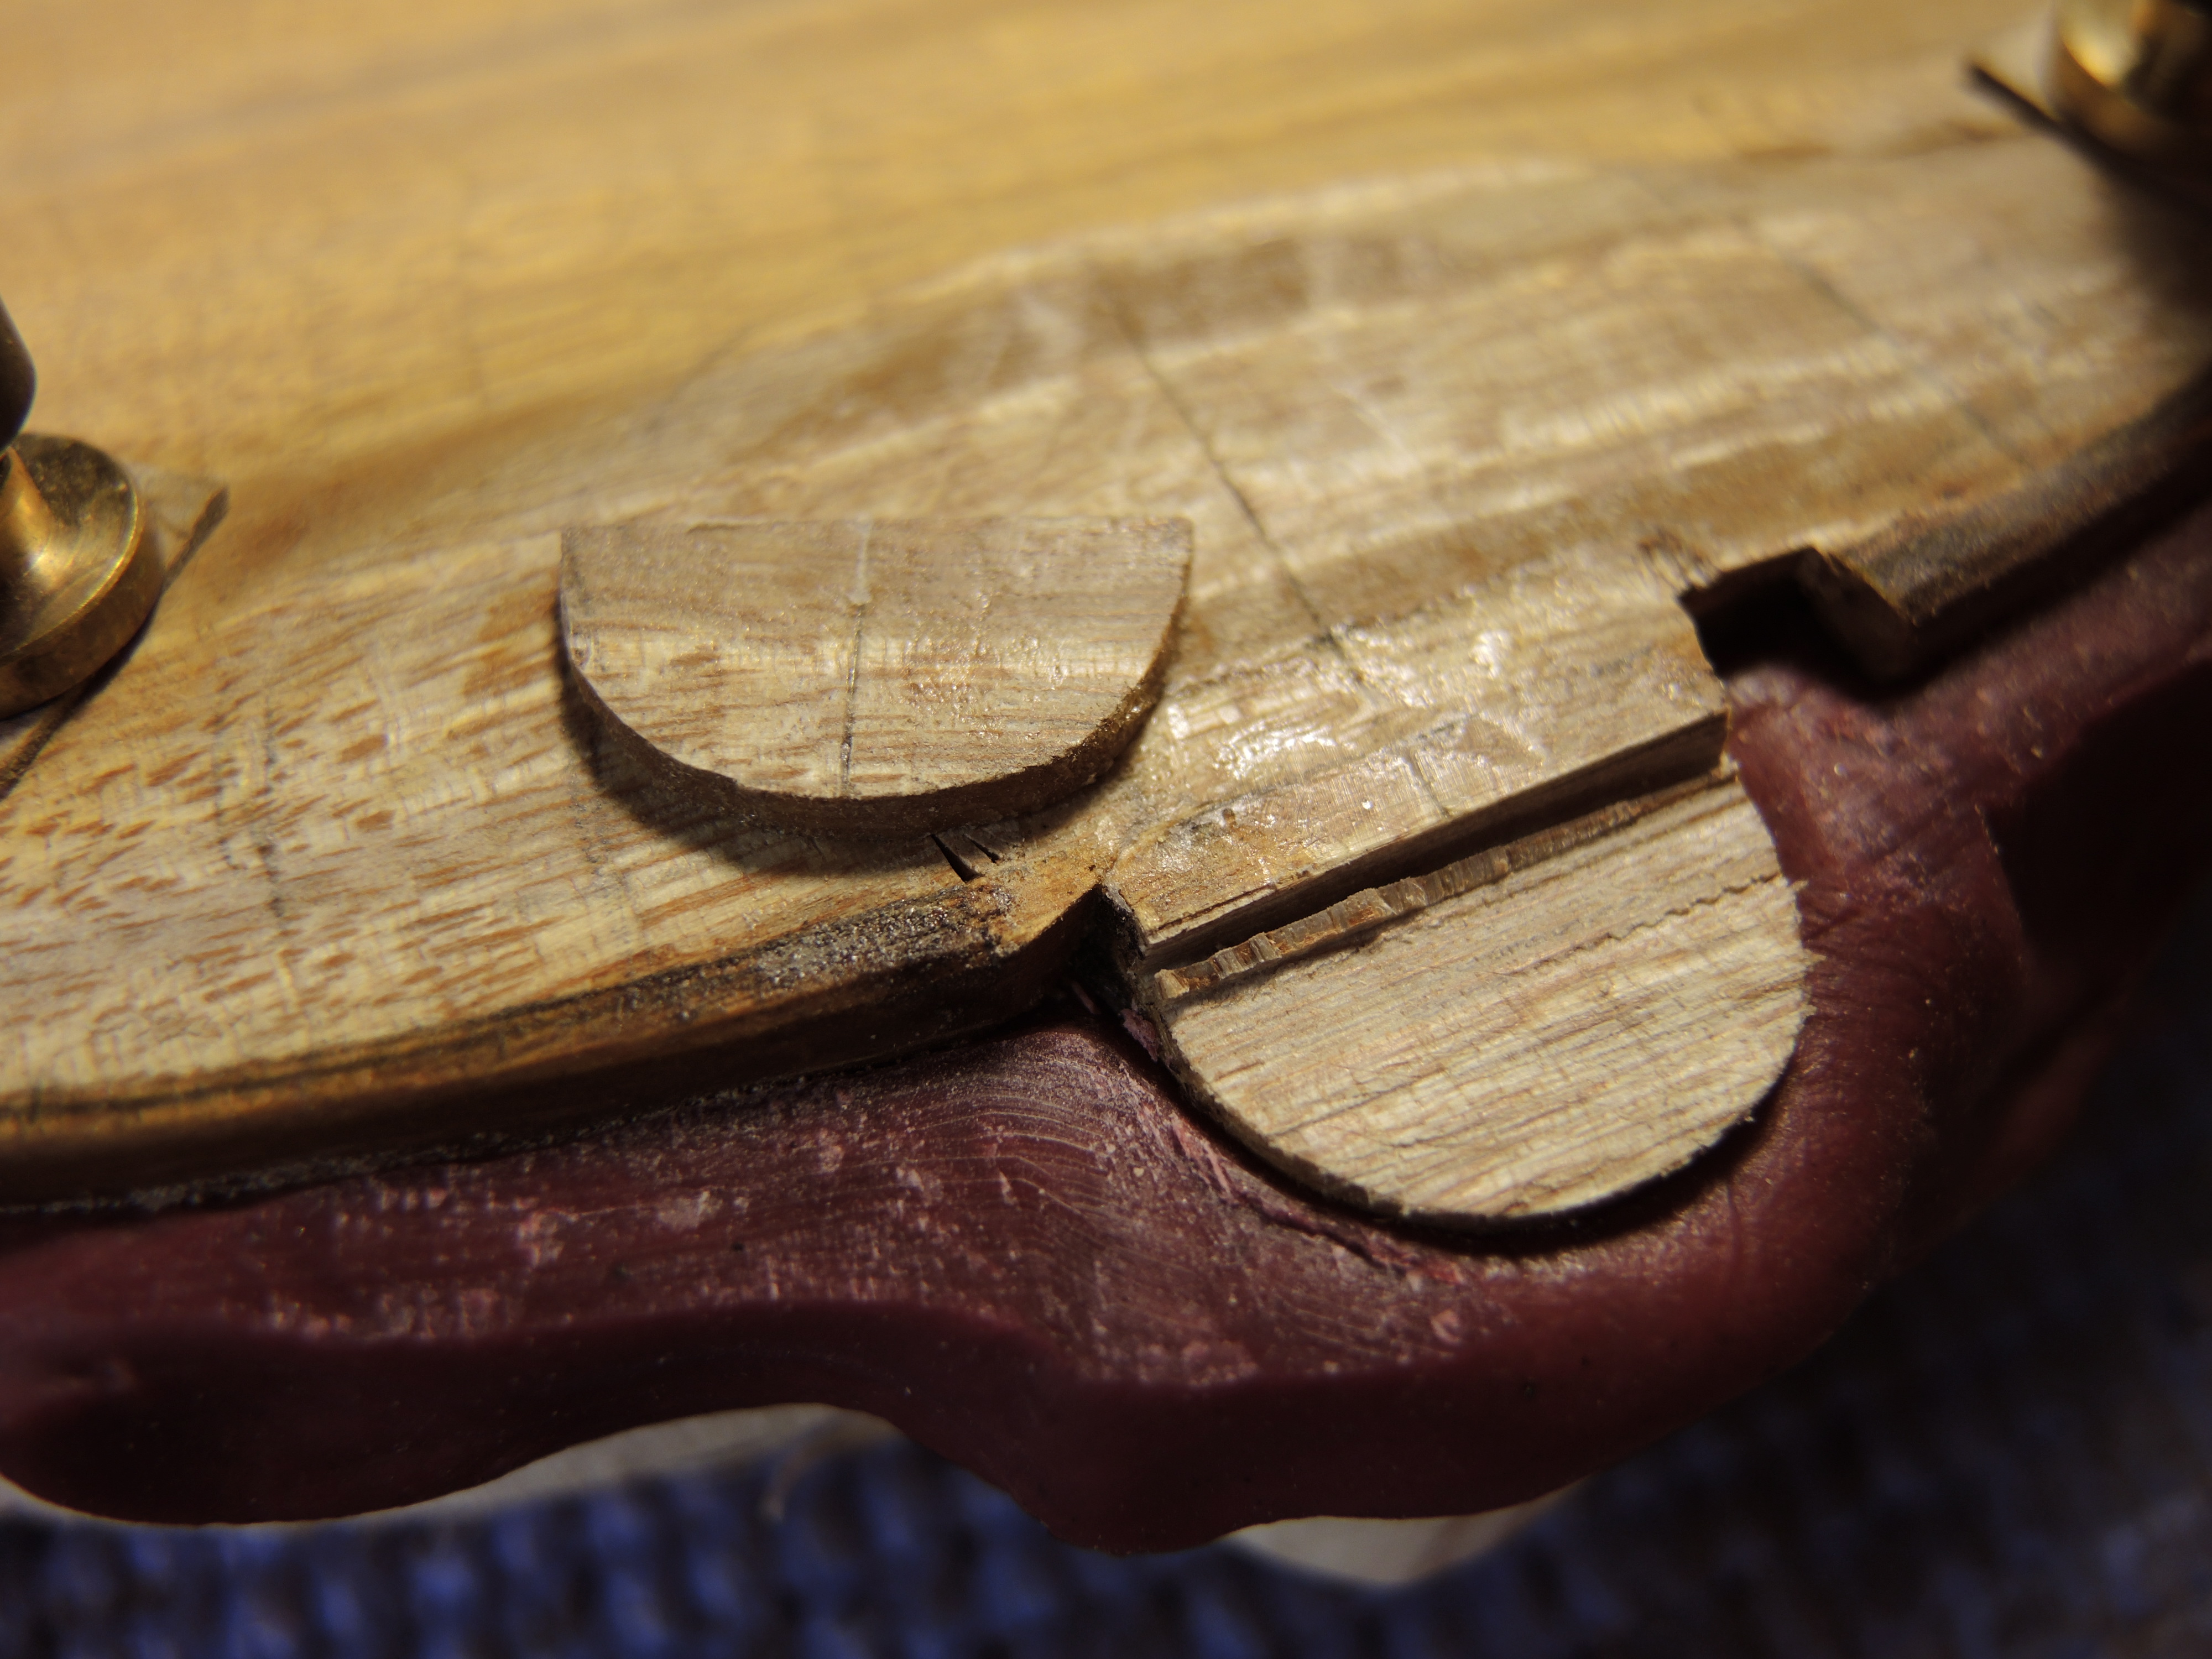
Down to the bare wood 
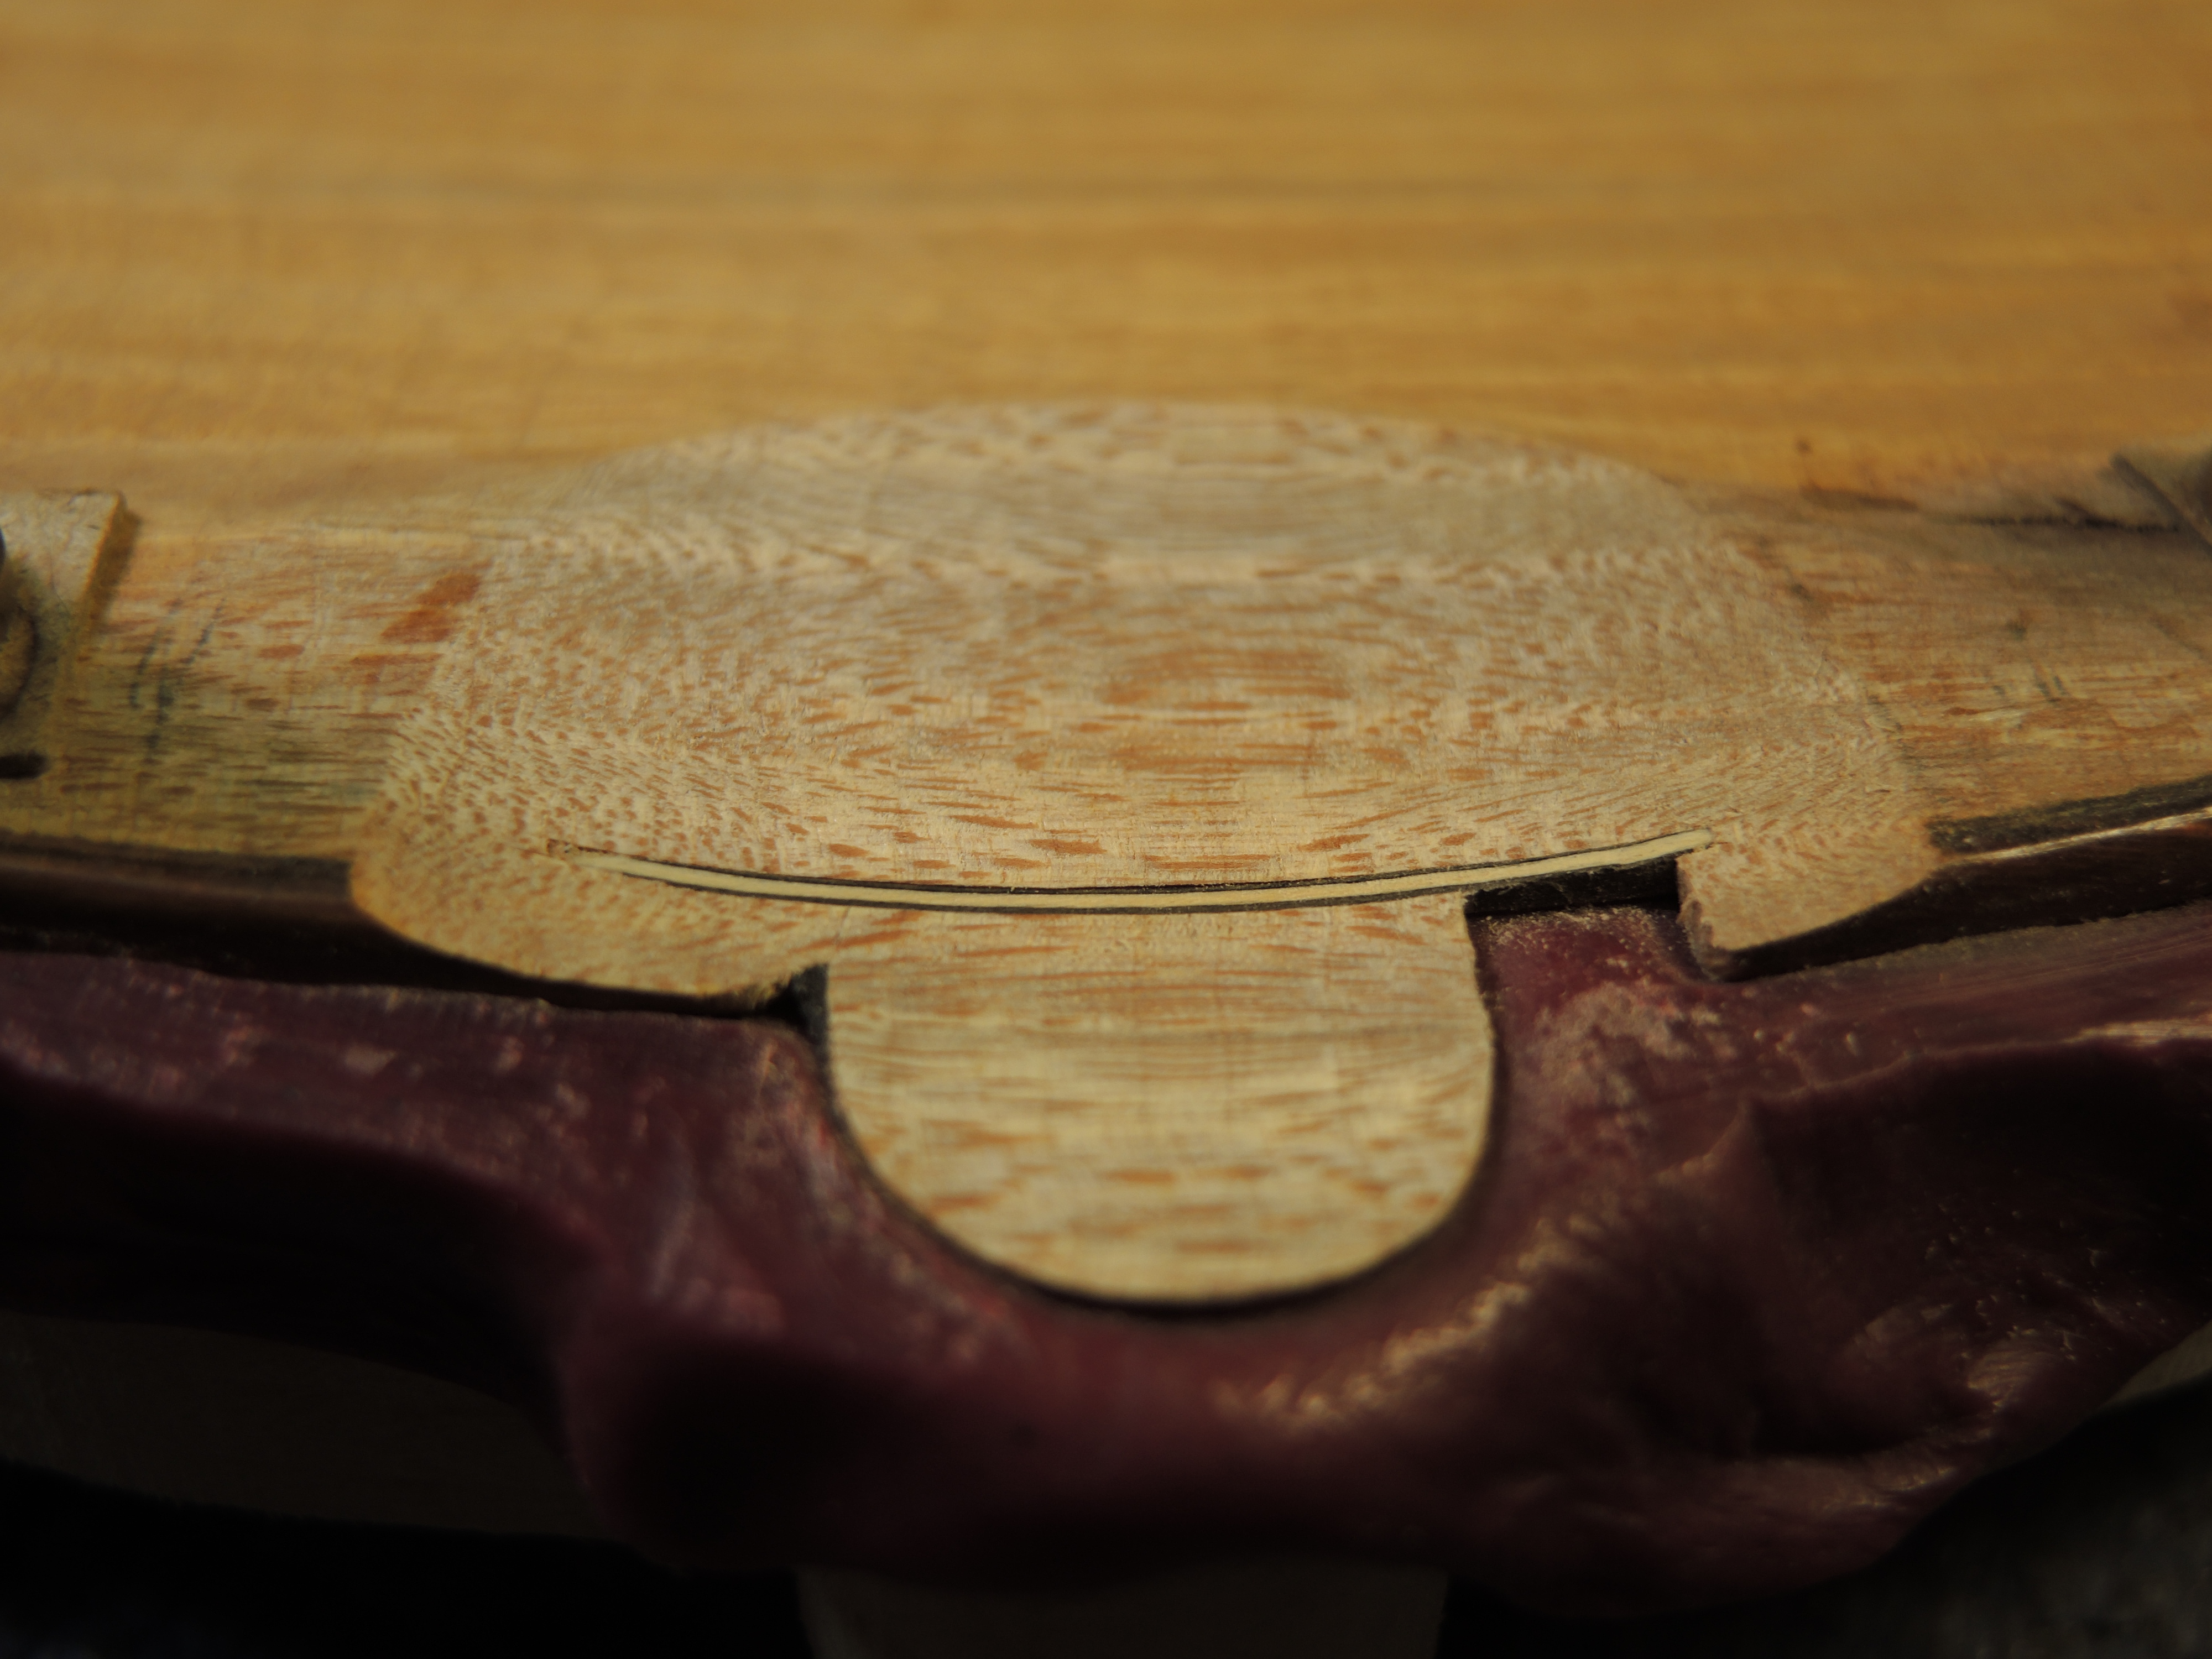
Sized and sealed 
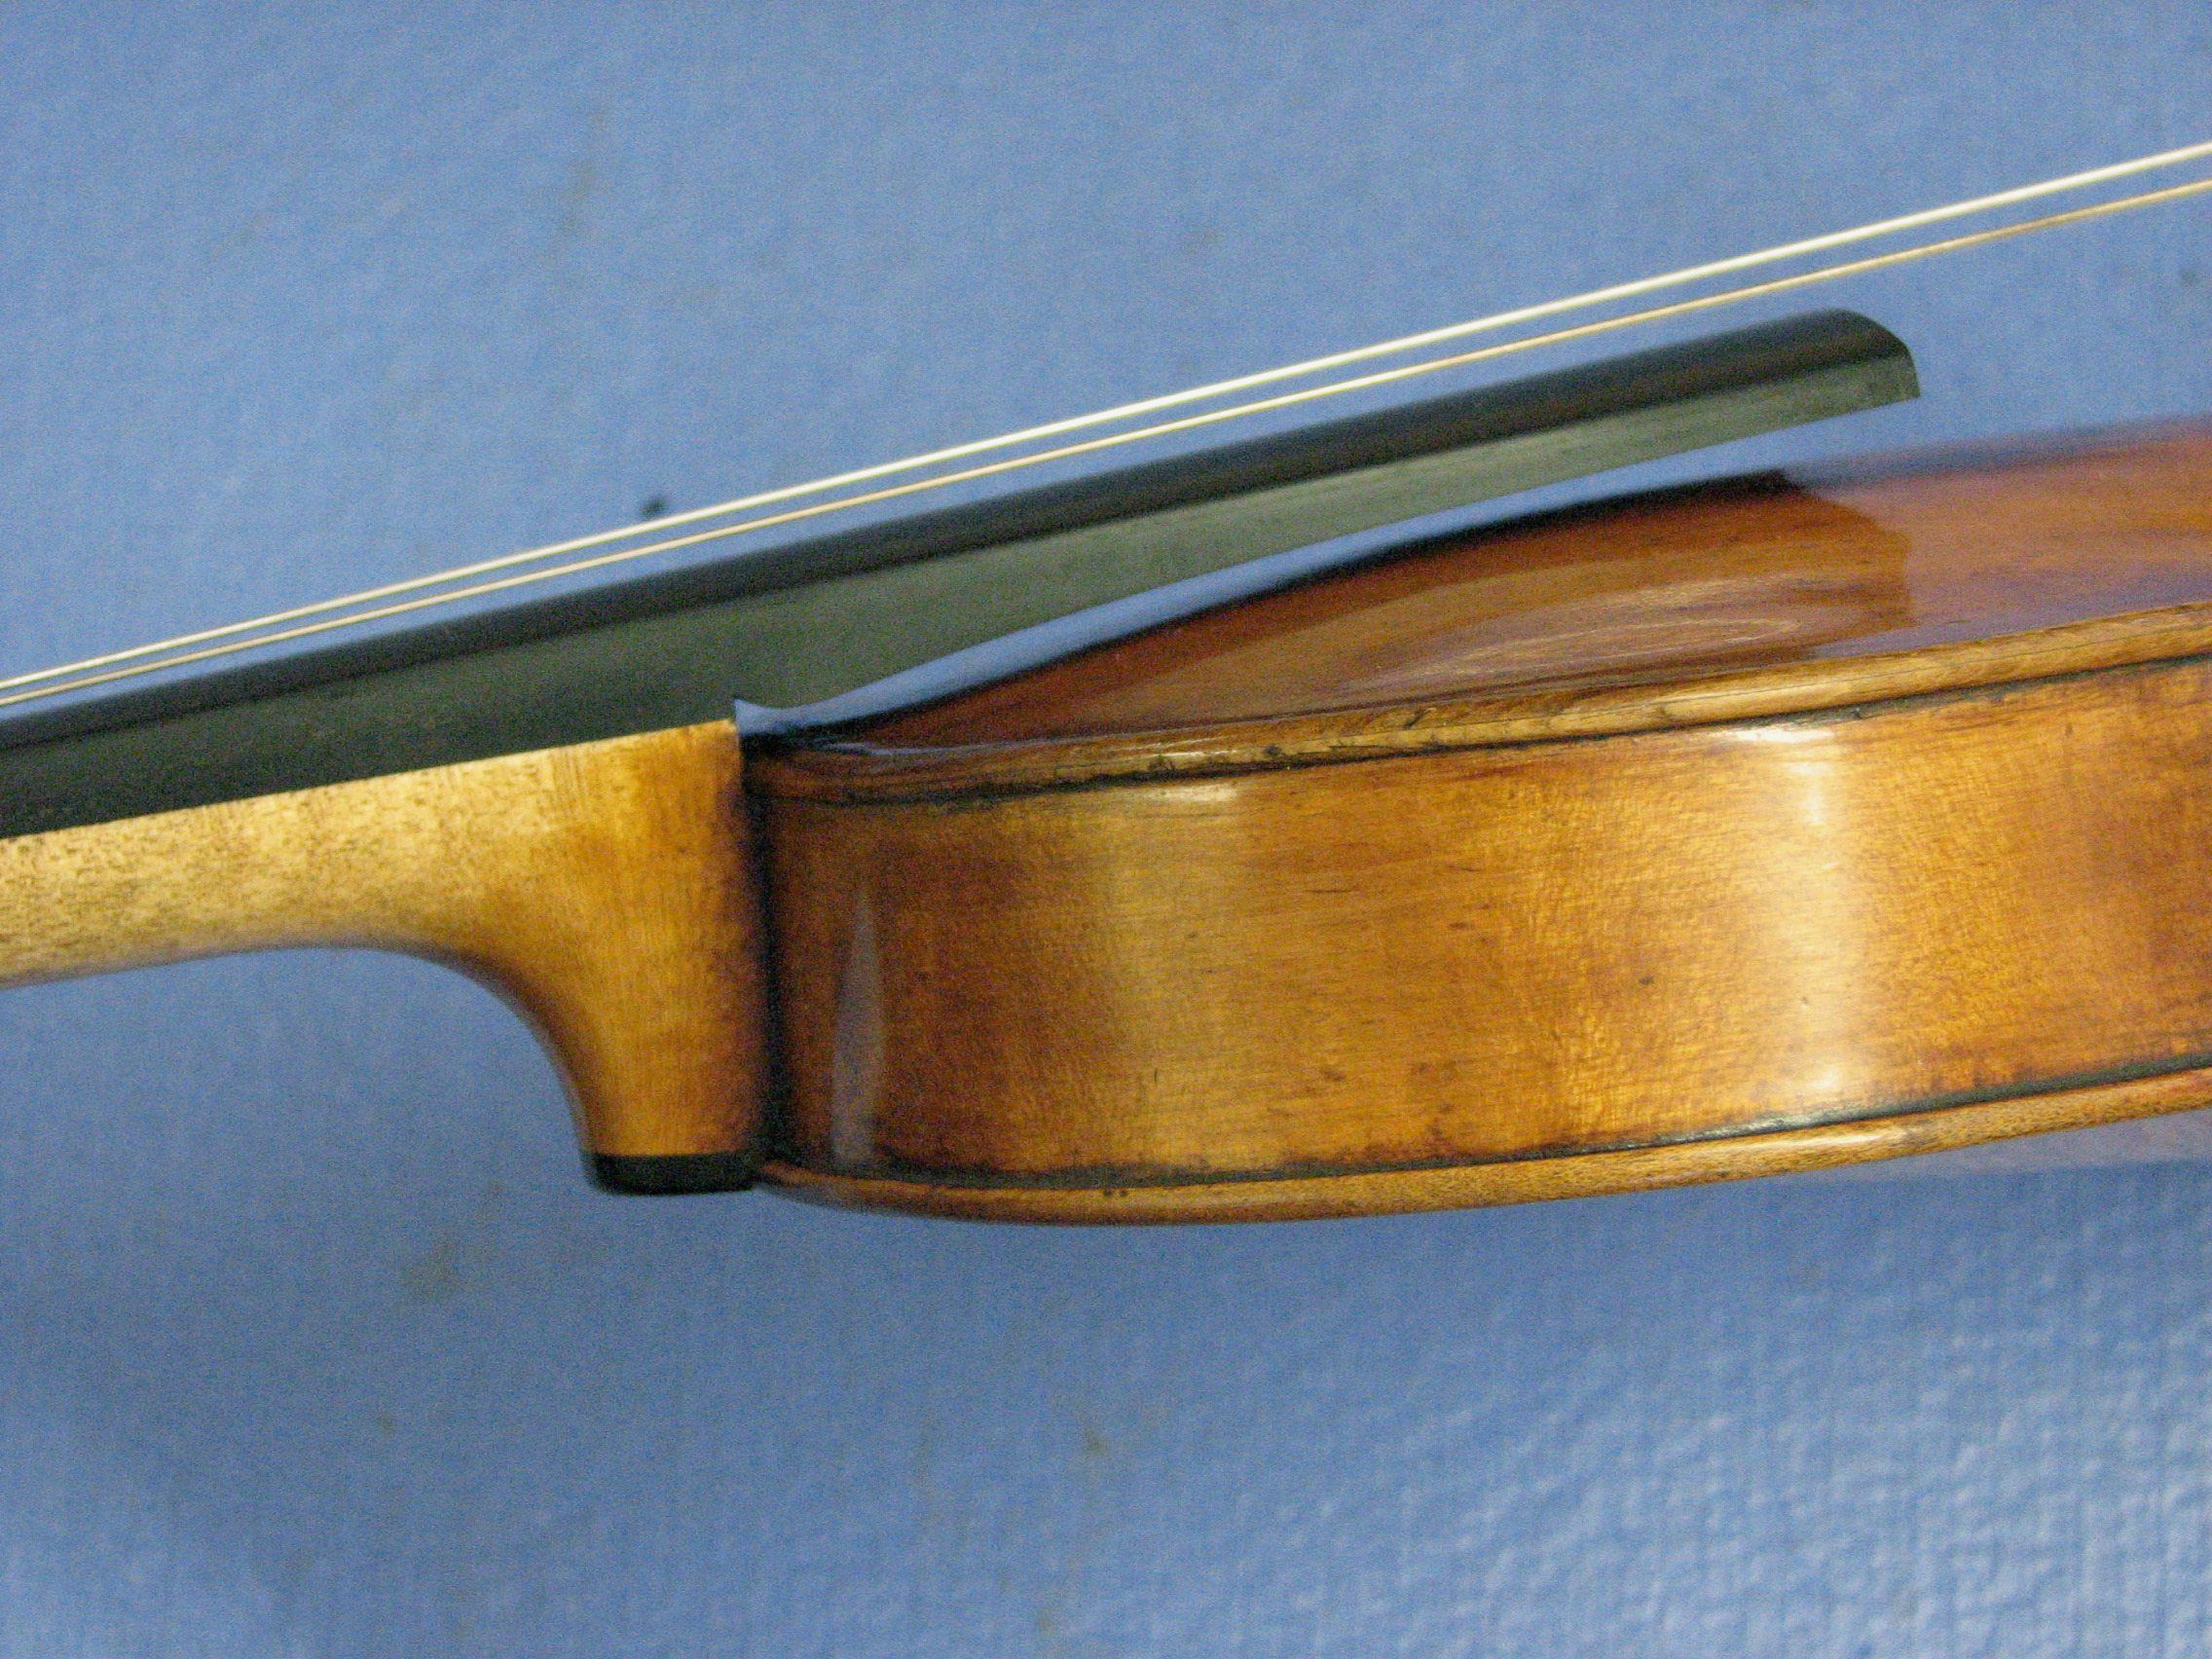
First layer of filler scraped level
Color then, was added in tiny increments from a relatively dry palette. With so very few variants in my visual field to work with, I relied mainly on transparent anilines to establish an accurate and fairly consistent color match (really an undulating mix of three or four colors), building slowly, and sealing lightly on occasion.
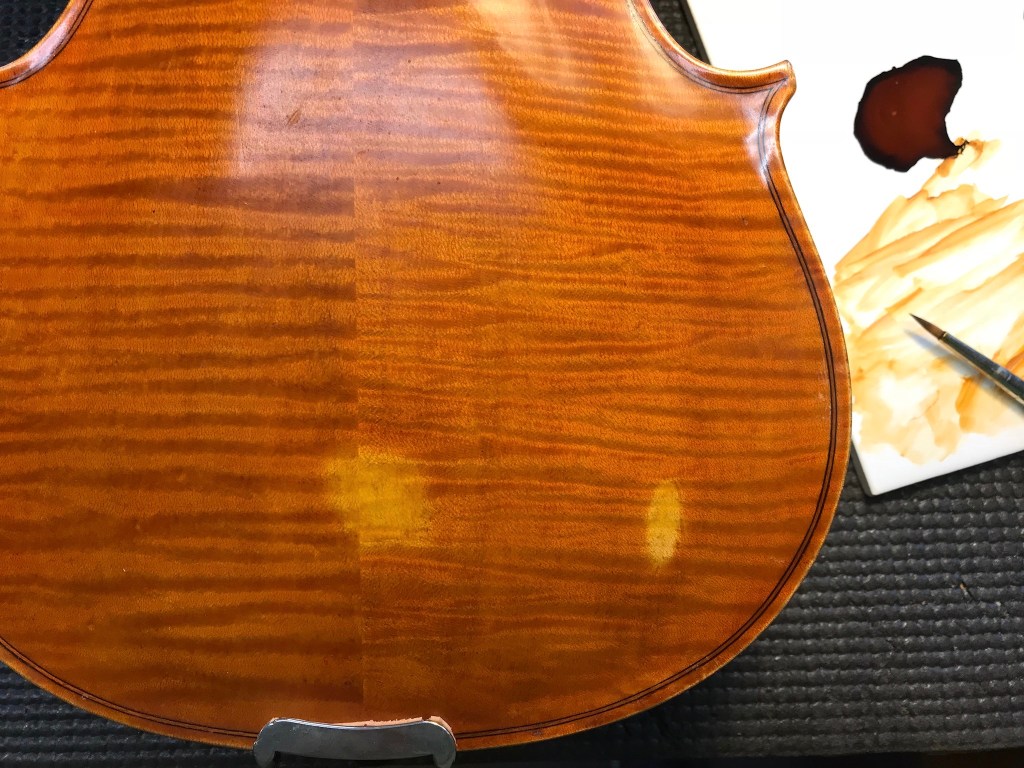
A bit more filler was added mid way.


There’s not really an adequate way to describe this process. It’s layering, it’s building, it’s knowing how fast and how far you can work without ruining what you’ve done with that last stroke of a brush. It’s figuring out how to keep the area visually lively without it throwing a punch to your little eye.
In my view, the color coats are the fun part. But the job isn’t done until it’s well sealed with a protective coat that matches the original in texture and luster. Several sealer coats secured the color work and the final blending was worked out with a fine scraper, micromesh, fine abrasive compounds and oil, and a careful French polish.
So many choices are made in the course of retouching, and it’s all predicated on the notions of layering and small increments of change. I am convinced that successful retouching is less about the specifics of pigments, varnishes and brushes, and more about how well one knows the materials one is using, and how one chooses to use them.